• Publishing a Streamlit App as a Container Instance in OCI β›΄οΈ

    I previously wrote about how to create a basic front-end for an OCI Generative AI Agent using Streamlit (which can be found here) 🎨.

    I often use Streamlit to create quick customer demo’s and PoCs for OCI Generative AI Agents. One thing that is really useful is the ability to run a Streamlit app within a container instance rather than locally on my laptop – which is ideal when I need to quickly give others access to the apps that I have built.

    Here is a quick guide as to how to take a Streamlit app and run this within an OCI Container Instance πŸ“‹.

    Step 1Ensure Container Instances have access to the Gen AI Agent service and Container Registry βœ…

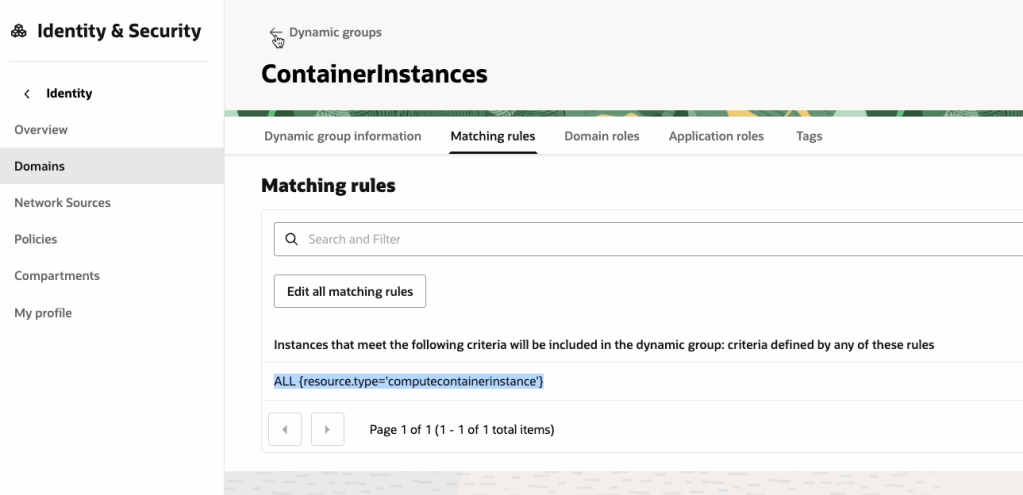
    To do this we will need to create a Dynamic Group within OCI IAM, with the following rule:

    ALL {resource.type='computecontainerinstance'}

    This rule will ensure that every Container Instance within the tenancy is added to the Dynamic Group, which in this example is named “ContainerInstances” – how original! In the real-world, you may want to be more specific and specify a single container instance or Compartment as a member of the Dynamic Group.

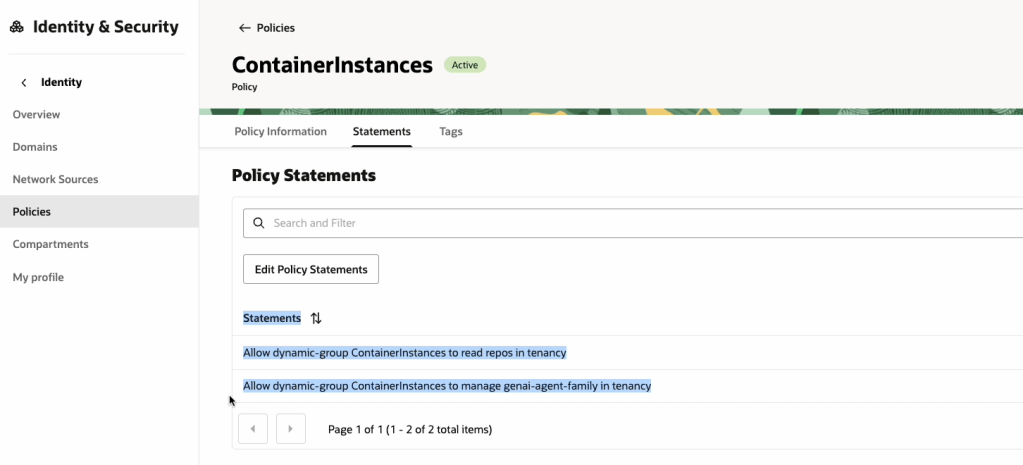
    Now that the Dynamic Group has been created, we need to create a Policy that provides this group (e.g. all container instances within the tenancy) access to pull images from the OCI Container Registry and also grant it access to the OCI Generative AI Agents service, the reason for the latter is that we will use Resource Principal authentication to authenticate the container instance to the service, rather than the API Keys for a specific user account (which is safer as we won’t need to include any keys within the container image! πŸ”‘).

    The policy should have the following two statements:

    Allow dynamic-group ContainerInstances to read repos in tenancy
    Allow dynamic-group ContainerInstances to manage genai-agent-family in tenancy

    Now that we’ve got the Dynamic Group and Policy created, we can move on to Step 2!

    Step 2 – Obtain an auth token and get the tenancy namespace βœ…

    An auth token is required to authenticate to the OCI Container Registry service, which is required when pushing the container image to the registry.

    To create an Auth Token, do the following:

    Make sure that you copy the Auth Token somewhere safe as you will not be able to re-retrieve it after creation ⛔️.

    We now need to get the tenancy namespace, which is required to authenticate to the Container Registry, this can be obtained as follows:

    Now onto Step 3 πŸ‘‡

    Step 3 – Create a Container Image of the Streamlit App βœ…

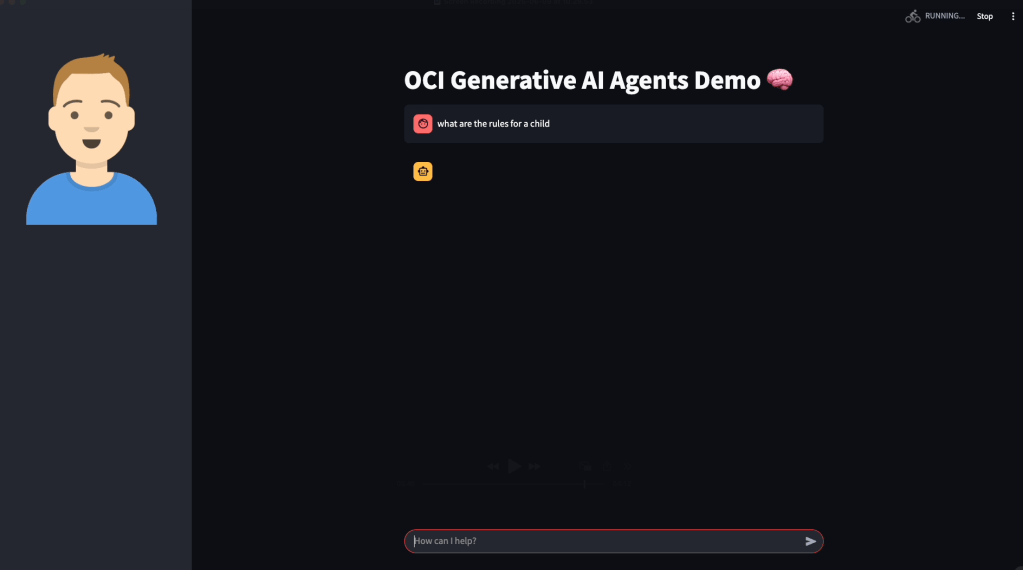
    The code that I will use for the Streamlit App can be found on GitHub, this is a basic app that connects to an OCI Generative AI Agent and allows a user to ask the agent questions:

    Once you have this, two additional files are required to create the container image:

    requirements.txt, which should contain the following and includes the Python packages required to run the Streamlit app:

    streamlit
    oci

    …and Dockerfile (no file extension required!), which is used to create the container image. This will launch the Streamlit app listening on port 80. Ensure that you update the name of the Python script (in this case OCI-GenAI-Agent-Streamlit.py) to reflect the name of the script you need to run.

    FROM python:3
    WORKDIR /app
    COPY . /app
    RUN pip install --no-cache-dir -r requirements.txt
    EXPOSE 80
    ENTRYPOINT ["streamlit", "run", "OCI-GenAI-Agent-Streamlit.py", "--server.port=80", "--server.address=0.0.0.0"]

    Place the requirement.txt, Dockerfile and Python script into a single directory:

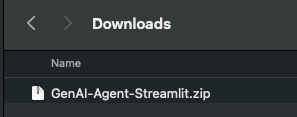
    …and then zip this up.

    Now login to the OCI Console, launch Cloud Shell, upload the zip file and uncompress (this is a quick way to transfer the files).

    We can now create the container image and upload this to the container registry, to do this run the following commands – make sure you run these from the directory that has been un-zipped, which contains the Streamlit app.

    docker login lhr.ocir.io --username namespace/username 

    The namespace was obtained in Step 2, the username is your username (what else could it be πŸ˜‚), for example within my case, this is:

    docker login lhr.ocir.io --username lrdkvqz1i7e6/brendankgriffin@hotmail.com 

    You may also need to update lhr.ocir.io to the correct endpoint for the container registry in your tenancies region, a full list of endpoints can be found here.

    It will then prompt for your password, for this you will need to enter the Auth Token 🎫 obtained in Step 2 (you did save this, right?)

    Here’s a short run-through of this:

    Next step is to build the container image and upload this to the container registry, you will need to run the following commands to do this.

    docker build --tag lhr.ocir.io/lrdkvqz1i7e6/streamlit:latest .

    Make sure that you update the endpoint (lhr.ocir.io) if needed and namespace (lrdkvqz1i7e6). This command will build the container image and tag it with the name streamlit:latest – this command needs to be run from the un-zipped directory that contains the Streamlit app files.

    Once it has built, it can be pushed to the OCI Container Registry using the following command:

    docker push lhr.ocir.io/lrdkvqz1i7e6/streamlit:latest

    Update the namespace and endpoint appropriately.

    Here’s a short walkthrough of this:

    Step 4 – Create a container instance from the container image βœ…

    We are nearly there 🏁, the final step is to create a container instance from the container image that we have just pushed to the container registry.

    To do this, you’ll need a Virtual Cloud Network (VCN) that has a public subnet (so that we can make the instance available over the Internet 🌍), if you don’t have one, you can use the VCN Wizard to quickly do this, as documented here.

    Make sure you have a Security List πŸ“‹ entry that permits access to the public subnet within the VCN on port 80 – in my case from any public IP address, but you may want to restrict this to specific public IP addresses.

    Once you have confirmed that you have a VCN in place, we can go through the process of creating the container instance using the container image that we just created.

    I’ve used the default settings for creating a container instance, in the real-world, you’d need to select an appropriate compute shape (CPU/memory).

    Grab the public IP address assigned to the container instance and open this in your browser of choice, the Streamlit app should open (all being well!).

    You may want to create a DNS entry and point this towards the public IP, to make it easier to access.

    Also in my final disclaimer, for anything but quick and dirty demo’s you should run this over SSL with authentication too! An OCI Load Balancer can be used to do SSL termination and Streamlit provide a useful guide on performing authentication, which can be found here.

    …and that’s it!

  • Avoiding double MFA when using identity federation with OCI IAM πŸ”

    I attended a security focussed hackathon with two of my immensely talented colleagues recently (James Patrick and Hussnan Haider) 🧠.

    One of the challenges we ran into when configuring identity federation between OCI and a separate trusted identity provider (such as Microsoft Entra ID or Okta), is that users had to perform MFA twice – once for the trusted identity provider and then for OCI IAM, this is obviously not ideal for users, it was super frustrating for us 😫!

    I’ve put together a short video that runs through the solution we put together to ensure that MFA within OCI IAM is bypassed when a separate federated identity provider is used for authentication πŸ“Ό.

    Key thing to point out here, is that the federated identity platform will be wholly responsible for MFA in this case, therefore it’s critical that this has been configured so that users require MFA for authentication, otherwise you have users authenticating to OCI using a single factor, which is not good πŸ“±!

    For further background on how to configure identity federation between OCI IAM and Microsoft Entra ID/Azure AD, check out my two previous posts on this topic.

    Thanks for reading πŸ“–.

  • Creating an OCI Generative AI Agent that can speak to a database πŸ§ 

    I’ve previously documented how to create an OCI Generative AI Agent in the post Creating a Generative AI Agent in less than 10 minutes.

    OCI Generative AI Agents recently released the ability to query a database using natural language (similar to Select AI), more details on this new feature can be found here.

    In this short video, I walkthrough the end to end process of creating an OCI Generative AI Agent and configuring this to query a database using natural language.

  • Crawling a web site using Trafilatura πŸ•·οΈ

    I’ve been building a lot of OCI Generative AI Agents for customer demos recently πŸ€–, one demo that typically resonates well with customers is a RAG agent that uses text scraped from their public website, for example when working with a council this can demonstrate how residents can use a Generative AI Agent to quickly get answers to their questions about council services…….without the hassle of navigating their maze of a website πŸ‘©β€πŸ’».

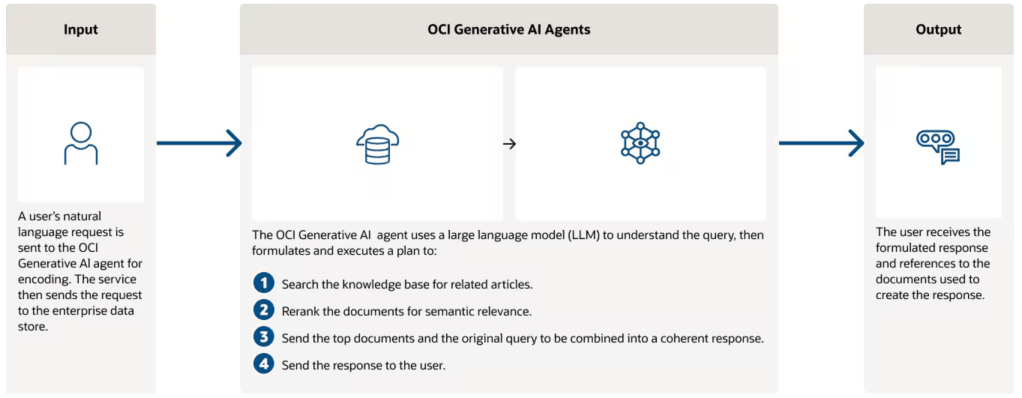
    For reference here’s how an OCI Gen AI Agent works at a high-level.

    In the real world a Gen AI Agent would use internal data that isn’t publicly accessible, however I typically don’t have access to customers data, therefore the approach of crawling their public website works well to showcase the capabilities of a Gen AI Agent and begin a conversation on real-world use-cases that use internal data πŸ“Š.

    I wrote a very hacky Python script to crawl a site and dump the content to a text file which can then be ingested into a Gen AI Agent…….however this is super unreliable as the script is held together with sticking plasters 🩹 and constantly needs to be updated to work around issues experienced when crawling.

    I recently stumbled across a fantastic Python package named Trafilatura which can reliably and easily scrape a site, enabling me to retire my hacky Python script 🐍.

    Trafilatura can be installed using the instructions here (basically pip install trafilatura).

    Once it had been installed, I was able to scrape my own blog (which you are currently reading) using two commands!

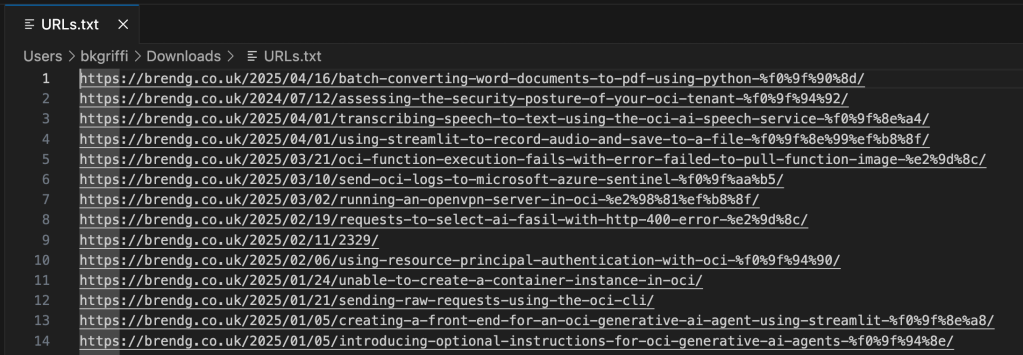
    trafilatura --sitemap "https://brendg.co.uk/" --list >> URLs.txt
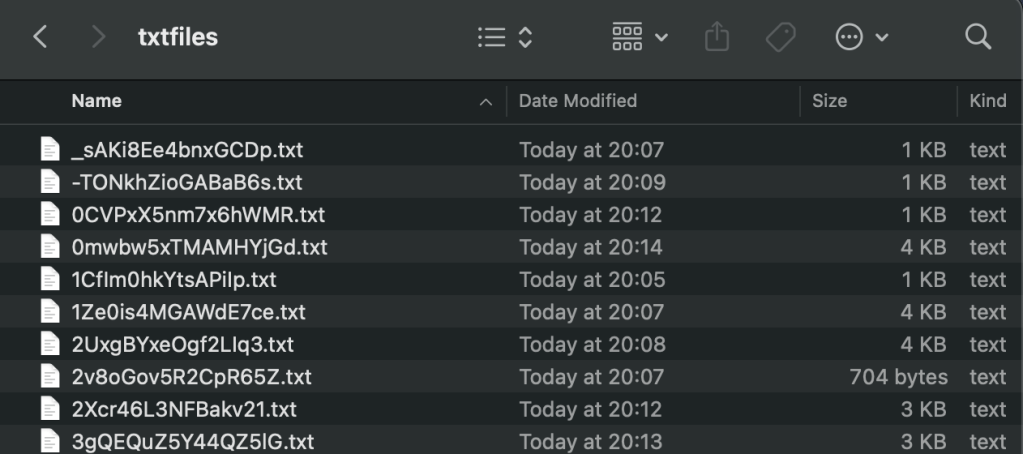
    trafilatura -i URLs.txt -o txtfiles/
    

    The first command grabs the sitemap for https://brendg.co.uk, and writes a list of all URLs found to URL.txt.

    The second command takes the URL.txt file as input and for each URL within, crawls the page and writes the contents to a text file within the folder txtfiles.

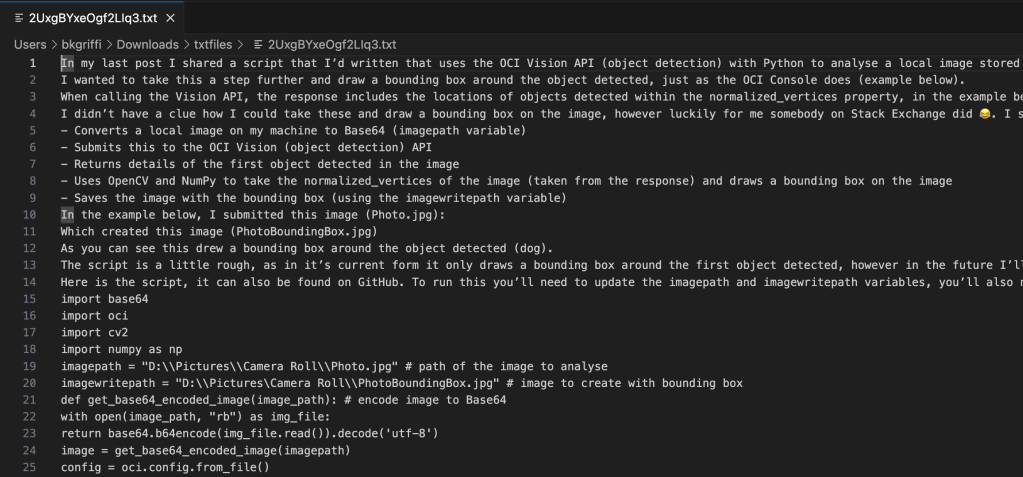
    Below is an example of one of the text files that have been output, you can clearly see the text from the blog post scraped.

    Such a useful tool, which will save me a ton of time ⏱️!

  • Batch Converting Word Documents to PDF using Python πŸ

    I’ve been working on a project deploying an OCI Generative AI Agent πŸ€–, which I’ve previously spoken about here πŸ“Ό.

    Marketing blurbOCI Generative AI Agents is a fully managed service that combines the power of large language models (LLMs) with AI technologies to create intelligent virtual agents that can provide personalized, context-aware, and highly engaging customer experiences.

    When creating a Knowledge Base for the agent to use, the only file types that are supported (at present) are PDF and text files. I had a customer that needed to add Word documents (DOCX format) to the agent, rather than converting these manually which would have taken a lifetime πŸ•£, I whipped up a Python script that uses the docx2pdf package – https://pypi.org/project/docx2pdf/ to perform a batch conversion of DOCX files to PDF, one thing to note is that the machine that runs the script needs Word installing locally.

    Here is the script πŸ‘‡

    import os
    import docx2pdf # install using "pip install docx2pdf" prior to running the script
    os.chdir("/Users/bkgriffi/Downloads") # the directory that contains the folders for the source (DOCX) and destination (PDF) files
    def convert_docx_to_pdf(docx_folder, pdf_folder): # function that performs the conversion
        for filename in os.listdir(docx_folder):
            if filename.endswith(".docx"):
                docx_path = os.path.join(docx_folder, filename)
                pdf_filename = filename[:-5] + ".pdf"
                pdf_path = os.path.join(pdf_folder, pdf_filename)
                try:
                    docx2pdf.convert(docx_path, pdf_path)
                    print(f"Converted: {filename} to {pdf_filename}")
                except Exception as e:
                    print(f"Error converting {filename}: {e}")
    convert_docx_to_pdf("DOCX-Folder", "PDF-Folder") # calling the function, with a source folder named DOCX-Folder and a destination folder named PDF-Folder, these folders should reside in the directory specified in line 4
    

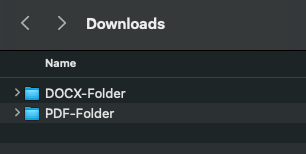
    Folder structure πŸ—‚οΈ

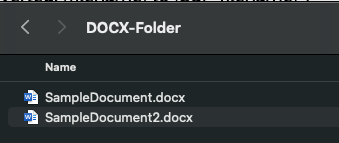
    Source DOCX files πŸ“„

    Script Running πŸƒ

    Output PDF files

    Once the documents have been converted to PDF format they could be added to an OCI Storage Bucket and ingested into the OCI Generative AI Agent.

  • Transcribing speech to text using the OCI AI Speech service with Python πŸŽ€

    I’ve been playing around with the OCI AI Speech service recently, one thing I really struggled with was using the AI Speech API to create a transcription job to extract the text from an audio/video file (as I needed to automate the process).

    After much head scratching (…and some help from a colleague), I was able to assemble the following Python script, this provides a function named transcribe, which can be called to submit a transcription job. The following parameters are required:

    • inputfile – The name of the audio/video file to transcribe e.g. recording.mp3
    • bucket – The name of the bucket that contains the inputfile to transcribe (this is also where the JSON output of the transcription job will be stored)
    • compartmentid – OCID of the compartment to run the transcription job in
    • namespace – The Object Storage namespace
    import oci
    
    config = oci.config.from_file()
    
    def transcribe(inputfile,compartmentid,bucket,namespace):
        ai_speech_client = oci.ai_speech.AIServiceSpeechClient(config)
        create_transcription_job_response = ai_speech_client.create_transcription_job(
                create_transcription_job_details=oci.ai_speech.models.CreateTranscriptionJobDetails(
                    compartment_id=compartmentid,
                    input_location=oci.ai_speech.models.ObjectListInlineInputLocation(
                        location_type="OBJECT_LIST_INLINE_INPUT_LOCATION",
                        object_locations=[oci.ai_speech.models.ObjectLocation(
                            namespace_name=namespace,
                            bucket_name=bucket,
                            object_names=[inputfile])]),
                    output_location=oci.ai_speech.models.OutputLocation(
                        namespace_name=namespace,
                        bucket_name=bucket)))
    
    transcribe(inputfile="Name of file to transcribe",compartmentid="OCID of the compartment to run the transcription job in",bucket="Bucket that contains the file to transcribe",namespace="Object storage namespace")
    

    For example:

    transcribe(inputfile=”recording.mp3“,compartmentid=”ocid1.compartment.oc1..aaaaaaaae“,bucket=”Transcription“,namespace=”lrdkvqz1i7f9“)

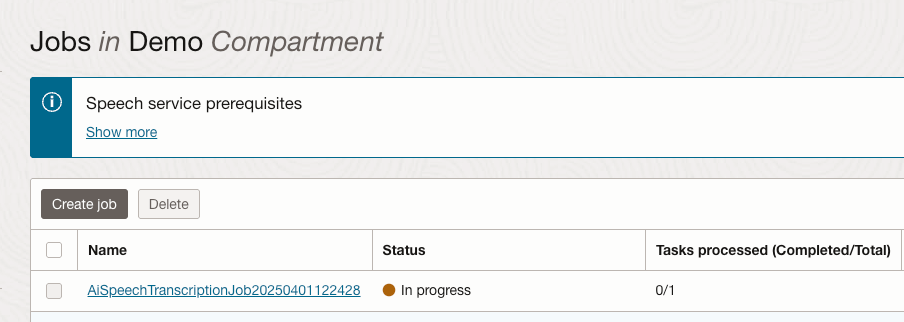
    When this has been executed, the transcription job can be viewed within the OCI Console.

    Once the job completed, the transcription was available to view from within the job (clicking the filename within the Tasks section):

    Here is the transcript in all it’s glory.

    The sample can also be found on GitHub.

  • Using Streamlit to record audio and save to a file πŸŽ™οΈ

    As an absolute terrible front-end developer, I’ve completely fallen in love with Streamlit – it makes building apps so simple, without the hassle of handcrafting a UI from scratch 🎨.

    I’m currently building an app that transcribes, summarises and translates audio using the AI capabilities of OCI (more on this in a future post πŸ—“οΈ).

    One of the things I wanted to do in the app is record audio, thankfully Streamlit has st.audio_input, which can record audio from a users’ microphone, however I needed a way to save the recorded audio to the server running the Streamlit app so that I could work some AI-magic on it πŸͺ„.

    It turns out that this is super-simple, the code below is for a page that has the st.audio_input widget, when a recording has been created it is saved with the filename recorded_audio.wav.

    import streamlit as st
    
    st.sidebar.title("Audio Recording App")
    st.title("Record Your Audio")
    st.write("Press the button to start recording and then stop when you're done.")
    audio = st.audio_input("Record your audio")
    
    if audio:
        with open("recorded_audio.wav", "wb") as f:
            f.write(audio.getbuffer())
            st.write("Audio recorded and saved successfully!")
    

    Here’s the page in all it’s glory:

    Within the directory that the Streamlit app is run from you can see that a WAV audio file has been saved:

    Happy days 😎.

  • OCI Function execution fails with error “failed to pull function image” βŒ

    I’d deployed a shiny new Function to OCI, I went to test this using fn invoke and it failed with the following error:

    Error invoking function. status: 502 message: Failed to pull function image

    The reason for this error is that I didn’t have a Service Gateway provisioned within the VCN that hosted the function app – but what is a Service Gateway you may ask???

    A service gateway lets a Virtual Cloud Network (VCN) privately access specific Oracle services without exposing the data to the public internet. No internet gateway or NAT gateway is required to reach those specific services. The resources in the VCN can be in a private subnet and use only private IP addresses. The traffic from the VCN to the Oracle service travels over the Oracle network fabric and never traverses the internet.

    To fix this I created a Service Gateway and attached this the subnet where my function app had been deployed, this provided the function app with access to the Container Registry to pull the image that contained the function.

    In my case I’d deployed the function app to a private subnet that had no connectivity to the outside world – even to OCI services πŸ”.

    I then needed to add a rule to route traffic through the Service Gateway.

    Once I’d done this, the function worked πŸ’ͺ.

  • Send OCI Logs to Microsoft Azure Sentinel πŸͺ΅

    I was going through the process of configuring OCI to send audit logs to Microsoft Sentinel using the following walkthrough – https://docs.oracle.com/en/learn/stream-oci-logs-to-azure-sentinel/

    When I got the section to configure Azure (Task 5), I ran into an issue – it wasn’t clear exactly what I needed to populate the App Insights Workspace Resource ID setting with as it’s not covered within the documentation πŸ€”.

    This setting can be obtained from the Log Analytics workspace in Azure that is created in Task 4.

    Go to Settings > Properties:

    Copy the Resource ID and paste this into the App Insights Workspace Resource ID setting.

    Once I’d done this, I was able to successfully configure the integration and now have lots of lovely OCI audit logs within Microsoft Sentinel.

  • Running an OpenVPN server in OCI β˜οΈ

    I’ve previously written about how I setup a site-to-site VPN between a Raspberry Pi and OCI, this has worked like a charm and I’ve had no issues with it. This works really well when I’m at home, but as I often travel and need a convenient way to VPN into my OCI tenancy I started exploring running OpenVPN in OCI, this would enable me to install a VPN client on my laptop/phone and conveniently VPN into my tenant from wherever I am in the world 🌍.

    There is a pre-configured marketplace image for OpenVPN available within OCI, further information on this can be found here. The one drawback to this is that it only supports deployment on x64 VM instances, I’m tight and wanted to deploy OpenVPN on a free Ampere (ARM) VM instance so that it didn’t cost me a penny πŸͺ™.

    Rather than muck about and learn how to setup OpenVPN and go through the process manually, I stumbled across this fantastic script that fully automates the configuration βœ….

    I have a single Virtual Cloud Network (VCN) that I need access to, this VCN has a private and a public subnet, the resources that I need access to all reside within the private subnet and are not directly accessible via the Internet (hence the need for a VPN!).

    Below is the end-to-end process that I followed for setting up OpenVPN in OCI.

    Step 1 – Provisioned an Ampere VM instance running Ubuntu 24.04, with 1 OCPU and 6GB memory, deployed this within the public subnet within the VCN.

    Step 2 – Ran the OpenVPN installation and configuration script found here, taking the defaults for everything.

    Step 3 – Copied the VPN connection profile that the setup created from the OpenVPN server to my local machine (.ovpn file).

    Step 4 – Before attempting to connect to the OpenVPN server I needed to open UDP port 1194 which is the port that OpenVPN listens on.

    As I only have a single server within the public subnet in the VCN, I simply added an entry to the Security List associated with the public subnet, using a Network Security Group is the recommended way to do this – especially when you have multiple instances within a public subnet, however I wanted a quick and dirty solution πŸ˜€.

    The rule I added provides access to UDP port 1194 from anywhere to the OpenVPN server within the public subnet.

    Step 5 – Enable IP forwarding on the OpenVPN server, using the guidance found here.

    Step 6 – Installed the client for OpenVPN from https://openvpn.net/client/, clients are available for Windows, MacOS, Linux, Android, iOS and Chrome OS, so plenty of choice!

    Once the profile was imported, I could connect!

    That was it – I was really impressed with the ease of setting this up, even better it doesn’t cost me a penny πŸͺ™!