If you are unsure what the OCI UK Sovereign Cloud in, please check this out.
This week I’ve been helping a customer to deploy an OCI Landing Zone (the One Operating Entity variant) to their tenancy using Terraform, we ran into a couple of issues that I wanted to document and hopefully help others.
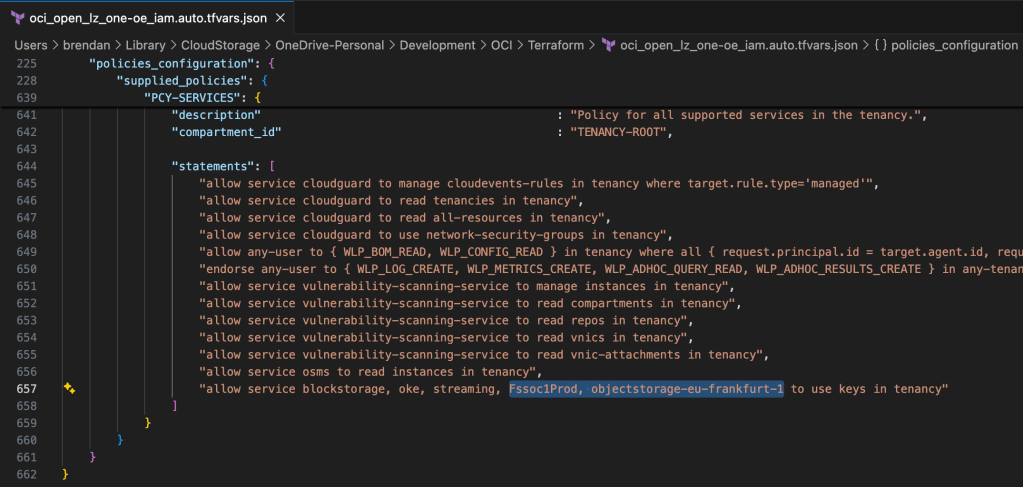
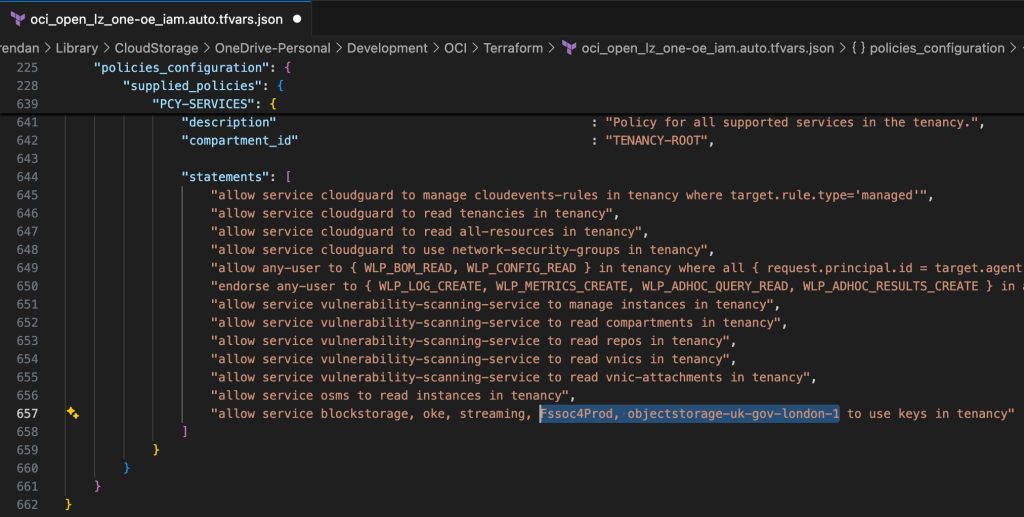
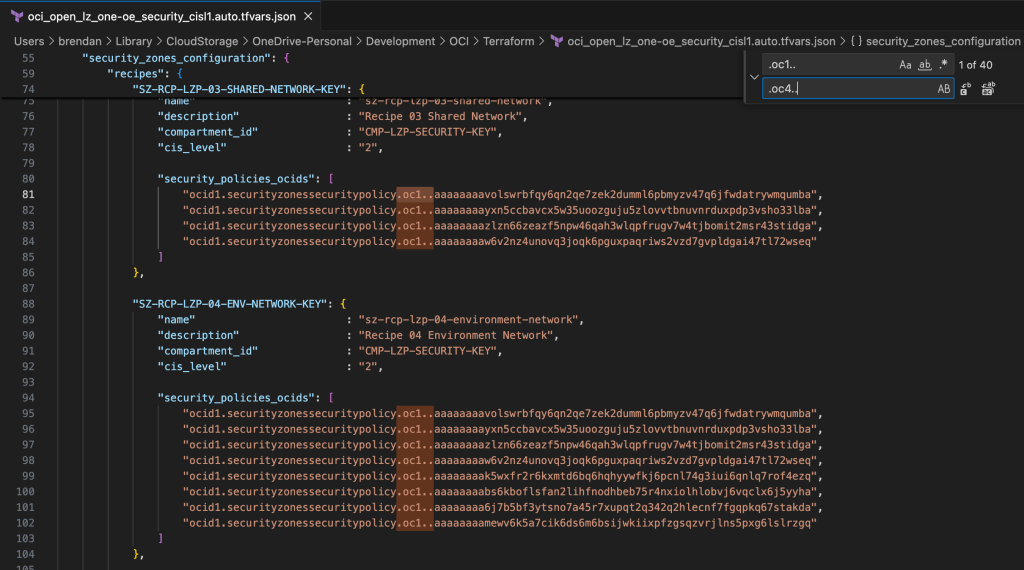
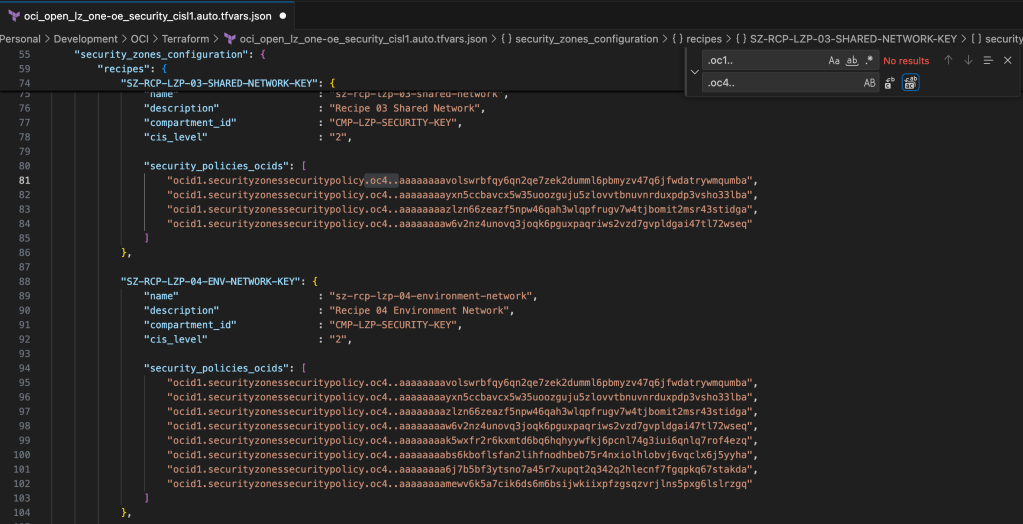
This is caused by two of the Terraform input configuration files having some hardcoded references to the OCI Commercial Cloud (OC1) rather than the UK Sovereign Cloud (OC4), which need to be updated for the configuration to apply correctly – otherwise the terraform apply command will fail.
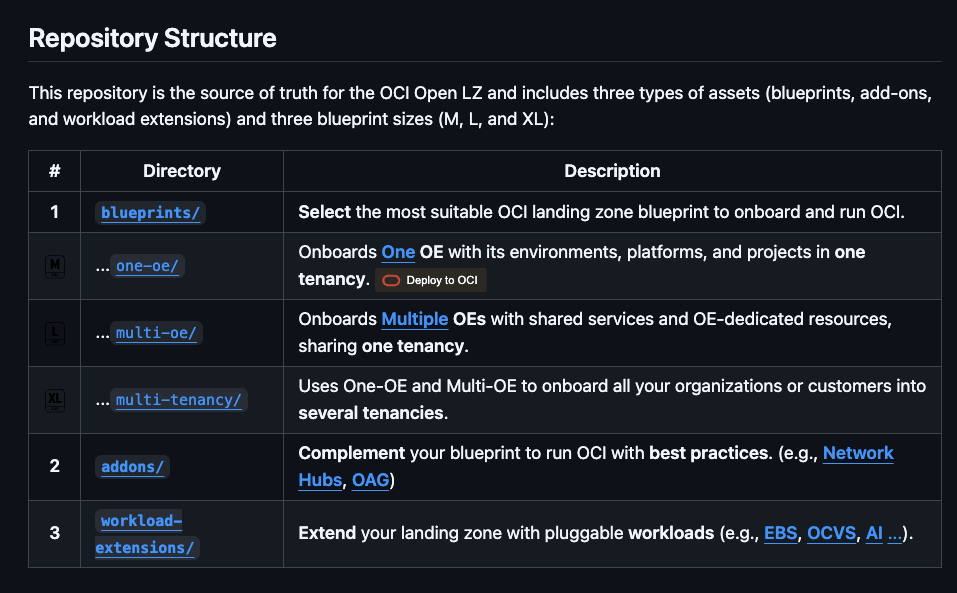
OCI has a number of Terraform based Landing Zone blueprints available.
The One OE (Operating Entity) OCI LZ blueprint can be deployed to an OCI tenancy directly from GitHub using the “Deploy to OCI” button:
This then uses OCI Resource Manager to deploy the blueprint to a tenancy – which uses Terraform under the hood.
I wanted to deploy the One OE blueprint to one of my test tenancies, however I wanted to do this natively using Terraform from my local machine rather than using OCI Resource Manager, mainly due to the additional flexibility and ease of troubleshooting that this approach provides.
It took me a while to figure out exactly how to do this (with a lot of help from one of the OCI LZ Black Belts 🥋).
I’ve documented the process that I followed below, hopefully it saves somebody else some time ⌚️.
✅ Step 0 – Make sure you have Terraform and Git installed (I’m assuming that you already have these installed locally).
✅ Step 1 – Create a directory to store the blueprints and configuration
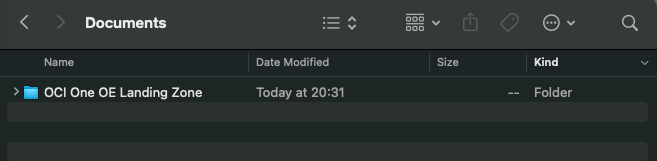
I created a folder aptly named “OCI One OE Landing Zone“
…then opened a terminal and ran the following commands from within this folder:
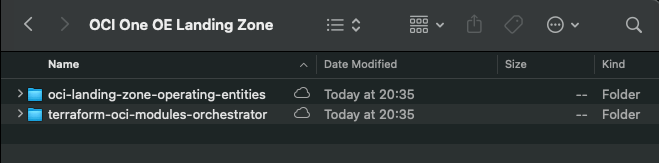
These commands download the OCI OE Landing Zone blueprints and the Landing Zone Orchestrator.
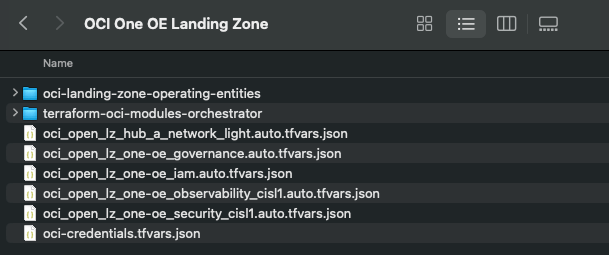
Once the downloads have completed, the folder should look something like this:
✅ Step 2 – Configure Authentication
Grab a copy of the file oci-credentials.tfvars.json.template, which is located within the folder OCI One OE Landing Zone/oci-landing-zone-operating-entities/commons/content.
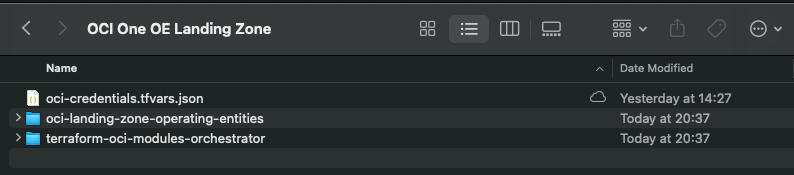
Take a copy of this file, place it in the root of the OCI One OE Landing Zone folder that you just created and rename the file to oci-credentials.tfvars.json
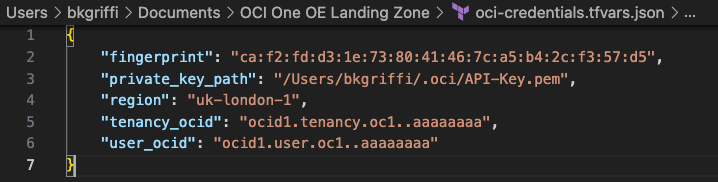
Open the oci-credentials.tfvars.json file and populate with your authentication information, if you don’t have this please follow the guide here to create an API Signing Key and obtain the other required information.
Here’s an example of what mine looks like:
✅ Step 3 – Grab a copy of the required configuration files
In order to deploy the One OE Landing Zone, a number of configuration files are required, these can be found within the following folder:
‘OCI One OE Landing Zone/oci-landing-zone-operating-entities/blueprints/one-oe/runtime/one-stack’
Copy these files into the root of the OCI One OE Landing Zone folder – you can leave them in their original location, but by taking a copy this means that you can edit them (if needed) and easy return them to their “vanilla” state by re-copying across from their original location.
✅ Step 4 – Timeto deploy 🚀
Run the following command from within the OCI One OE Landing Zone/terraform-oci-modules-orchestrator folder to download the required Terraform Providers and Modules
terraform init
Once this has completed, run terraform plan (from the same folder), referencing the required configuration files:
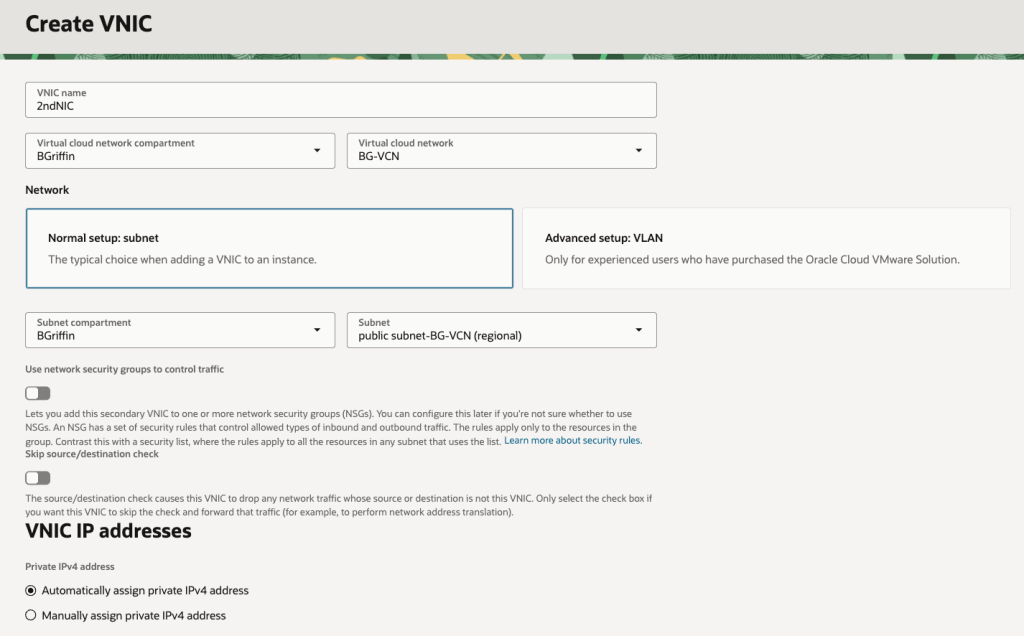
I was recently playing around in my lab and needed to add a secondary VNIC to one of my VMs for some testing that I was doing.
I quickly set about adding a secondary VNIC and used the default option of assigning an IP address automatically using DHCP rather than specifying a static IP address (I’m lazy, I know!).
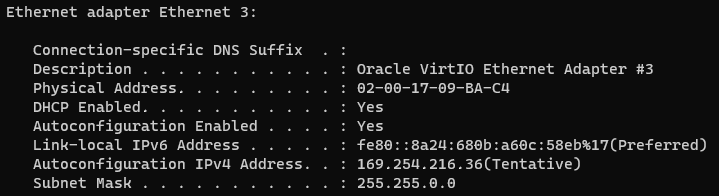
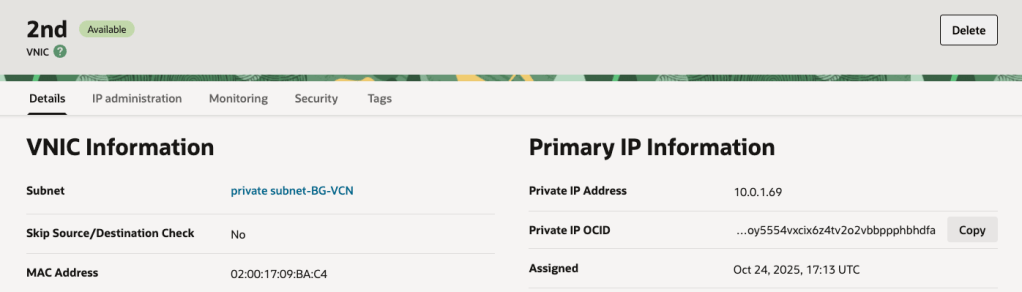
I gave the server a reboot, logged in and to my surprise the shiny new secondary VNIC had acquired a nasty APIPA address (169.x.x.x) rather than the dynamic IP address that OCI had assigned (10.0.1.69) ❌:
What is an APIPA address you may ask:
“An APIPA (Automatic Private IP Addressing) IP address is a self-assigned address in the 169.254.x.x range that a device uses when it cannot get an IP address from a DHCP server. This feature allows devices on a local network to communicate with each other even when the DHCP server is down, providing basic connectivity”
I deleted and re-added the VNIC, rebooted the server more times that I care to admit – but still nothing, I couldn’t get rid of this pesky APIPA IP address and get the “real” IP address that OCI had assigned (10.0.1.69).
After realising I’d sunk far too much time on this, I reached out to a colleague who is a networking whizz in OCI who informed me that OCI will only use DHCP for the primary VNIC on VM instances – for any secondary VNICs that you add to a VM instance, these must be configured with a static IP address (why oh why didn’t I ask them sooner 😫).
This is quite confusing as the OCI console allows you to add a secondary VNIC and specify DHCP – it just doesn’t work 🤦♂️.
It will even display the “dynamic” IP address that has been assigned to the instance in the console – it just won’t be picked up by the underling OS on the VM instance as DHCP doesn’t work:
Moral of the story, when adding a secondary VNIC (or tertiary for that matter) use static IP addressing ✅.
Note that whilst this affected a Windows Server in my case, this also applies to Linux too.
Hopefully my pain, will help somebody else in the future!
I was playing around with Terraform in my lab the other day and attempted to run a destroy operation to tear down everything I’d built – this was to avoid any unnecessary charges for resources that I’m not actively using in my test tenancy 💷.
The destroy operation kept failing with a 409-Conflict error which stated that the subnet it was trying to delete had references to a VNIC, this made no sense at all as everything had been provisioned with Terraform…..and the VM instances attached to the subnet had been deleted earlier in the destroy operation 😤.
I figured out what was actualluy blocking the deletion…..it was a VNIC attached to the subnet, however it wasn’t a VNIC that I (or Terraform!) had created.
As part of the testing I’d done post-build, I had attached the Cloud Shell to a Virtual Cloud Network & Subnet – this enabled me to SSH into a VM instance that didn’t have a public IP address assigned (as I’ve previously wrote about here).
The fix for this was simple, I just needed to close the Cloud Shell session (which detaches the VNIC from the subnet) and retry the destroy operation – which worked this time ✅.
This is probably my most niche-ist post ever – however if it helps at least one person then it was worth writing up!
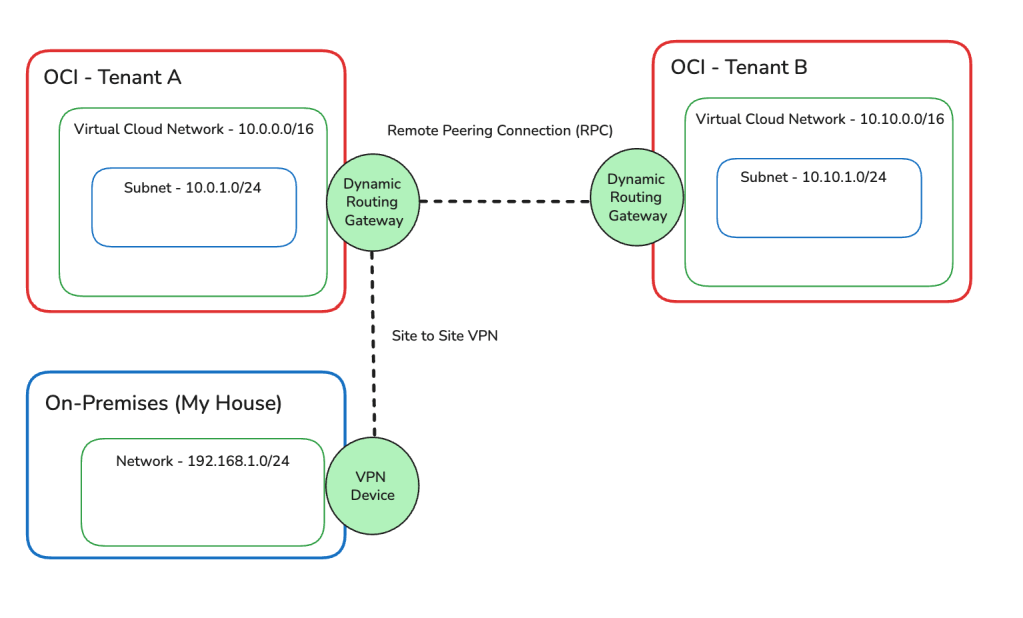
I have an OCI Tenant (Tenant A), which has a Site-to-Site VPN connection configured between my On-Premises network (my house 🏠) and Tenant A, this enables me to connect to resources within my tenant using their private IP addresses rather than using a Bastion/Jump Server – for example I can SSH directly into VM instances.
This has worked perfectly well for the last couple of years, recently I provisioned a second OCI Tenant (Tenant B) and I wanted to configure connectivity between Tenant A and B, after some research I selected the option of connecting the networks in Tenant A and Tenant B using a Remote Peering Connection (RPC) between the Dynamic Routing Gateways (DRGs) in each tenancy.
There are two other options to achieve this, however as I like a challenge, I picked the most difficult of the three options – this is also because the customer I’m working with, will likely choose the RPC option too.
To set this up, I used the step-by-step guide available here, which is excellent – I found it far better than the official documentation.
Once I had this all setup, I had the following architecture.
Based on my initial testing I could now do the following:
Connect from my On-Premises network to resources in Tenant A ✅
Connect from Tenant A to resources in Tenant B ✅
Connect from Tenant B to resources in Tenant A ✅
I couldn’t however connect from On-Premises to resources in Tenant B ❌.
In the real-world (outside of my lab), it would be essential (in most cases) to have the ability to connect from On-Premises to all OCI tenancies – in particular when they are connected like this.
After much head-scratching and reading documentation – which is always a last resort! I figure out the problem(s) and managed to resolve the issue with my On-Premises network being unable to connect to Tenant B.
This was resolved by doing the following in Tenant A (no changes were required for Tenant B).
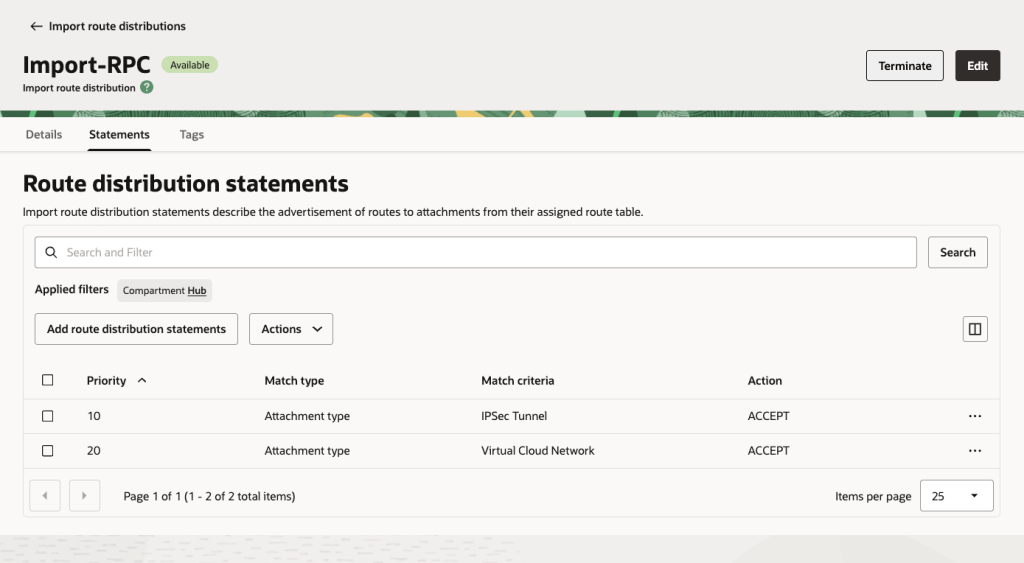
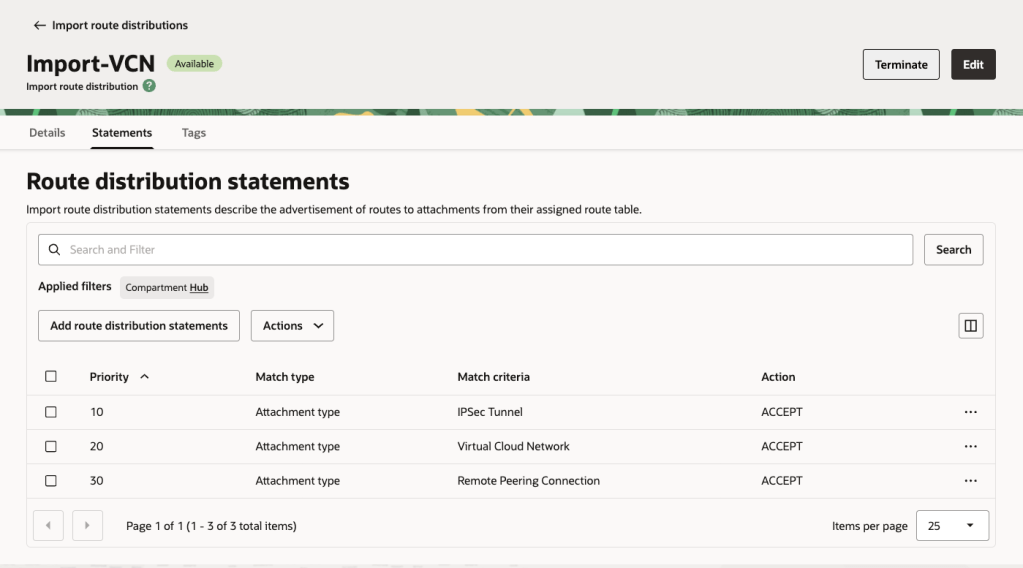
Created 3 x Import Rule Distributions (On-Prem/RPC/VCN).
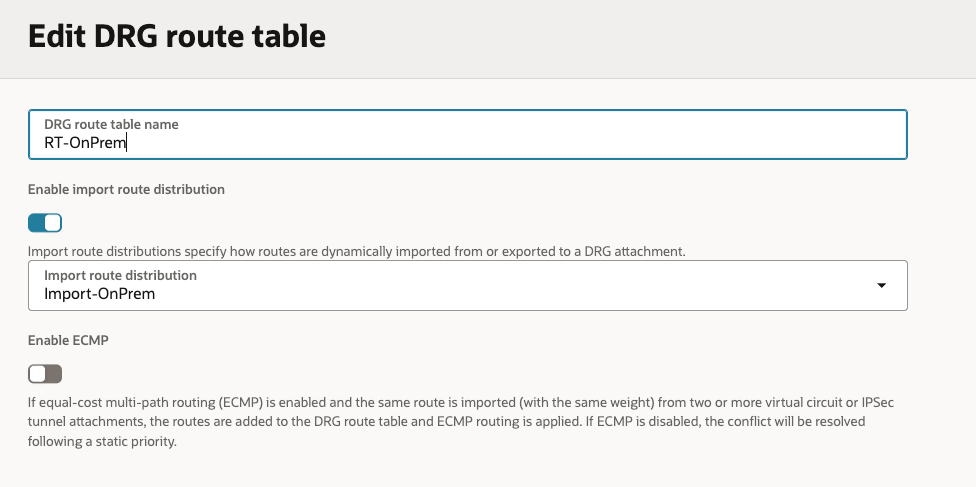
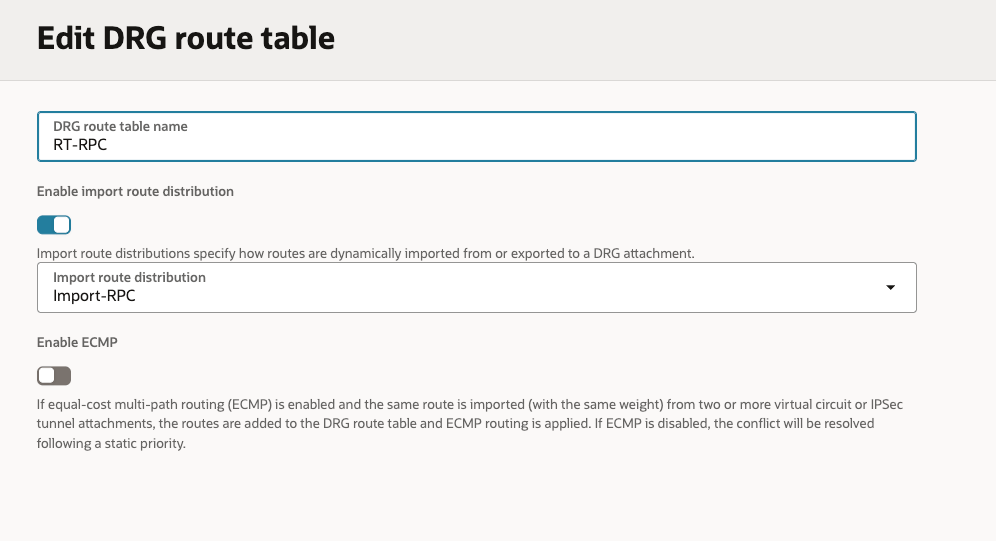
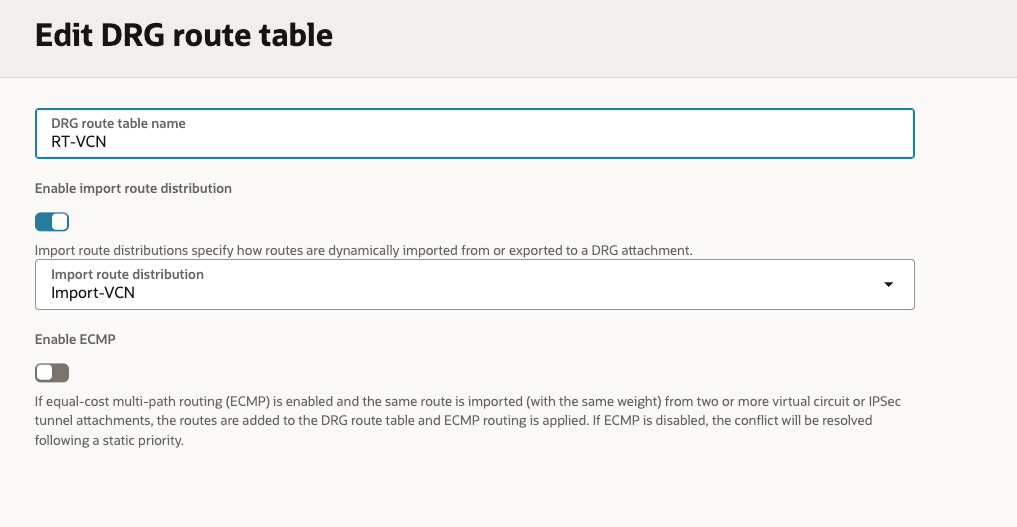
Created 3 x Route Tables (On-Prem/RPC/VCN), associating each of these new Route Tables with the respective new Import Rule Distributions.
Associated each Route Table with the respective Attachments (replacing the OOTB configuration).
On-Prem > IPSec Tunnel Attachment
RPC > Remote Peering Connection Attachment
VCN > VCN Attachments
Here are the Import Route Distributions that I needed to create:
On-Prem Import Routes: This will enable On-Prem to see all of the routes from the VCNs and Remote Peering Connection.
Remote Peering Connection Import Routes: This will enable the RPC to see all of the VCNs and IPSec tunnel (which is the Site to Site VPN).
VCN Import Routes: This enables all VCNs to see all of the VCNs, RPCs and IPSec Tunnel.
Here are the Route Tables with the mapping to the Import Rule Distributions On-Prem/RPC/VCN:
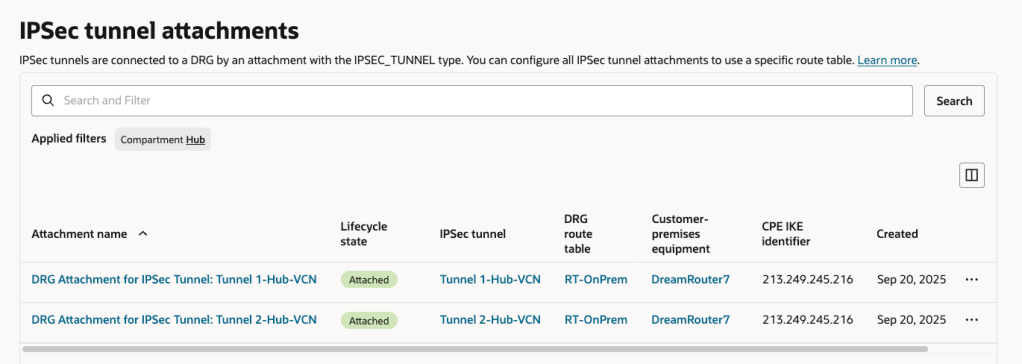
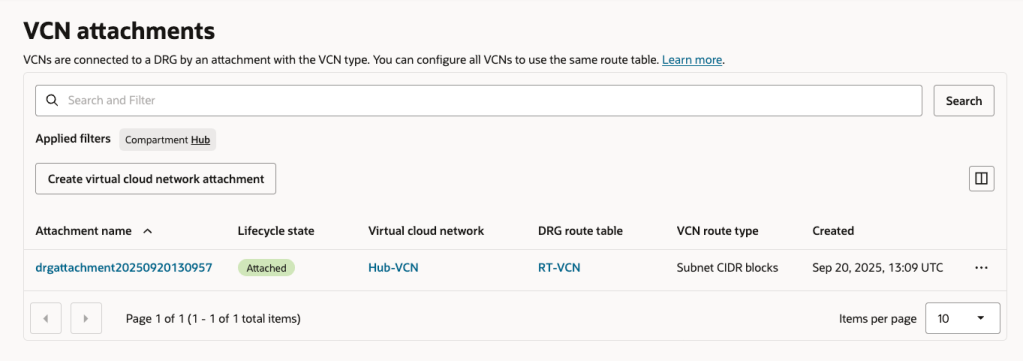
Here are the Attachments with the association to the respective Route Tables.
As a side note, if you are using a FastConnect rather than a Site-to-Site VPN for On-Premises to OCI connectivity the tweaks you’ll need to make to the configuration are:
Replace IPSec Tunnel with Virtual Circuit in the Import Rules
The On-Prem Route Table should be associated with the Virtual Circuit Attachment rather than IPSec Tunnel Attachment.
User Error: Failed to execute DB query with Error – NotAuthorizedOrNotFound: Authorization failed or requested resource not found with http status 404
If you are like me, the reason for this error is that you didn’t read the manual 🤦, this error is typically returned because the Generative AI Agent service does not have permission to the Database Connection and Key Vault – which is required to connect to the database and run the query generated by the agent.
The fix for this is to create a policy that grants the necessary permissions to the Generative AI Agents service – which is documented here (below for reference too).
Allow any-user to use database-tools-connections in compartment <compartment-name> where request.principal.type='genaiagent'

Allow any-user to read database-tools-family in compartment <compartment-name> where request.principal.type='genaiagent'

Allow any-user to read secret-family in compartment <compartment-name> where request.principal.type='genaiagent'
One thing I’ve been caught out with in the past with OCI Gen AI is when an AI model gets retired and my apps that specifically call the model start to fail as the model is no longer available!
The fix for this isn’t particularly difficult, it’s just a case of updating the code to point to the new model name (via model_id), this can be quite stressful though when you are about to deliver a demo to a customer 😫.
I was really pleased to see the introduction of model aliases (Cohere-only at this time), so rather than using a hardcoded reference to a specific model version you can now use the following aliases, which will always point to the latest version of the Cohere Command R and Coheren Command R+ models.
cohere.command-latest points to cohere.command-r-08-20204 cohere.command-plus-latest points to cohere.command-r-plus-08-2024
Yesterday I added a new AI profile to an Oracle Autonomous Database using the Database Actions UI, when testing this new profile I received the following error:
This appears to be caused by Database Actions not creaing the profile correctly, the fix was to manually create the profile using the following SQL statement:
This created a profile named TestProfile that uses the existing saved credentials named TESTCREDS to connect to the cohere.command-r-plus-08-2024 model in the uk-london-1 region – for some reason the Database Actions UI hardcodes the region to Chicago (which is another reason to create the profile manually!)
In addition to this, it gives the profile access to all objects owned by the account named ADMIN.
Obvouisly, you’ll need to update these with the relevant values for your environment.
After doing this, it was able to successfull connect:
This afternoon I was using the OCI Cloud Shell to build a container to be pushed to the OCI Container Registry which I was then going to create an OCI Container Instance from. This is something that I’ve done countless times without any issues, as I was short of time (I’m going on holiday tomorrow) as is typical, anything that could go wrong, did 😭.
When running the following command from the OCICloud Shell to build the container.
docker build --tag container-name .
It returned the following error (interesting bits in bold).
Error: committing container for step {Env:[PATH=/usr/local/bin:/usr/local/sbin:/usr/local/bin:/usr/sbin:/usr/bin:/sbin:/bin LANG=C.UTF-8 GPG_KEY=E3FF2839C048B25C084DEBE995E310250568 PYTHON_VERSION=3.9.21 PYTHON_SHA256=3126f59592c9b0d7955f2bf7b081fa1ca35ce7a6fea980108d752a05bb1] Command:run Args:[pip3 install -r requirements.txt] Flags:[] Attrs:map[] Message:RUN pip3 install -r requirements.txt Heredocs:[] Original:RUN pip3 install -r requirements.txt}: copying layers and metadata for container “4aa0c966251fa75dac10afc257b8c8d62aae50c45eb5dd1157d3c1cae0208413”: writing blob: adding layer with blob “sha256:5699f359aa00daa8a93b831b478fea1fe7c339396e532f13e859fb4ef92fd83f”: processing tar file(open /usr/local/lib/python3.9/site-packages/oci/addons/adk/__pycache__/agent_client.cpython-39.pyc: no space left on device): exit status 1
After much Googling (without much luck I may add!) I had a brainwave – the OCI Cloud Console only provides 5GB storage as per the documentation – perhaps I’d hit the storage limit 🤔:
It turned out that the majority of the storage consumed was by Docker / Podman (as a side note the Cloud Shell now uses Podman, however the Docker commands are aliased to it, so you can continue to use them).
So……it looked like I needed to do some housekeeping 🧹.
To identify the storage used by Docker / Podman, you can run the following command:
docker system df
Which returned the following:
To free up some space I ran the following command (which is a little brute force, I may add 🔨):
docker system prune -a
Using my YOLO approach, I selected y to continue which worked its magic and free’d up some space (please take heed of the warnings ⚠️).
I then had plenty of free space and could build the container successfully ✅
I can now enjoy my holiday, safe in the knowledge that I managed to fix this issue 🗺️.
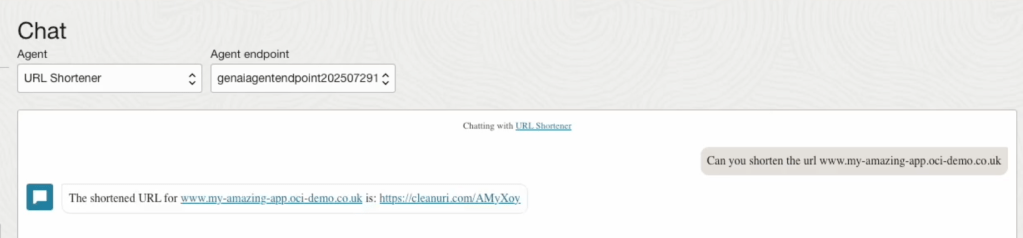
In this short video, I step through how to create an Oracle Generative AI Agent and then configure a tool within the Agent to connect to a public API that performs URL shortening. This uses the new (as of July 2025) API Endpoint Calling Tool functionality within the Generative AI Agents Service.
This allows users to ask the agent to shorten a URL, the agent then calls a public API that can shorten URLs (https://cleanuri.com/docs) and returns a shortened URL to the user.