Buried within the December 2024 release notes for the OCI Generative AI Agents service is this little gem 💎:
This now enables you to do some prompt engineering to influence the response produced by an agent, this is useful if you need to tailor the length, style and tone of the response from the agent. For example you may need the response to include a maximum of 3 bullet points.
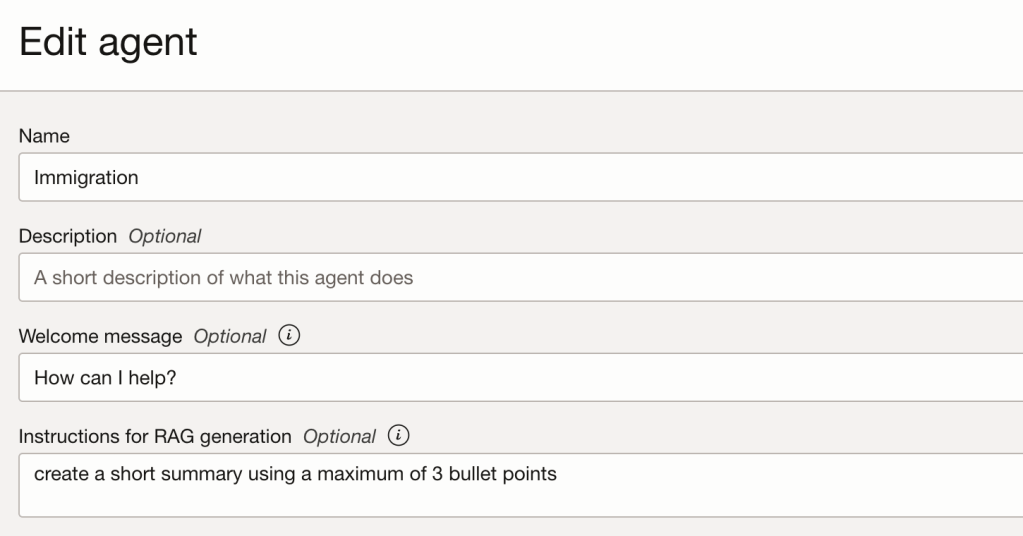
To provide additional instructions to an agent response, navigate to the agent and select Edit. Below you will see a field named Instructions for RAG generation, within this add the additional instructions. In the example below, I have simply asked it to crerate a short summary using a maximum of 3 bullet points.
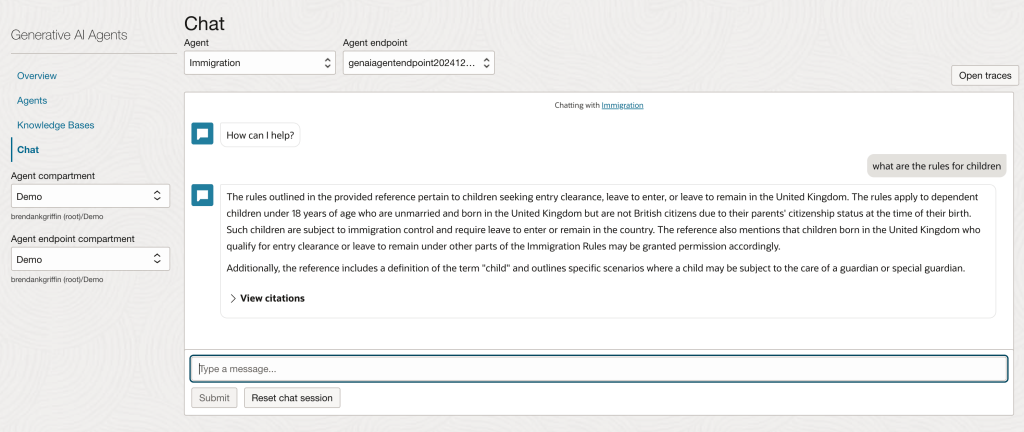
Here is a before/after comparison of the response from the agent, this is using an agent I built that is trained on UK immigration policy data.
Before
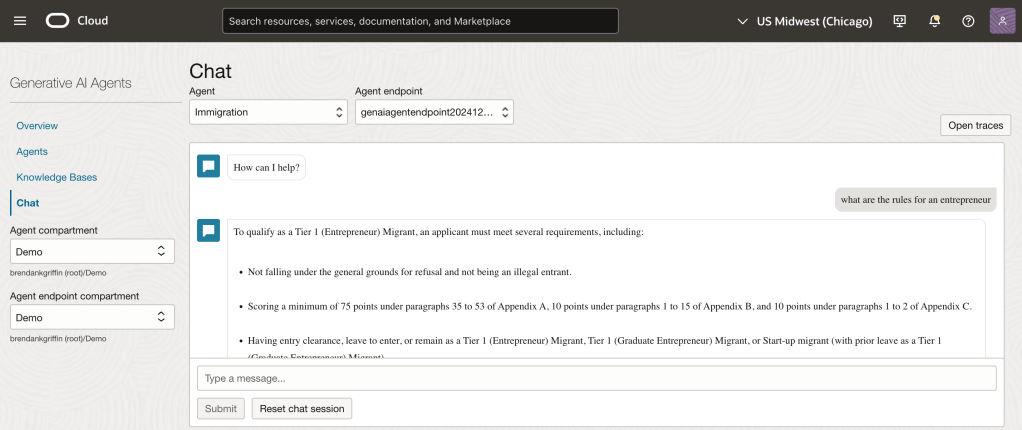
After
There’s some other interesting features in the December release, including more detailed citations and the ability to override Object Storage citation links through custom Object Storage metadata.
I stumbled upon an amazing tool recently called Streamlit. Streamlit makes it super-simple to create web apps using Python without any front-end dev experience (which was music to my ears!).
I had one use-case which was perfect for Streamlit – creating a front end for OCI Generative AI Agents. I’ve built a number of PoCs recently and have used the OCI Console to demonstrate an OCI Generative AI Agent in action, whilst this is functional, it’s not particularly pretty 😀.
If you want to know more about OCI Generative AI Agents, be sure to check out this short video that I created that walks through the end-to-end process of creating an agent in less than 10 minutes ⏱️.
Anyway……back to the main topic. The advantage of using Streamlit is that it enables custom web apps to be created in minutes, which are highly customizable and therefore perfect for PoCs to demonstrate the art of the possible .
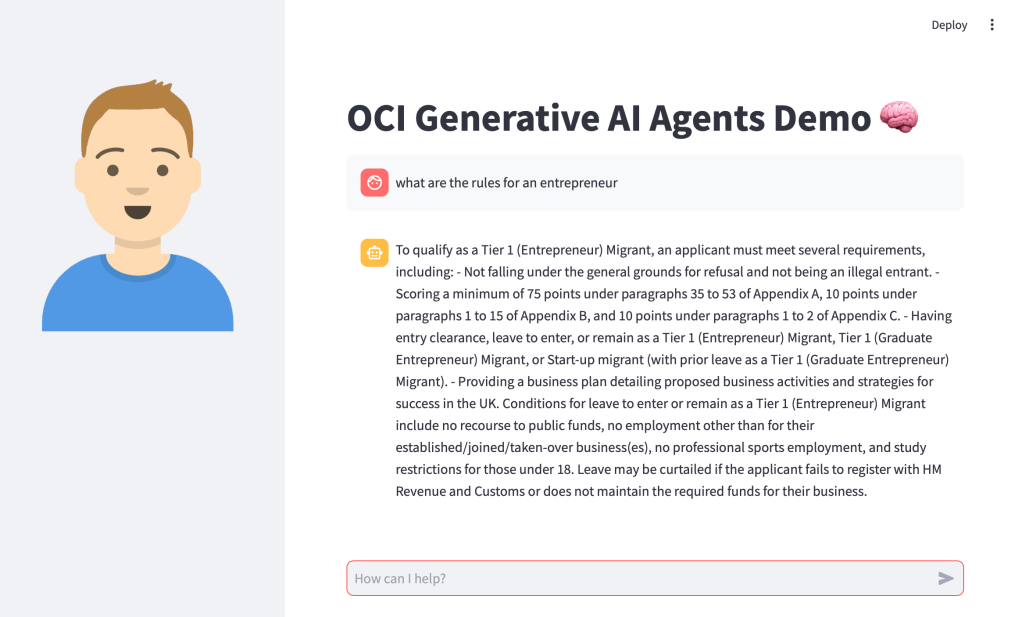
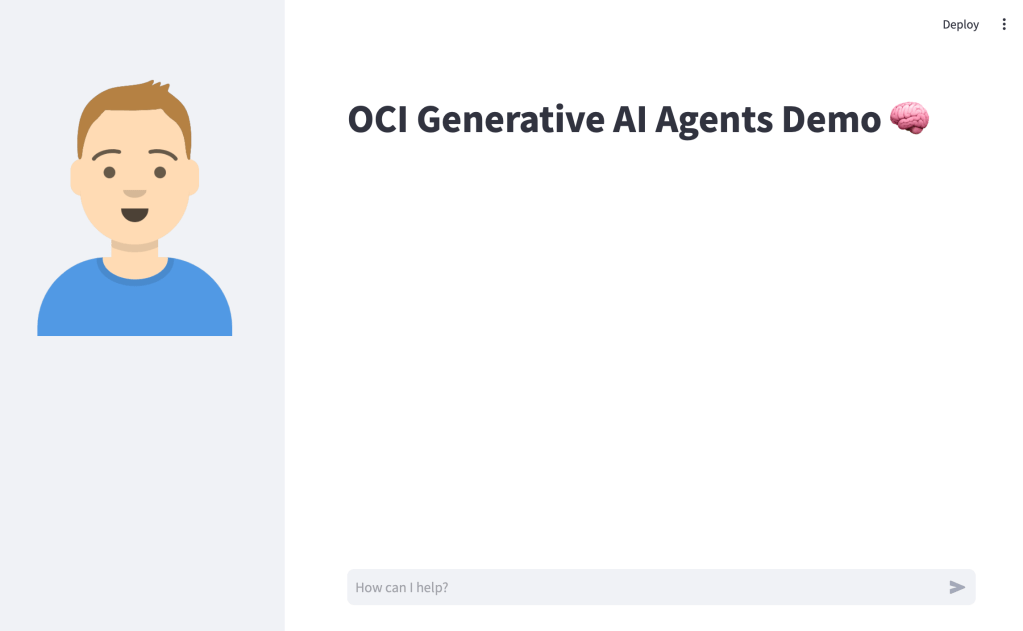
Before I jump into sharing the code, this is how the end result looked (running locally on my Mac, will also work on Windows too) – using an agent that I developed to help understand UK immigration policy 📄. Here I am asking about the rules for an entrepreneur.
Installing Streamlit is a breeze using the single command below.
pip install streamlit
Once I’d done this, I put together the following Python script to create the web app, this can also be downloaded from GitHub.
Disclaimer: I’m no developer and this code is a little hacky, but it gets the job done!
The following variables need to be updated before running the script – further info can be found in the code comments:
st.title – Set’s the title of the page
st.sidebar.image – Configures the image to use in the sidebar
service_ep – Defines the Generative AI Agent service endpoint to connect to (this varies by region)
agent_ep_id – Sets the OCID of the agent to connect to
import streamlit as st
import time
import oci

# Page Title
st.title("OCI Generative AI Agents Demo 🧠") # Update this with your own title

# Sidebar Image
st.sidebar.image("https://brendg.co.uk/wp-content/uploads/2021/05/myavatar.png") # Update this with your own image

# OCI GenAI settings
config = oci.config.from_file(profile_name="DEFAULT") # Update this with your own profile name
service_ep = "https://agent-runtime.generativeai.us-chicago-1.oci.oraclecloud.com" # Update this with the appropriate endpoint for your region, a list of valid endpoints can be found here - https://docs.oracle.com/en-us/iaas/api/#/en/generative-ai-agents-client/20240531/
agent_ep_id = "ocid1.genaiagentendpoint.oc1.us-chicago-1.amaaaaaaayvpzvaa7z2imflumr7bbxeguh6y7bpnw2yie4lca2usxrct" # Update this with your own agent endpoint OCID, this can be found within Generative AI Agents > Agents > (Your Agent) > Endpoints > (Your Endpoint) > OCID

# Response Generator
def response_generator(textinput):
    # Initialize service client with default config file
    generative_ai_agent_runtime_client = oci.generative_ai_agent_runtime.GenerativeAiAgentRuntimeClient(config,service_endpoint=service_ep)

    # Create Session
    create_session_response = generative_ai_agent_runtime_client.create_session(
        create_session_details=oci.generative_ai_agent_runtime.models.CreateSessionDetails(
            display_name="USER_Session",
            description="User Session"),
        agent_endpoint_id=agent_ep_id)

    sess_id = create_session_response.data.id

    response = generative_ai_agent_runtime_client.chat(
        agent_endpoint_id=agent_ep_id,
        chat_details=oci.generative_ai_agent_runtime.models.ChatDetails(
            user_message=textinput,
            session_id=sess_id))

    #print(str(response.data))
    response = response.data.message.content.text
    return response

# Initialize chat history
if "messages" not in st.session_state:
    st.session_state.messages = []

# Display chat messages from history on app rerun
for message in st.session_state.messages:
    with st.chat_message(message["role"]):
        st.markdown(message["content"])

# Accept user input
if prompt := st.chat_input("How can I help?"):
    # Add user message to chat history
    st.session_state.messages.append({"role": "user", "content": prompt})
    # Display user message in chat message container
    with st.chat_message("user"):
        st.markdown(prompt)

    # Display assistant response in chat message container
    with st.chat_message("assistant"):
        response = response_generator(prompt)
        write_response = st.write(response)
    # Add assistant response to chat history
    st.session_state.messages.append({"role": "assistant", "content": response})
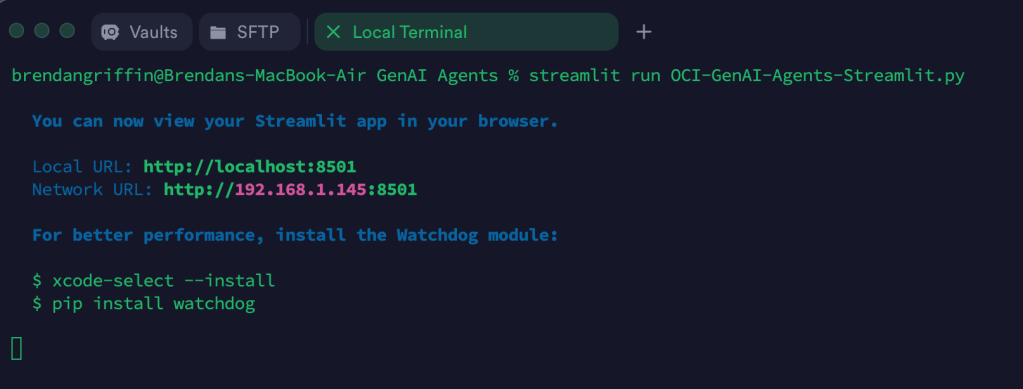
Once this file has been saved, it’s simple to run with a single command:
streamlit run OCI-GenAI-Agents-Streamlit.py
It will then automatically launch a browser and show the web app in action 🖥️
This basic example can easily be updated to meet your requirements, the Streamlit documentation is very comprehensive and easy to follow with some useful examples – https://docs.streamlit.io/.
Probably the longest title I’ve ever had for a post!
I have an Oracle Autonomous Database that I created a private endpoint for and published via a public load balancer in OCI……my reason for this complexity – I wanted to use a custom vanity URL to access the database and this is the supported way to do this. If want to know more about setting this up, be sure to check out this step by step guide 📖.
Once I’d got this setup, everything worked as expected apart from one small issue – when trying to get a token via REST so that I could call an Oracle Machine Learning model within the database I received the following error ❌.
b'{“error_message”:”\’DEMO1USER\’ unauthorized to \’use OML application\’”,”errorCode”:0,”request_id”:”OMLIDMREST-955f999622584d33a70″}’
I was calling the REST API via Python, but other methods such as Curl returned the same error (further details on calling the REST API to get a token and authenticate can be found here). The user had the relevant permissions so it was definitely something else 🤔.
The trick to fixing this is to update the URL that is called to obtain the token, rather than using this:
The reason for this, is that when using a custom (vanity) URL to access the REST endpoint, it doesn’t know which tenancy and database you are trying to obtain an authentication token for, therefore you need to specify this in the REST endpoint.
To do this I needed an SSL certificate and decided to use Let’s Encrypt as they provide free SSL certificates (with a validity period of 90 days).
It was relatively straightforward to create a certificate using the Certbot client for macOS, to do this I did the following:
Step 1 – Installed Certbot using the following command
brew install certbot
Step 2 – Created a directory to store the generated certificates
mkdir certs
cd certs
Step 3 – Create the certificate request using Certbot
This uses the DNS challenge type, which is ideal when you need to create a certificate for use on a system that doesn’t provide native integration with Certbot (such as Oracle Analytics Cloud). Replace “e-mail address” with a valid address to use for renewal reminders.
When this command has been run, it will ask for the hostname to create the SSL certificate for. In my case I requested a certificate for demo1oac.oci-demo.co.uk.
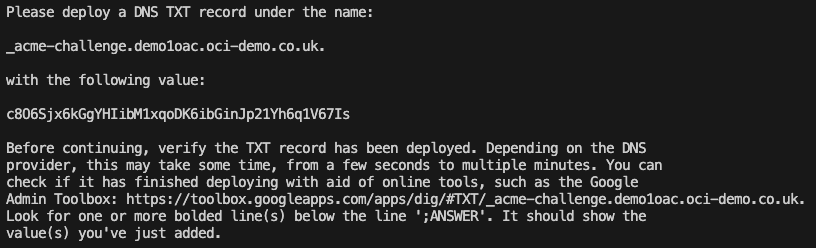
After hitting enter, it then provides a DNS record that needs to be created to validate domain ownership.
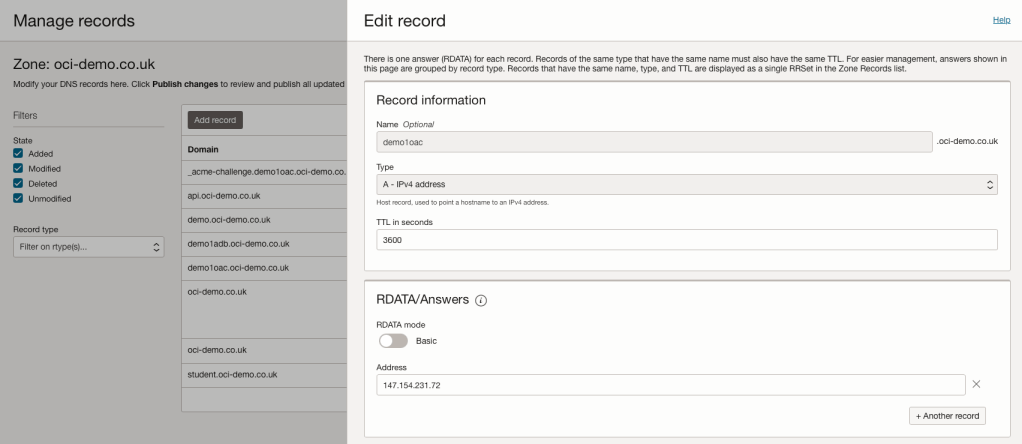
I host my DNS within OCI, so this was as simple as creating a DNS TXT record using the OCI Console (the process will vary depending on your DNS provider).
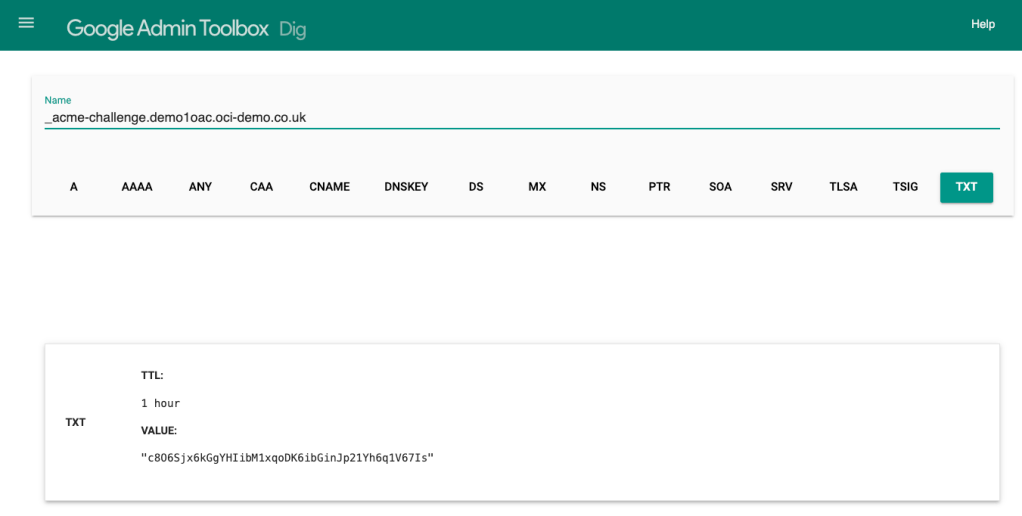
I then used the link within the instructions to validate the presence of the DNS TXT records that I had just created.
Once I’d verified that the DNS record was available publicly, I hit enter and the SSL certificates were created for me!
Step 4 – Configure OAC to use a custom hostname with SSL (example)
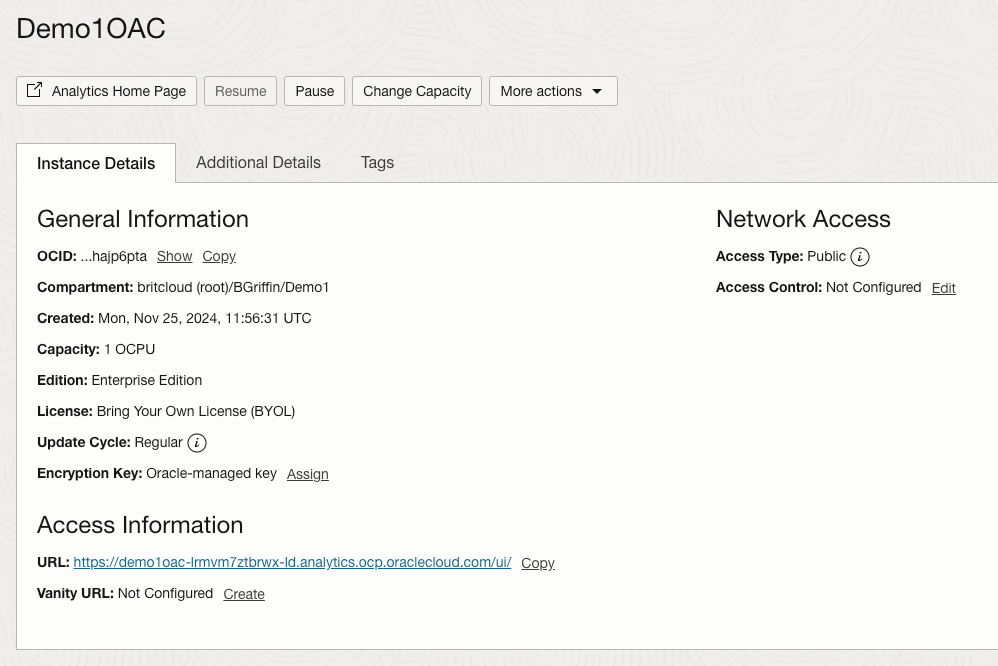
I then navigated to Oracle Analytics Cloud within the OCI Console and within Vanity URL selected Create.
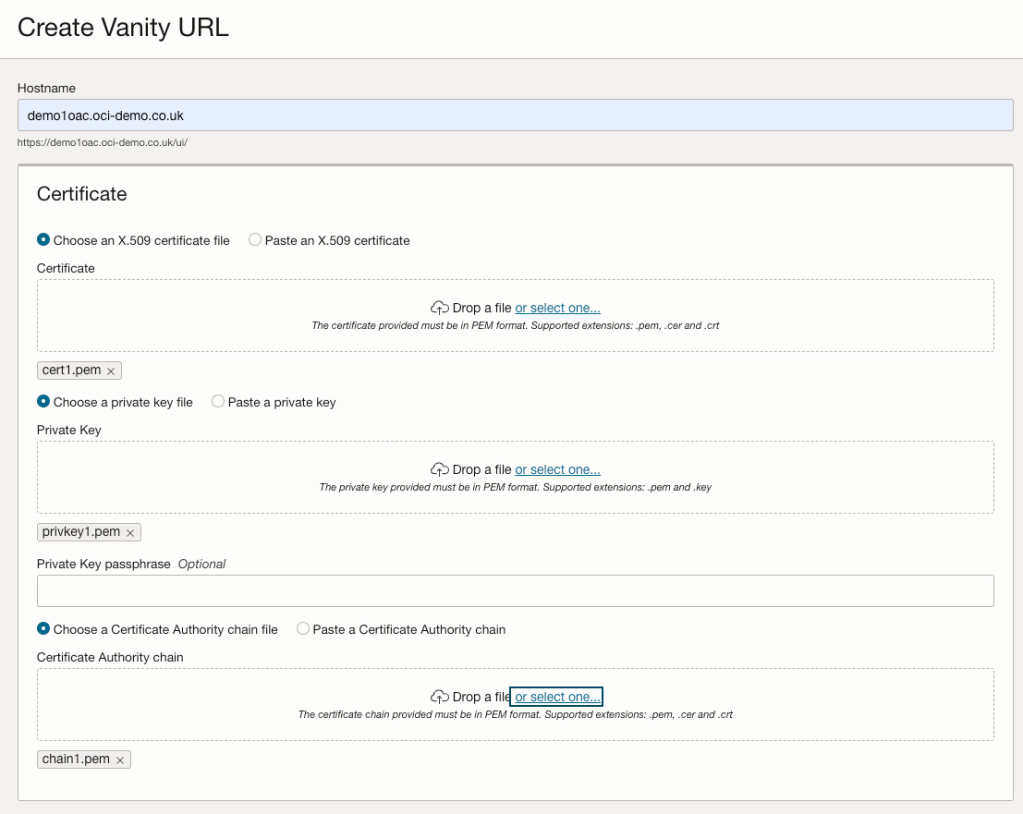
I entered the hostname for the vanity URL – demo1oac.oci-demo.co.uk. I then uploaded the certificates that had just been generated.
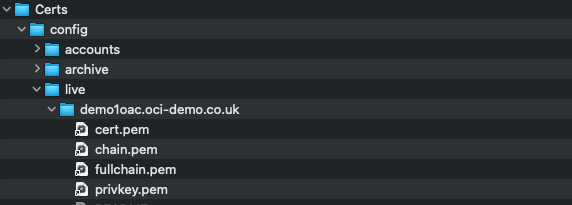
The mapping between certificate types and the .pem files created is as follows:
Certificate = cert1.pem
Private Key = privkey1.pem
Certificate Authority chain file = chain1.pem
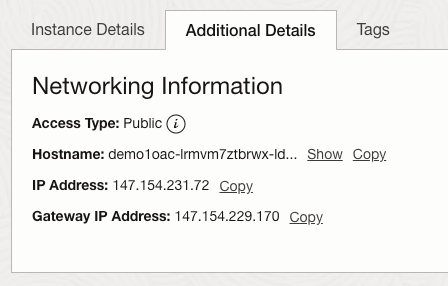
I then hit Create to apply the configuration. A final step was for me to create a DNS entry to point demo1oac.oci-demo.co.uk to the public IP address of the OAC instance.
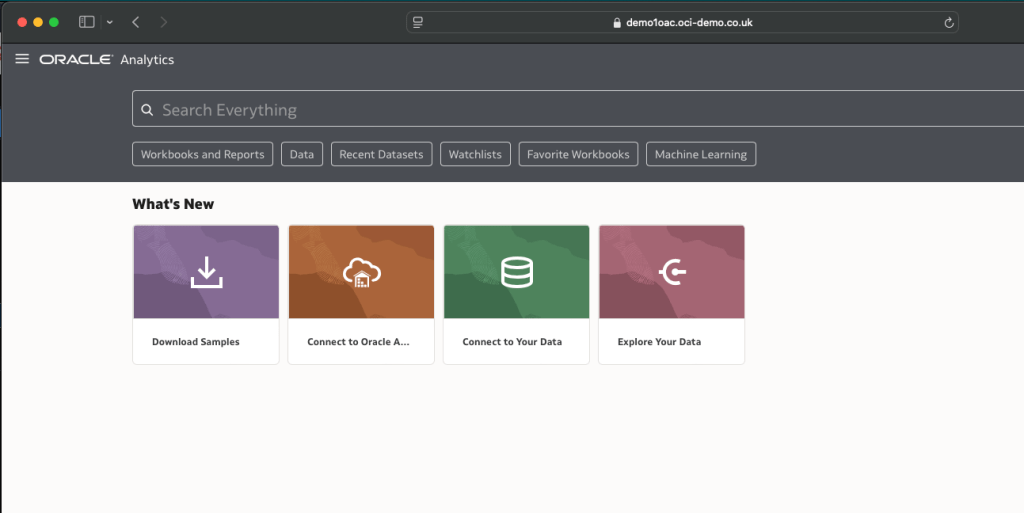
I then waited a few minutes for the DNS record to come to life and then browsed to https://demo1oac.oci-demo.co.ukand it worked!
The time finally came for me to get hands on with Kubernetes on OCI (or OKE as it’s affectionately know).
Spinning up a Kubernetes cluster was an absolute breeze, however when I started to work through the Quick Start….or not so Quick Start for me – I stumbled up an error when attempting to deploy the sample app to my cluster.
When I ran the command in Step 3 I received the following error:
error: error validating “https://k8s.io/examples/application/deployment.yaml”: error validating data: failed to download openapi: the server has asked for the client to provide credentials; if you choose to ignore these errors, turn validation off with –validate=false
Looked like some form of authentication issue, after much head scratching and experimentation I figured out what the problem was (it took me far too long ⏱️).
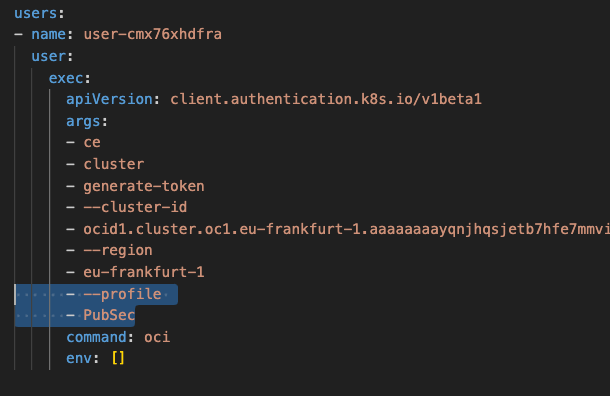
I have multiple profiles specified within my OCI CLI configuration file, example below (with the juicy bits removed!):
The OKE cluster I needed to connect to is within the tenancy I have named PubSec, if I take a look at the Kubernetes config file (located in “.kube” within my user profile), I could see that this uses the OCI CLI to connect to the cluster – however as it doesn’t specify a profile within the OCI CLI config this will use the DEFAULT profile, in my specific case I needed to override this to uses the PubSec profile.
I resolved this by adding the highlighted lines (below) to the Kubernetes config file within “.kube”. This tells the OCI CLI to connect to the cluster using the PubSec profile rather than DEFAULT.
Once I’d updated this, saved and re-sarted the terminal, I ran the command again and it worked like magic 🪄
There’s been a lot of buzz about Generative AI Agents recently, so I thought that I’d take Oracle Gen AI Agents for a spin 🧠.
In this short video (<10 minutes ⏱️), I walk through the full end-to-end process of creating a Gen AI agent within OCI that uses the power of a LLM and business data to provide contextually relevant answers to business questions, saving users time and reducing costs 👩💻.
I’ve recently posted a short video on YouTube that walks through the process of creating and loading sample data into Oracle Autonomous Database using AI – this feature is fully baked into the product too!
This will be a huge timesaver for me as I create a lot of demo’s 👨💻.
OCI Object Storage has a notion of a Pre-Authenticated Request, this gives users access to a bucket or an object (file) without having provide their sign-on credentials 🪪 – all is needed is a single URL (which can have an expiration time/date on).
I’ve used PAR’s to provide read access to specific objects (files) within a storage bucket, this has been useful to quickly (and relatively securely) share content.
I recently needed to provide a user the ability to upload content to a storage bucket using a PAR, to do this I configured PAR on a bucket as follows 🪣:
However, after creating the PAR on the bucket and getting the URL, I was at a loss as to how to upload files to the bucket. If I browsed to the URL in a browser, it simply listed the files within the bucket with no visual means to upload (I was expecting a nice upload button!).
I couldn’t see any way to upload files using the OCI CLI either, after much head-scratching and experimentation it turned out that the easiest way upload a file is to use Curl
Here is the command that I used:
curl -v -X PUT --data-binary '@/Users/brendan/Downloads/MyFile.zip' PAR URL/MyFile.zip
You need to include the path to the file to upload (after the @ sign). The PAR URL provided by OCI and finally the name to give the uploaded file within the storage bucket.
Running this command successfully uploaded the file to the bucket that the PAR had been created for – result!