Tag: oracle-cloud

  • Using Resource Principal authentication with OCI πŸ”

    When connecting to OCI services in using the SDKs there are four options for authentication πŸ”:

    • API Key
    • Session Token
    • Instance Principal
    • Resoure Principal

    Each of these is covered in detail within the OCI SDK Authentication Methods documentation πŸ“•.

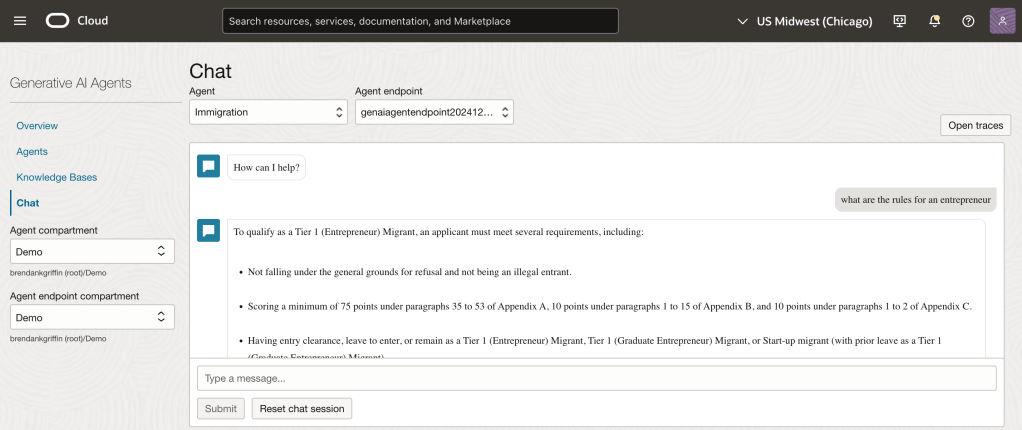
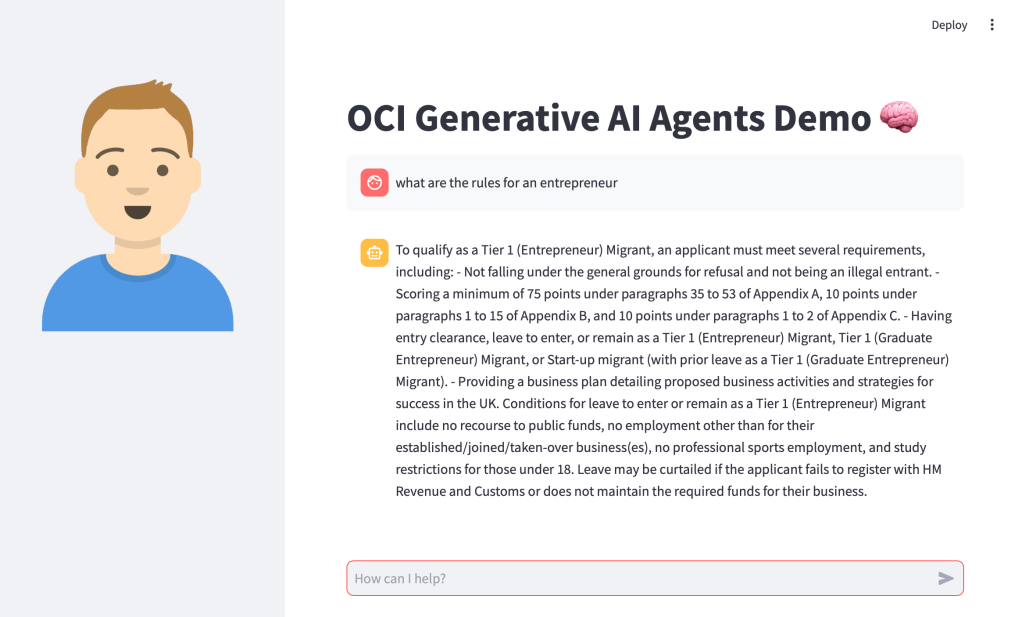
    I had a situation recently where I wanted to use Resource Principal authentication to authenticate a Container Instance to an OCI Generative AI Agent, the container was running a Python-based front end for an agent that I had created, however rather than using an API Key to authenticate as a specific user account to the Generative AI Agent service, I wanted to authenticate as the actual Container Instance itself.

    Doing this meant that I didn’t need to store a private key and config file (of the user account) on the Container Instance, which could be viewed as a security risk.

    There are three steps required to configure Resource Principal authentication which I have explained below, one thing to note is that this approach can be adapted for authenticating to other OCI services.

    Step 1 – Create a Dynamic Group that includes the Container Instance πŸ«™

    This defines the resource that will be connecting from (the Container Instance) to the Generative AI Agent. To create the Dynamic Group, I did the following within the OCI Console – I navigated to:

    Identity & Security > Domains > (My Domain) > Dynamic groups > Create dynamic group.

    I then created a group named Container-Instances with the following rule:

    ALL {resource.type=’computecontainerinstance’}

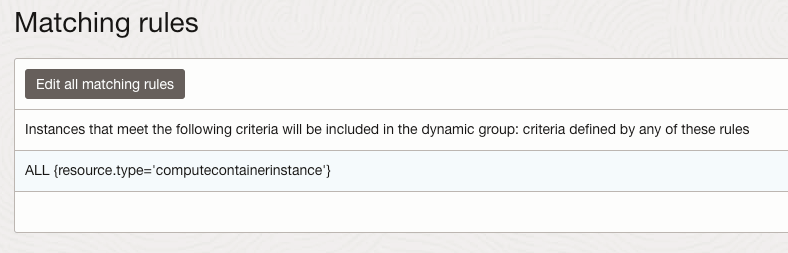
    This Dynamic Group contains every Container Instance within my tenant, I could have been more granular and specified an individual Container Instance.

    For further details on how to create Dynamic Groups be sure to check out the official documentation.

    Step 2 – Create a Policy that provides members of the Dynamic Group with access to the Generative AI Agents service πŸ“„

    The policy grants permissions to the Dynamic Group created above so that members of this group are able to connect to the Generative AI Agent service, to create the policy I did the following within the OCI Console:

    Navigated to – Identity & Security > Domains > Policies > Create Policy

    I then created a policy with the following statement:

    Allow dynamic-group Container-Instances to manage genai-agent-family in tenancy

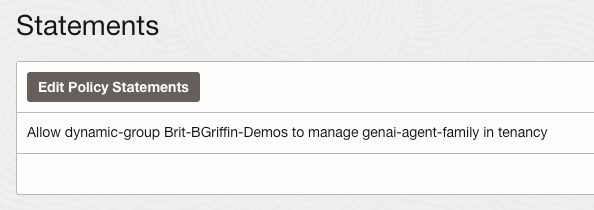
    This provides the Dynamic Group named Container-Instances (created in Step 1) the desired access to the Generative AI Agent service – each OCI service has specific resource types that can be used within policies, the full policy reference for the Generative AI Agent service can be found here.

    Step 3 – Update the Python code to authenticate to the Generative AI Agent service using the identify of the Container Instance (Resource Principal) 🐍

    To update the Python script that connects to the Generative AI Agent so that it uses Resource Principal rather than API Key authentication, I updated the following lines of code from this:

    config = oci.config.from_file("config")
    service_ep = "https://agent-runtime.generativeai.uk-london-1.oci.oraclecloud.com"
    agent_ep_id = "OCID"
    
    generative_ai_agent_runtime_client = oci.generative_ai_agent_runtime.GenerativeAiAgentRuntimeClient(config,service_endpoint=service_ep)
    

    To this:

    rps = oci.auth.signers.get_resource_principals_signer() 
    service_ep = "https://agent-runtime.generativeai.uk-london-1.oci.oraclecloud.com"
    agent_ep_id = "OCID"
    
    generative_ai_agent_runtime_client = oci.generative_ai_agent_runtime.GenerativeAiAgentRuntimeClient(config={},signer=rps,service_endpoint=service_ep)


    The two major changes are:

    • Using “oci.auth.signers.get_resource_principals_signer()” rather than loading a config file with “config = oci.config.from_file(“config”)”
    • When connecting to the service, using config={},signer=rps,service_endpoint=service_ep” (key bits in bold) rather than “config,service_endpoint=service_ep

    As mentioned earlier the approach that I’ve covered above an be adapted to work with other OCI services.

  • Creating a front end for an OCI Generative AI Agent using Streamlit πŸŽ¨

    I stumbled upon an amazing tool recently called Streamlit. Streamlit makes it super-simple to create web apps using Python without any front-end dev experience (which was music to my ears!).

    I had one use-case which was perfect for Streamlit – creating a front end for OCI Generative AI Agents. I’ve built a number of PoCs recently and have used the OCI Console to demonstrate an OCI Generative AI Agent in action, whilst this is functional, it’s not particularly pretty πŸ˜€.

    If you want to know more about OCI Generative AI Agents, be sure to check out this short video that I created that walks through the end-to-end process of creating an agent in less than 10 minutes ⏱️.

    Anyway……back to the main topic. The advantage of using Streamlit is that it enables custom web apps to be created in minutes, which are highly customizable and therefore perfect for PoCs to demonstrate the art of the possible .

    Before I jump into sharing the code, this is how the end result looked (running locally on my Mac, will also work on Windows too) – using an agent that I developed to help understand UK immigration policy πŸ“„. Here I am asking about the rules for an entrepreneur.

    Installing Streamlit is a breeze using the single command below.

    pip install streamlit
    

    Once I’d done this, I put together the following Python script to create the web app, this can also be downloaded from GitHub.

    Disclaimer: I’m no developer and this code is a little hacky, but it gets the job done!

    The following variables need to be updated before running the script – further info can be found in the code comments:

    • st.title – Set’s the title of the page
    • st.sidebar.image – Configures the image to use in the sidebar
    • config – Set’s the OCI SDK profile to use, further info on this can be found here – https://docs.oracle.com/en-us/iaas/Content/API/Concepts/sdkconfig.htm
    • service_ep – Defines the Generative AI Agent service endpoint to connect to (this varies by region)
    • agent_ep_id – Sets the OCID of the agent to connect to
    import streamlit as st
    import time
    import oci
    
    # Page Title
    st.title("OCI Generative AI Agents Demo 🧠") # Update this with your own title
    
    # Sidebar Image
    st.sidebar.image("https://brendg.co.uk/wp-content/uploads/2021/05/myavatar.png") # Update this with your own image
    
    # OCI GenAI settings
    config = oci.config.from_file(profile_name="DEFAULT") # Update this with your own profile name
    service_ep = "https://agent-runtime.generativeai.us-chicago-1.oci.oraclecloud.com" # Update this with the appropriate endpoint for your region, a list of valid endpoints can be found here - https://docs.oracle.com/en-us/iaas/api/#/en/generative-ai-agents-client/20240531/
    agent_ep_id = "ocid1.genaiagentendpoint.oc1.us-chicago-1.amaaaaaaayvpzvaa7z2imflumr7bbxeguh6y7bpnw2yie4lca2usxrct" # Update this with your own agent endpoint OCID, this can be found within Generative AI Agents > Agents > (Your Agent) > Endpoints > (Your Endpoint) > OCID
    
    # Response Generator
    def response_generator(textinput):
        # Initialize service client with default config file
        generative_ai_agent_runtime_client = oci.generative_ai_agent_runtime.GenerativeAiAgentRuntimeClient(config,service_endpoint=service_ep)
    
        # Create Session
        create_session_response = generative_ai_agent_runtime_client.create_session(
            create_session_details=oci.generative_ai_agent_runtime.models.CreateSessionDetails(
                display_name="USER_Session",
                description="User Session"),
            agent_endpoint_id=agent_ep_id)
    
        sess_id = create_session_response.data.id
    
        response = generative_ai_agent_runtime_client.chat(
            agent_endpoint_id=agent_ep_id,
            chat_details=oci.generative_ai_agent_runtime.models.ChatDetails(
                user_message=textinput,
                session_id=sess_id))
    
        #print(str(response.data))
        response = response.data.message.content.text
        return response
    
    # Initialize chat history
    if "messages" not in st.session_state:
        st.session_state.messages = []
    
    # Display chat messages from history on app rerun
    for message in st.session_state.messages:
        with st.chat_message(message["role"]):
            st.markdown(message["content"])
    
    # Accept user input
    if prompt := st.chat_input("How can I help?"):
        # Add user message to chat history
        st.session_state.messages.append({"role": "user", "content": prompt})
        # Display user message in chat message container
        with st.chat_message("user"):
            st.markdown(prompt)
    
        # Display assistant response in chat message container
        with st.chat_message("assistant"):
            response = response_generator(prompt)
            write_response = st.write(response)
        # Add assistant response to chat history
        st.session_state.messages.append({"role": "assistant", "content": response})
    

    Once this file has been saved, it’s simple to run with a single command:

    streamlit run OCI-GenAI-Agents-Streamlit.py
    

    It will then automatically launch a browser and show the web app in action πŸ–₯️

    This basic example can easily be updated to meet your requirements, the Streamlit documentation is very comprehensive and easy to follow with some useful examples – https://docs.streamlit.io/.