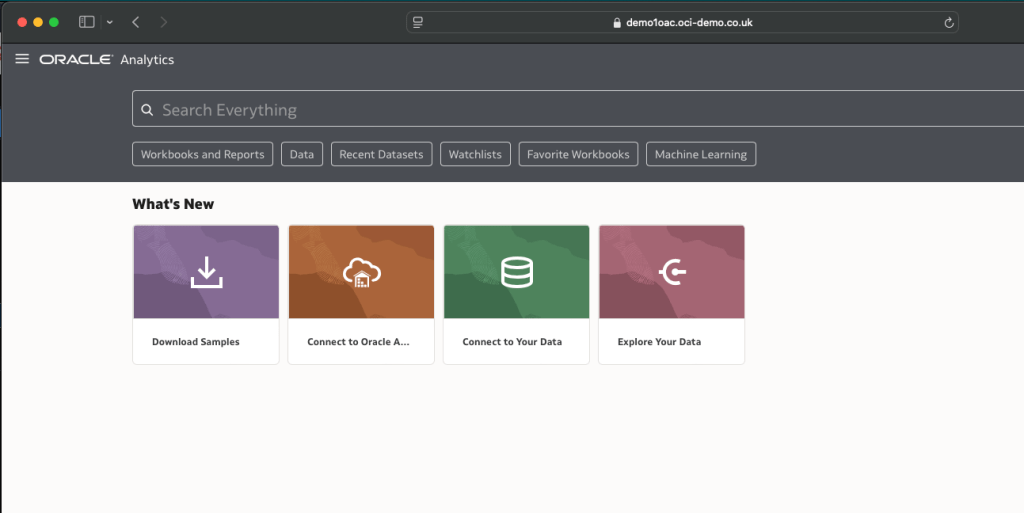
I needed an SSL certificate recently as wanted to make an instance of Oracle Analytics Cloud available publicly with a nice vanity URL, rather than https://demo1analyticscloud-lrmvtbrwx-ld.analytics.ocp.oraclecloud.com, something a little more memorable, such as https://oac.oci-demo.co.uk.
To do this I needed an SSL certificate and decided to use Let’s Encrypt as they provide free SSL certificates (with a validity period of 90 days).
It was relatively straightforward to create a certificate using the Certbot client for macOS, to do this I did the following:
Step 1 – Installed Certbot using the following command
brew install certbot
Step 2 – Created a directory to store the generated certificates
mkdir certs
cd certs
Step 3 – Create the certificate request using Certbot
This uses the DNS challenge type, which is ideal when you need to create a certificate for use on a system that doesn’t provide native integration with Certbot (such as Oracle Analytics Cloud). Replace “e-mail address” with a valid address to use for renewal reminders.
cd certs
certbot certonly --manual --preferred-challenges=dns --config-dir config --work-dir workdir --logs-dir logs --agree-tos -m e-mail address --key-type rsa
When this command has been run, it will ask for the hostname to create the SSL certificate for. In my case I requested a certificate for demo1oac.oci-demo.co.uk.

After hitting enter, it then provides a DNS record that needs to be created to validate domain ownership.
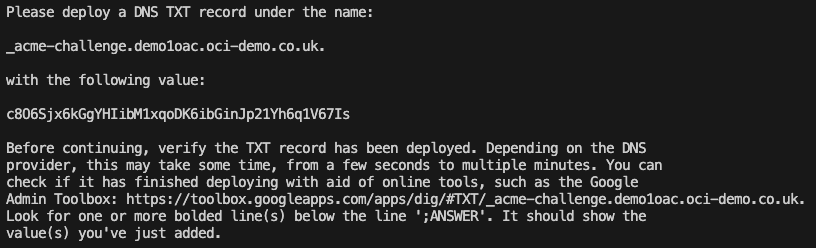
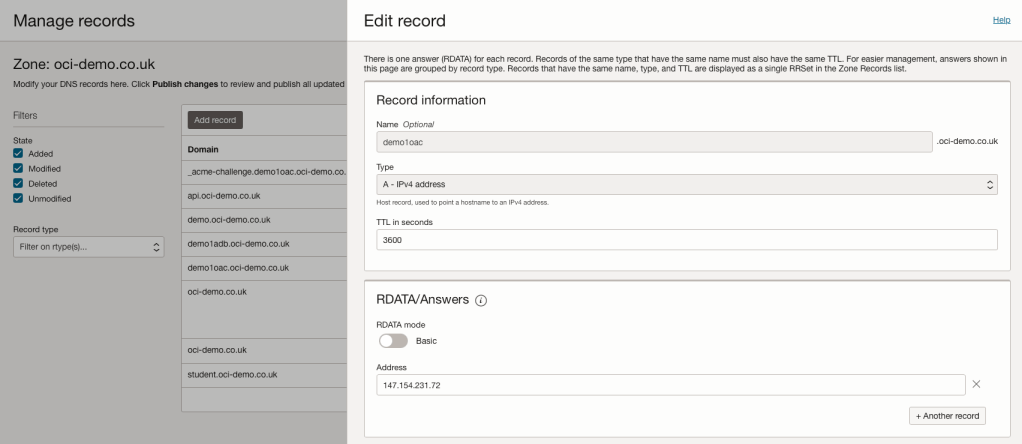
I host my DNS within OCI, so this was as simple as creating a DNS TXT record using the OCI Console (the process will vary depending on your DNS provider).

I then used the link within the instructions to validate the presence of the DNS TXT records that I had just created.
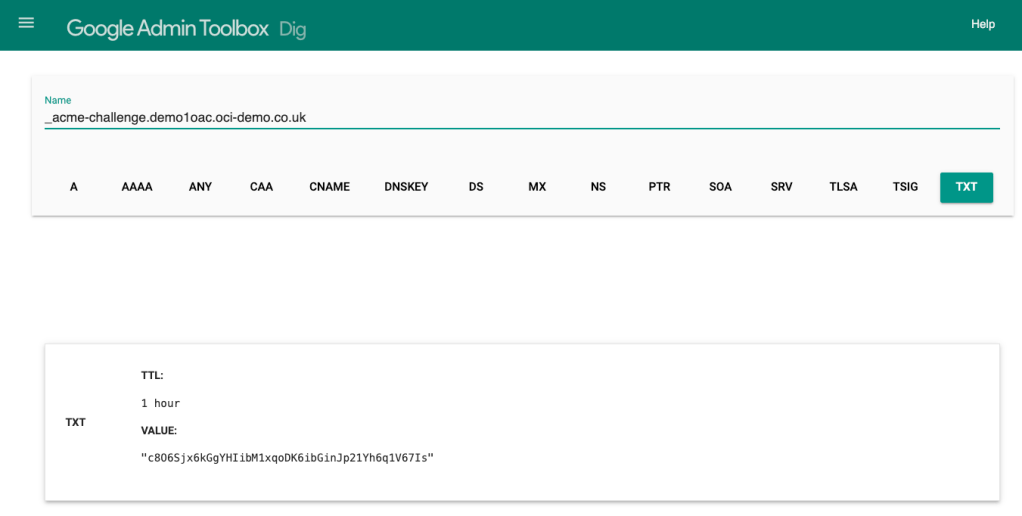
Once I’d verified that the DNS record was available publicly, I hit enter and the SSL certificates were created for me!

Step 4 – Configure OAC to use a custom hostname with SSL (example)
I then navigated to Oracle Analytics Cloud within the OCI Console and within Vanity URL selected Create.
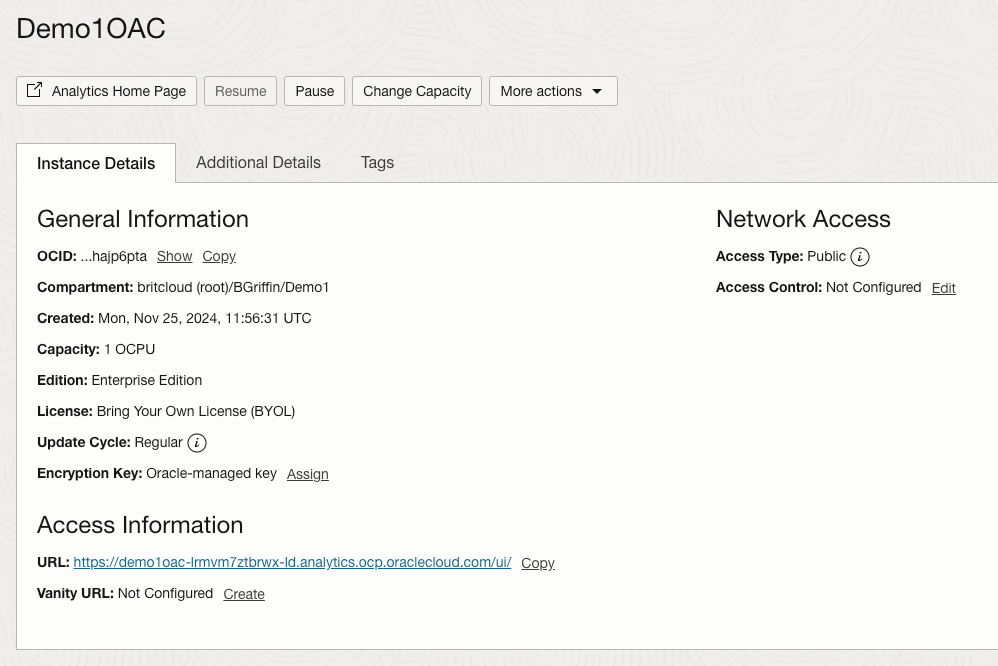
I entered the hostname for the vanity URL – demo1oac.oci-demo.co.uk. I then uploaded the certificates that had just been generated.
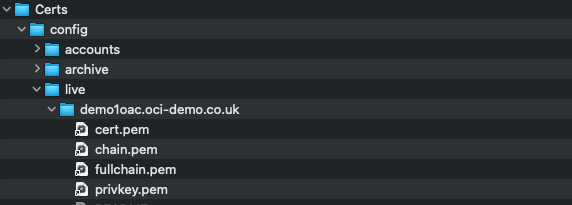
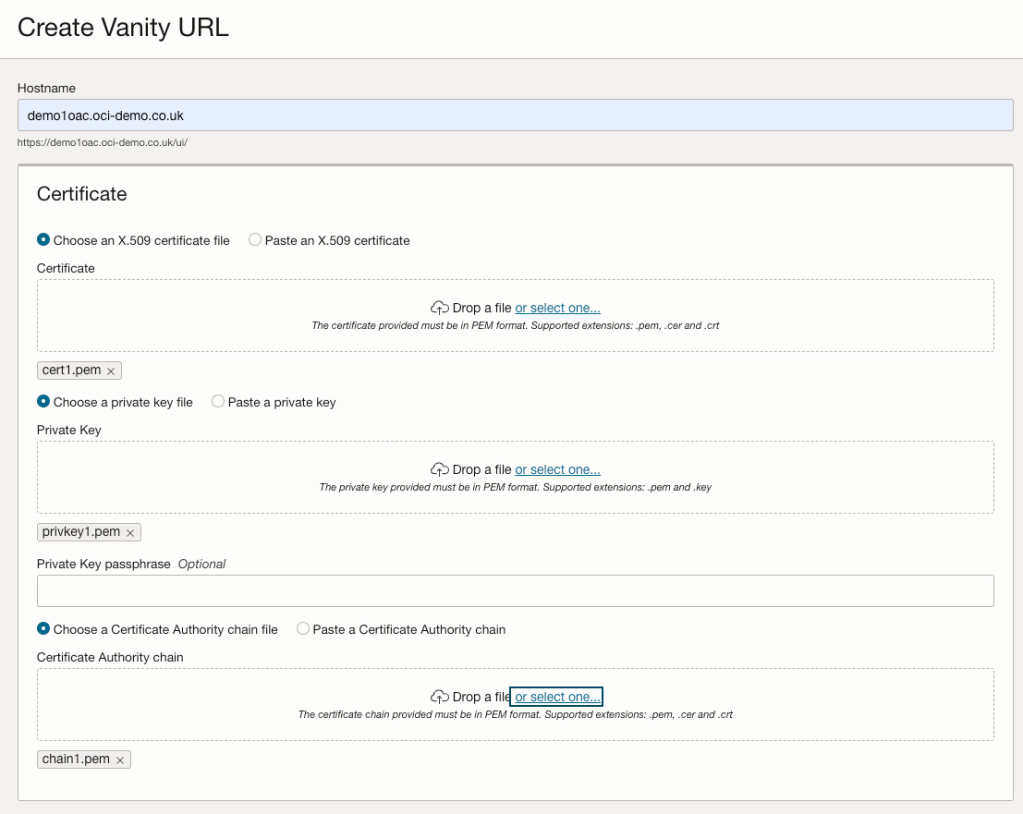
The mapping between certificate types and the .pem files created is as follows:
- Certificate = cert1.pem
- Private Key = privkey1.pem
- Certificate Authority chain file = chain1.pem
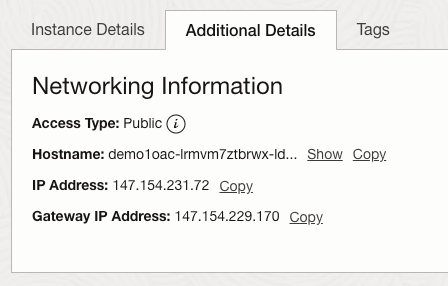
I then hit Create to apply the configuration. A final step was for me to create a DNS entry to point demo1oac.oci-demo.co.uk to the public IP address of the OAC instance.
I then waited a few minutes for the DNS record to come to life and then browsed to https://demo1oac.oci-demo.co.uk and it worked!