Next up in random things Brendan has done……installing a desktop environment (Gnome) on a Linux instance (Ubuntu) hosted in OCI and making this available via Remote Desktop Protocol (RDP) with xrdp – it sounds quite complicated but there isn’t that much to getting it up and running ✅.
Basically, I wanted a VM that I can RDP to from anywhere….and any computer, importantly! To do basic coding (is in my coding is all basic 😀) using Visual Studio Code and Python.
To keep the costs down (I’m a tight Yorkshireman after all) I’m using an Always Free Ampere A1 VM instance running in OCI – so this will not cost me a penny to run 🙌.
To learn more about the OCI Always Free resources, check this article out.
To get started, I created a Linux instance using Ubuntu 24.04:
I placed this into a Public Subnet within a Virtual Cloud Network, to learn more about how to do this, check this guide out – the reason for placing the VM into a Public Subnet is so that it gets a public IP address and I can connect to this directly over the Internet, without requiring that a VPN or FastConnect be in-place.
Once the VM had been provisioned, I SSH’d onto the VM instance (if you are not sure how to do this, check this guide out) and then ran the following commands in order:
Update and Upgrade Installed Packages
sudo apt update && sudo apt upgrade -y
Install Ubuntu Desktop
sudo apt install ubuntu-desktop -y
Install xrdp
sudo apt install xrdp -y
Ensure that Gnome runs (the Ubuntu Desktop Environment) when logging in via RDP
echo "gnome-session" > ~/.xsession
Restart xrdp
sudo systemctl restart xrdp
Permit inbound traffic on TCP port 3389 (the port used by RDP)
sudo iptables -I INPUT 4 -m state --state NEW -p tcp --dport 3389 -j ACCEPT
sudo netfilter-persistent save
Set a password for the user “ubuntu” by default OCI configures the VM instance to authenticate the ubuntu user using SSH keys, for RDP you’ll need to use a password – you may prefer to use a separate non-root account for this.
sudo passwd ubuntu
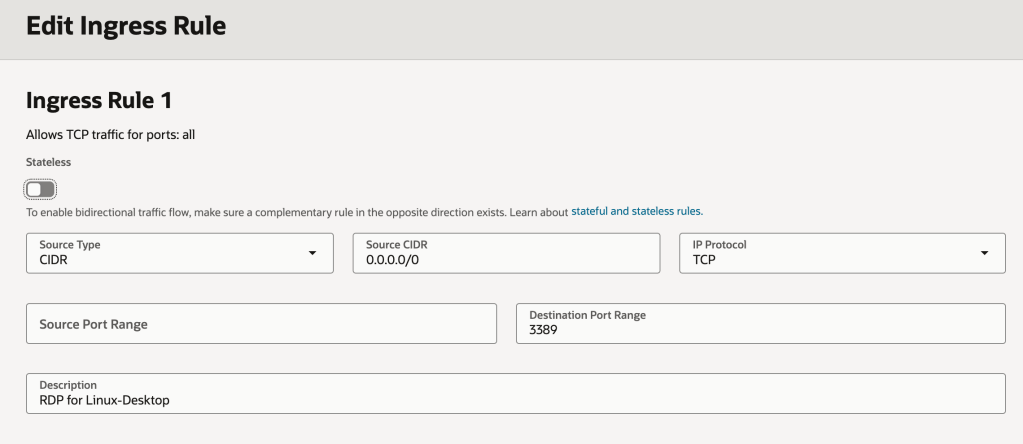
Once those commands have been run, the final thing you’ll need to do is ensure that any Security Lists OR Network Security Groups (NSGs) that the VM instance is associated with permit inbound access to port 3389 – the port used by RDP.
More info on this (including how to do this) can be found here.
Here is how my Security List looks (there isn’t an NSG associated with my VM instance).
WARNING: This gives any machine on the Internet (source CIDR 0.0.0.0/0) access to this VM instance…..and any other resources in the subnet via RDP – port 3389! You’d likely want to restrict this to specific IP addresses or IP address ranges e.g. the public IP address you break out from your house/office to prevent any randomer on the Internet getting access.
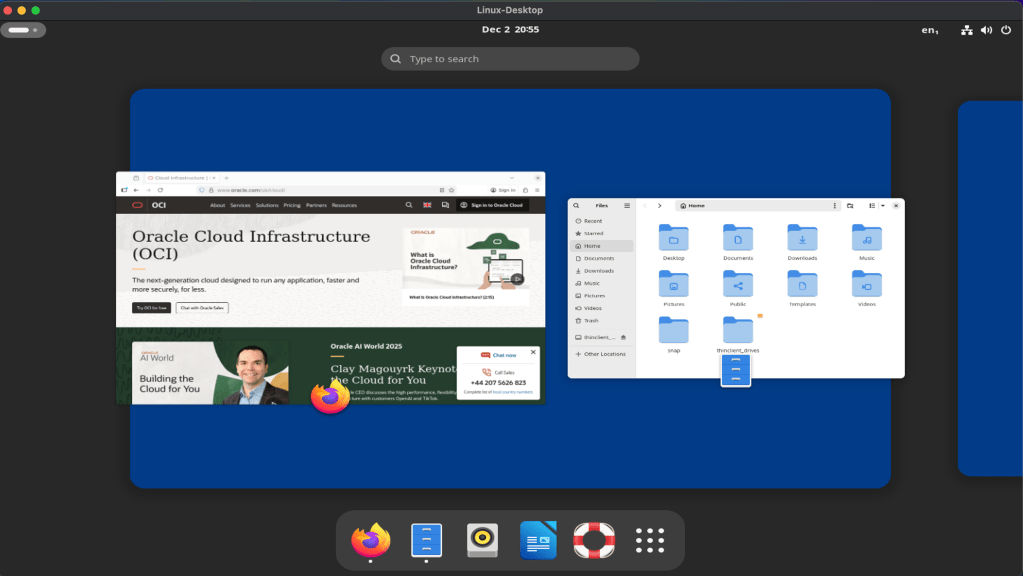
Once the Security List had been updated. I fired up the Microsoft RDP client (other RDP clients are available!) and configured it to connect to the public IP address of the VM instance and Voilà – I now have access to the desktop on my Ubuntu VM instance from anywhere.
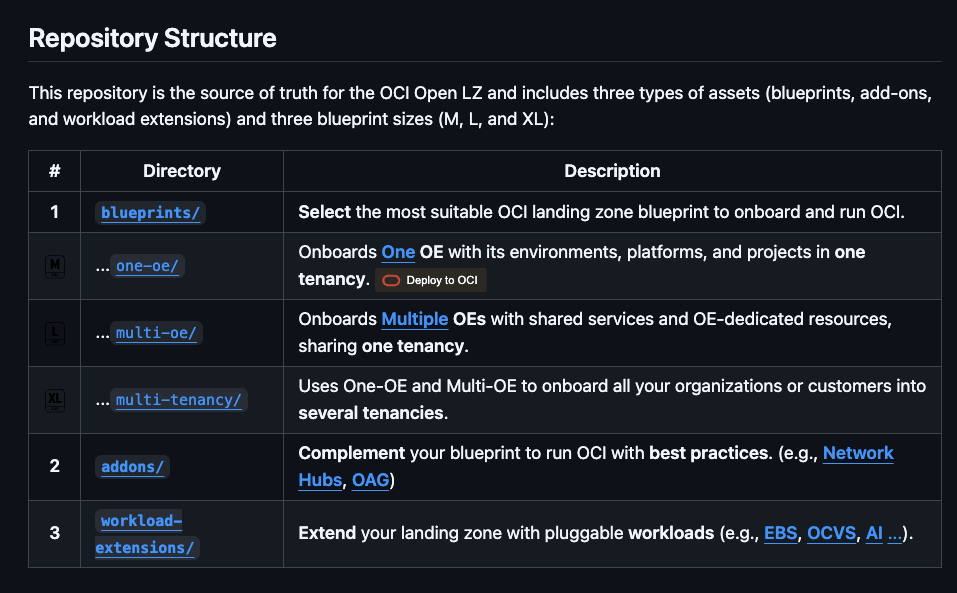
OCI has a number of Terraform based Landing Zone blueprints available.
The One OE (Operating Entity) OCI LZ blueprint can be deployed to an OCI tenancy directly from GitHub using the “Deploy to OCI” button:
This then uses OCI Resource Manager to deploy the blueprint to a tenancy – which uses Terraform under the hood.
I wanted to deploy the One OE blueprint to one of my test tenancies, however I wanted to do this natively using Terraform from my local machine rather than using OCI Resource Manager, mainly due to the additional flexibility and ease of troubleshooting that this approach provides.
It took me a while to figure out exactly how to do this (with a lot of help from one of the OCI LZ Black Belts 🥋).
I’ve documented the process that I followed below, hopefully it saves somebody else some time ⌚️.
✅ Step 0 – Make sure you have Terraform and Git installed (I’m assuming that you already have these installed locally).
✅ Step 1 – Create a directory to store the blueprints and configuration
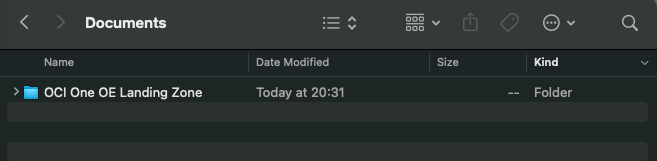
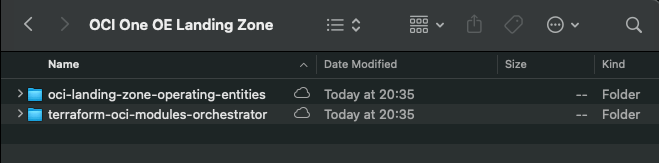
I created a folder aptly named “OCI One OE Landing Zone“
…then opened a terminal and ran the following commands from within this folder:
These commands download the OCI OE Landing Zone blueprints and the Landing Zone Orchestrator.
Once the downloads have completed, the folder should look something like this:
✅ Step 2 – Configure Authentication
Grab a copy of the file oci-credentials.tfvars.json.template, which is located within the folder OCI One OE Landing Zone/oci-landing-zone-operating-entities/commons/content.
Take a copy of this file, place it in the root of the OCI One OE Landing Zone folder that you just created and rename the file to oci-credentials.tfvars.json
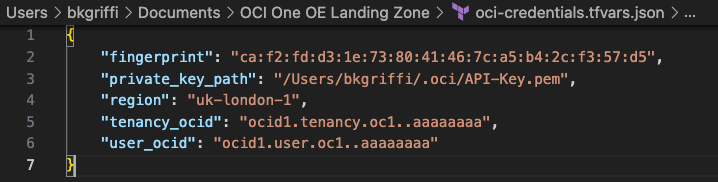
Open the oci-credentials.tfvars.json file and populate with your authentication information, if you don’t have this please follow the guide here to create an API Signing Key and obtain the other required information.
Here’s an example of what mine looks like:
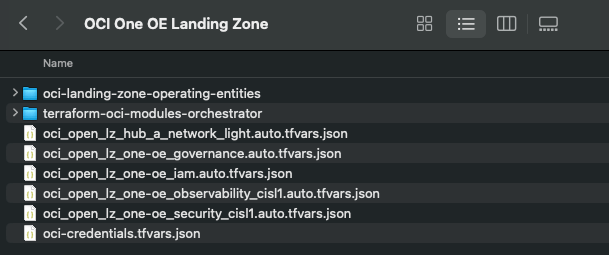
✅ Step 3 – Grab a copy of the required configuration files
In order to deploy the One OE Landing Zone, a number of configuration files are required, these can be found within the following folder:
‘OCI One OE Landing Zone/oci-landing-zone-operating-entities/blueprints/one-oe/runtime/one-stack’
Copy these files into the root of the OCI One OE Landing Zone folder – you can leave them in their original location, but by taking a copy this means that you can edit them (if needed) and easy return them to their “vanilla” state by re-copying across from their original location.
✅ Step 4 – Timeto deploy 🚀
Run the following command from within the OCI One OE Landing Zone/terraform-oci-modules-orchestrator folder to download the required Terraform Providers and Modules
terraform init
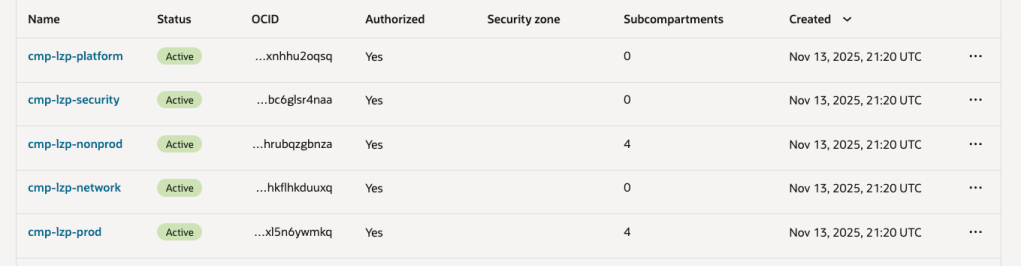
Once this has completed, run terraform plan (from the same folder), referencing the required configuration files:
This afternoon I was using the OCI Cloud Shell to build a container to be pushed to the OCI Container Registry which I was then going to create an OCI Container Instance from. This is something that I’ve done countless times without any issues, as I was short of time (I’m going on holiday tomorrow) as is typical, anything that could go wrong, did 😭.
When running the following command from the OCICloud Shell to build the container.
docker build --tag container-name .
It returned the following error (interesting bits in bold).
Error: committing container for step {Env:[PATH=/usr/local/bin:/usr/local/sbin:/usr/local/bin:/usr/sbin:/usr/bin:/sbin:/bin LANG=C.UTF-8 GPG_KEY=E3FF2839C048B25C084DEBE995E310250568 PYTHON_VERSION=3.9.21 PYTHON_SHA256=3126f59592c9b0d7955f2bf7b081fa1ca35ce7a6fea980108d752a05bb1] Command:run Args:[pip3 install -r requirements.txt] Flags:[] Attrs:map[] Message:RUN pip3 install -r requirements.txt Heredocs:[] Original:RUN pip3 install -r requirements.txt}: copying layers and metadata for container “4aa0c966251fa75dac10afc257b8c8d62aae50c45eb5dd1157d3c1cae0208413”: writing blob: adding layer with blob “sha256:5699f359aa00daa8a93b831b478fea1fe7c339396e532f13e859fb4ef92fd83f”: processing tar file(open /usr/local/lib/python3.9/site-packages/oci/addons/adk/__pycache__/agent_client.cpython-39.pyc: no space left on device): exit status 1
After much Googling (without much luck I may add!) I had a brainwave – the OCI Cloud Console only provides 5GB storage as per the documentation – perhaps I’d hit the storage limit 🤔:
It turned out that the majority of the storage consumed was by Docker / Podman (as a side note the Cloud Shell now uses Podman, however the Docker commands are aliased to it, so you can continue to use them).
So……it looked like I needed to do some housekeeping 🧹.
To identify the storage used by Docker / Podman, you can run the following command:
docker system df
Which returned the following:
To free up some space I ran the following command (which is a little brute force, I may add 🔨):
docker system prune -a
Using my YOLO approach, I selected y to continue which worked its magic and free’d up some space (please take heed of the warnings ⚠️).
I then had plenty of free space and could build the container successfully ✅
I can now enjoy my holiday, safe in the knowledge that I managed to fix this issue 🗺️.
I often use Streamlit to create quick customer demo’s and PoCs for OCI Generative AI Agents. One thing that is really useful is the ability to run a Streamlit app within a container instance rather than locally on my laptop – which is ideal when I need to quickly give others access to the apps that I have built.
Here is a quick guide as to how to take a Streamlit app and run this within an OCI Container Instance 📋.
Step 1 – Ensure Container Instances have access to the Gen AI Agent service and Container Registry ✅
To do this we will need to create a Dynamic Group within OCI IAM, with the following rule:
ALL {resource.type='computecontainerinstance'}
This rule will ensure that every Container Instance within the tenancy is added to the Dynamic Group, which in this example is named “ContainerInstances” – how original! In the real-world, you may want to be more specific and specify a single container instance or Compartment as a member of the Dynamic Group.
Now that the Dynamic Group has been created, we need to create a Policy that provides this group (e.g. all container instances within the tenancy) access to pull images from the OCI Container Registry and also grant it access to the OCI Generative AI Agents service, the reason for the latter is that we will use Resource Principal authentication to authenticate the container instance to the service, rather than the API Keys for a specific user account (which is safer as we won’t need to include any keys within the container image! 🔑).
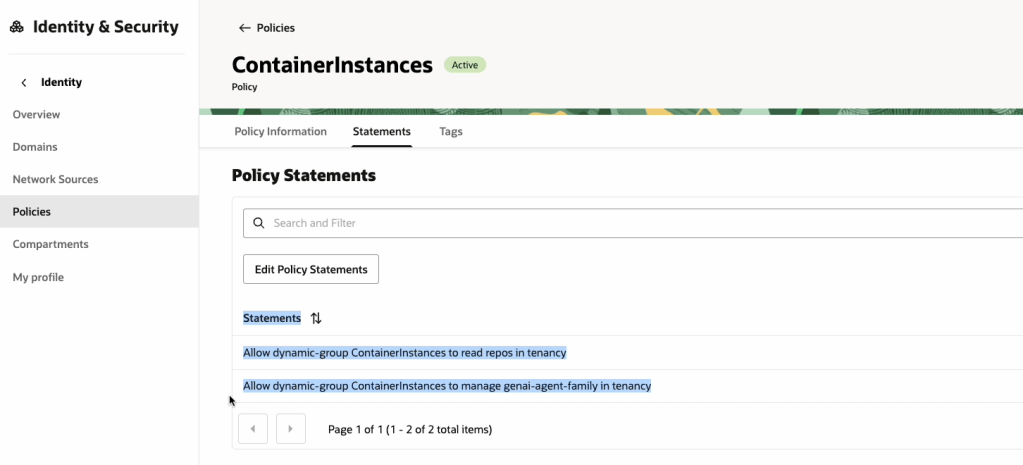
The policy should have the following two statements:
Allow dynamic-group ContainerInstances to read repos in tenancy
Allow dynamic-group ContainerInstances to manage genai-agent-family in tenancy
Now that we’ve got the Dynamic Group and Policy created, we can move on to Step 2!
Step 2 – Obtain an auth token and get the tenancy namespace ✅
An auth token is required to authenticate to the OCI Container Registry service, which is required when pushing the container image to the registry.
To create an Auth Token, do the following:
Make sure that you copy the Auth Token somewhere safe as you will not be able to re-retrieve it after creation ⛔️.
We now need to get the tenancy namespace, which is required to authenticate to the Container Registry, this can be obtained as follows:
Now onto Step 3 👇
Step 3 – Create a Container Image of the Streamlit App ✅
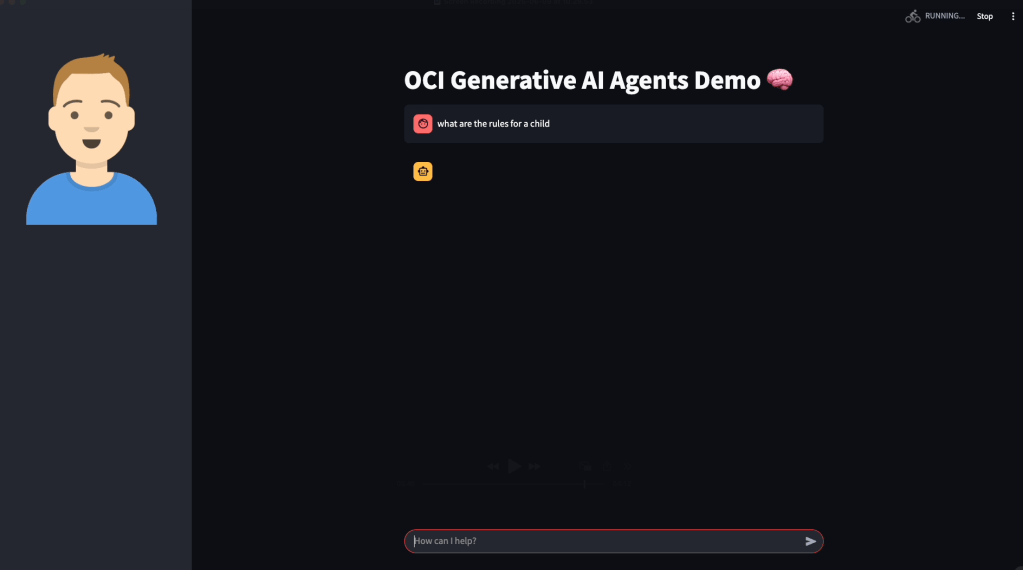
The code that I will use for the Streamlit App can be found on GitHub, this is a basic app that connects to an OCI Generative AI Agent and allows a user to ask the agent questions:
Once you have this, two additional files are required to create the container image:
requirements.txt, which should contain the following and includes the Python packages required to run the Streamlit app:
streamlit
oci
…and Dockerfile (no file extension required!), which is used to create the container image. This will launch the Streamlit app listening on port 80. Ensure that you update the name of the Python script (in this case OCI-GenAI-Agent-Streamlit.py) to reflect the name of the script you need to run.
Place the requirement.txt, Dockerfile and Python script into a single directory:
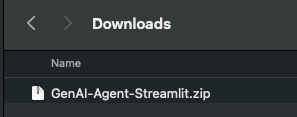
…and then zip this up.
Now login to the OCI Console, launch Cloud Shell, upload the zip file and uncompress (this is a quick way to transfer the files).
We can now create the container image and upload this to the container registry, to do this run the following commands – make sure you run these from the directory that has been un-zipped, which contains the Streamlit app.
You may also need to update lhr.ocir.io to the correct endpoint for the container registry in your tenancies region, a full list of endpoints can be found here.
It will then prompt for your password, for this you will need to enter the Auth Token 🎫 obtained in Step 2 (you did save this, right?)
Here’s a short run-through of this:
Next step is to build the container image and upload this to the container registry, you will need to run the following commands to do this.
Make sure that you update the endpoint (lhr.ocir.io) if needed and namespace (lrdkvqz1i7e6). This command will build the container image and tag it with the name streamlit:latest – this command needs to be run from the un-zipped directory that contains the Streamlit app files.
Once it has built, it can be pushed to the OCI Container Registry using the following command:
Step 4 – Create a container instance from the container image ✅
We are nearly there 🏁, the final step is to create a container instance from the container image that we have just pushed to the container registry.
To do this, you’ll need a Virtual Cloud Network (VCN) that has a public subnet (so that we can make the instance available over the Internet 🌍), if you don’t have one, you can use the VCN Wizard to quickly do this, as documented here.
Make sure you have a Security List 📋 entry that permits access to the public subnet within the VCN on port 80 – in my case from any public IP address, but you may want to restrict this to specific public IP addresses.
Once you have confirmed that you have a VCN in place, we can go through the process of creating the container instance using the container image that we just created.
I’ve used the default settings for creating a container instance, in the real-world, you’d need to select an appropriate compute shape (CPU/memory).
Grab the public IP address assigned to the container instance and open this in your browser of choice, the Streamlit app should open (all being well!).
You may want to create a DNS entry and point this towards the public IP, to make it easier to access.
Also in my final disclaimer, for anything but quick and dirty demo’s you should run this over SSL with authentication too! An OCI Load Balancer can be used to do SSL termination and Streamlit provide a useful guide on performing authentication, which can be found here.
The OCI CLI includes a raw-request option, as the name suggests this is a useful way to send manual requests to OCI services instad of using the native CLI commands 💻.
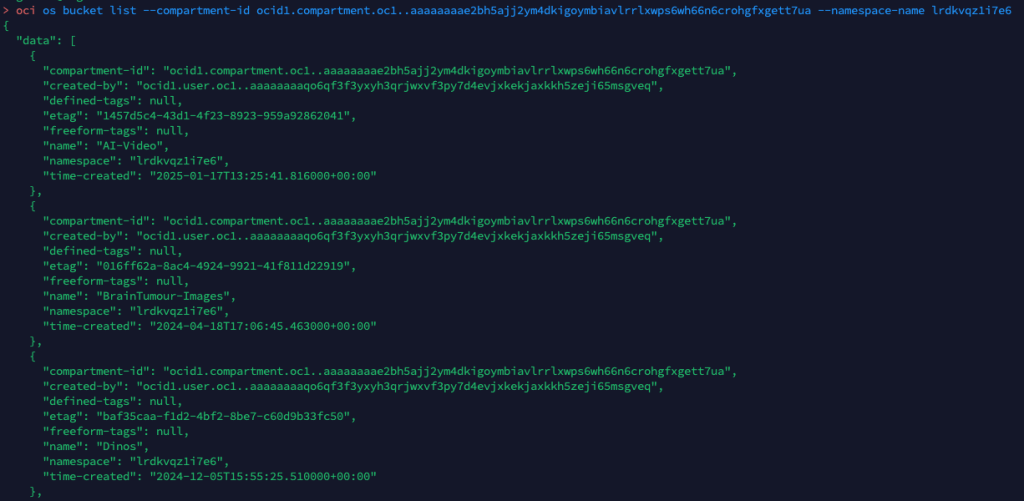
For example to list the buckets within a specific compartment I can run the following OCI CLI command 🪣:
oci os bucket list --compartment-id (OCID) --namespace-name (NameSpace)
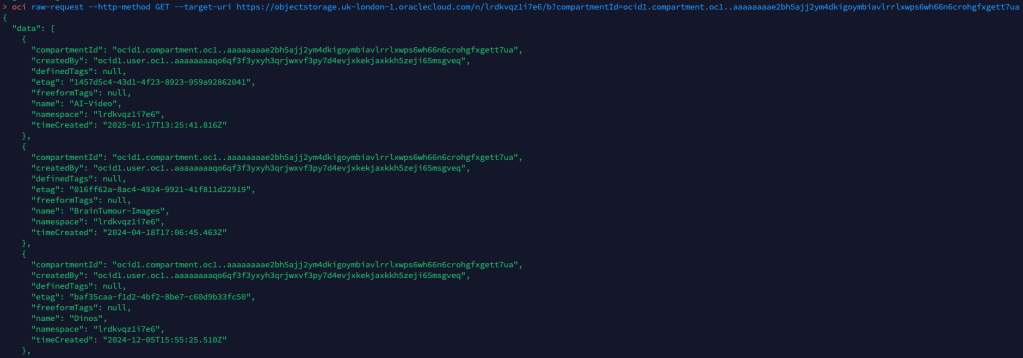
Or alternatively I could run the following using the OCI CLI raw-request command.
oci raw-request --http-method GET --target-uri https://objectstorage.uk-london-1.oraclecloud.com/n/lrdkvqz1i7e6/b?compartmentId=ocid1.compartment.oc1..aaaaaaaa5yxo6ynmcebpvqgcapt3vpmk72kdnl33iomjt3bk2bcraqprp6fq
This is a fairly simple read request against object storage, to help me understand how to formulate the URL (target-uri) I added –debug to the initial oci os bucket list CLI command that I ran. This provides a wealth of information on what happens “under the hood” when running a CLI command and helped me to understand the –target-uri I needed to use for the raw-request command.
For more complex scenarios, such as creating resources or using a service e.g. analysing an image with AI Vision, you can add –generate-param-json-input to a CLI command and it will generate a JSON file which can be populated with the desired parameters that you can then pass to raw-request using the –request-body parameter.
In terms of real-world usage, the only real use-case for this is with new services that you need to interact with, where there isn’t a CLI command available, with that being said this would mean that you couldn’t use the –debug parameter to help understand how to send the request using raw-request, so you’d need to rely on documentation and/or trial and error – probably the latter!
The time finally came for me to get hands on with Kubernetes on OCI (or OKE as it’s affectionately know).
Spinning up a Kubernetes cluster was an absolute breeze, however when I started to work through the Quick Start….or not so Quick Start for me – I stumbled up an error when attempting to deploy the sample app to my cluster.
When I ran the command in Step 3 I received the following error:
error: error validating “https://k8s.io/examples/application/deployment.yaml”: error validating data: failed to download openapi: the server has asked for the client to provide credentials; if you choose to ignore these errors, turn validation off with –validate=false
Looked like some form of authentication issue, after much head scratching and experimentation I figured out what the problem was (it took me far too long ⏱️).
I have multiple profiles specified within my OCI CLI configuration file, example below (with the juicy bits removed!):
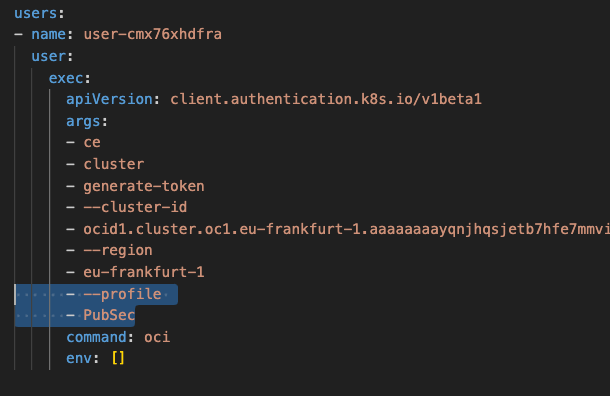
The OKE cluster I needed to connect to is within the tenancy I have named PubSec, if I take a look at the Kubernetes config file (located in “.kube” within my user profile), I could see that this uses the OCI CLI to connect to the cluster – however as it doesn’t specify a profile within the OCI CLI config this will use the DEFAULT profile, in my specific case I needed to override this to uses the PubSec profile.
I resolved this by adding the highlighted lines (below) to the Kubernetes config file within “.kube”. This tells the OCI CLI to connect to the cluster using the PubSec profile rather than DEFAULT.
Once I’d updated this, saved and re-sarted the terminal, I ran the command again and it worked like magic 🪄