Tag: cloud

  • Deploying an OCI Landing Zone using Terraform πŸ›©οΈ

    OCI has a number of Terraform based Landing Zone blueprints available.

    The One OE (Operating Entity) OCI LZ blueprint can be deployed to an OCI tenancy directly from GitHub using the “Deploy to OCI” button:

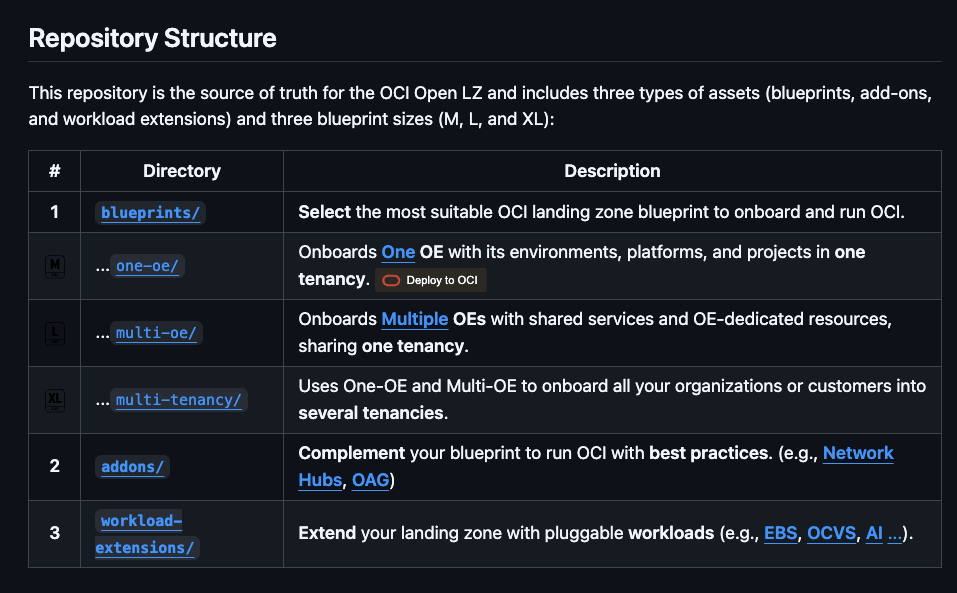
    This then uses OCI Resource Manager to deploy the blueprint to a tenancy – which uses Terraform under the hood.

    I wanted to deploy the One OE blueprint to one of my test tenancies, however I wanted to do this natively using Terraform from my local machine rather than using OCI Resource Manager, mainly due to the additional flexibility and ease of troubleshooting that this approach provides.

    It took me a while to figure out exactly how to do this (with a lot of help from one of the OCI LZ Black Belts πŸ₯‹).

    I’ve documented the process that I followed below, hopefully it saves somebody else some time ⌚️.

    βœ… Step 0Make sure you have Terraform and Git installed (I’m assuming that you already have these installed locally).
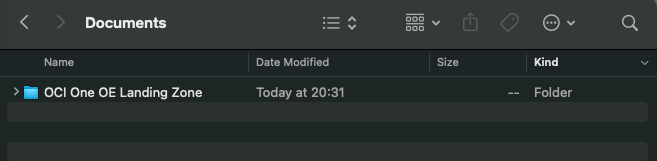
    βœ… Step 1 – Create a directory to store the blueprints and configuration

    I created a folder aptly named “OCI One OE Landing Zone

    …then opened a terminal and ran the following commands from within this folder:

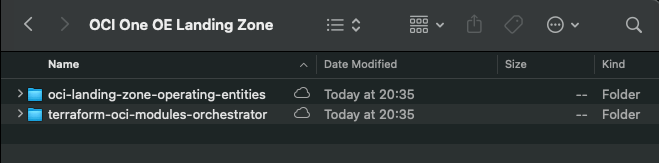
    git clone https://github.com/oci-landing-zones/oci-landing-zone-operating-entities.git
    git clone https://github.com/oci-landing-zones/terraform-oci-modules-orchestrator.git

    These commands download the OCI OE Landing Zone blueprints and the Landing Zone Orchestrator.

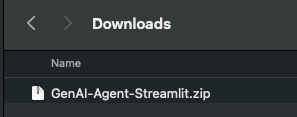
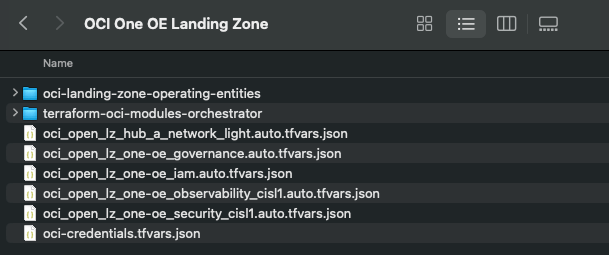
    Once the downloads have completed, the folder should look something like this:

    βœ… Step 2 – Configure Authentication

    Grab a copy of the file oci-credentials.tfvars.json.template, which is located within the folder OCI One OE Landing Zone/oci-landing-zone-operating-entities/commons/content.

    Take a copy of this file, place it in the root of the OCI One OE Landing Zone folder that you just created and rename the file to oci-credentials.tfvars.json

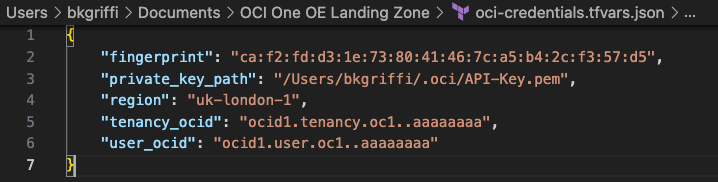
    Open the oci-credentials.tfvars.json file and populate with your authentication information, if you don’t have this please follow the guide here to create an API Signing Key and obtain the other required information.

    Here’s an example of what mine looks like:

    βœ… Step 3 – Grab a copy of the required configuration files

    In order to deploy the One OE Landing Zone, a number of configuration files are required, these can be found within the following folder:

    ‘OCI One OE Landing Zone/oci-landing-zone-operating-entities/blueprints/one-oe/runtime/one-stack’

    • oci_open_lz_one-oe_governance.auto.tfvars.json
    • oci_open_lz_one-oe_iam.auto.tfvars.json
    • oci_open_lz_one-oe_security_cisl1.auto.tfvars.json
    • oci_open_lz_hub_a_network_light.auto.tfvars.js
    • oci_open_lz_one-oe_observability_cisl1.auto.tfvars.json

    Copy these files into the root of the OCI One OE Landing Zone folder – you can leave them in their original location, but by taking a copy this means that you can edit them (if needed) and easy return them to their “vanilla” state by re-copying across from their original location.

    βœ… Step 4 – Time to deploy πŸš€

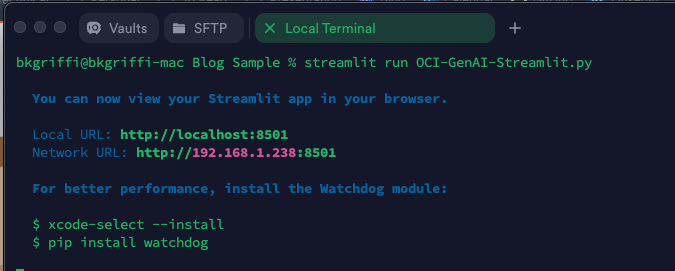
    Run the following command from within the OCI One OE Landing Zone/terraform-oci-modules-orchestrator folder to download the required Terraform Providers and Modules

    terraform init

    Once this has completed, run terraform plan (from the same folder), referencing the required configuration files:

    terraform plan \
    -var-file ../oci-credentials.tfvars.json \
    -var-file ../oci_open_lz_one-oe_governance.auto.tfvars.json \
    -var-file ../oci_open_lz_one-oe_iam.auto.tfvars.json \
    -var-file ../oci_open_lz_hub_a_network_light.auto.tfvars.json \
    -var-file ../oci_open_lz_one-oe_security_cisl1.auto.tfvars.json \
    -var-file ../oci_open_lz_one-oe_observability_cisl1.auto.tfvars.json 

    ….if all goes well, you can run terraform apply (from the same folder) using the exact same configuration files.

    terraform apply \
    -var-file ../oci-credentials.tfvars.json \
    -var-file ../oci_open_lz_one-oe_governance.auto.tfvars.json \
    -var-file ../oci_open_lz_one-oe_iam.auto.tfvars.json \
    -var-file ../oci_open_lz_hub_a_network_light.auto.tfvars.json \
    -var-file ../oci_open_lz_one-oe_security_cisl1.auto.tfvars.json \
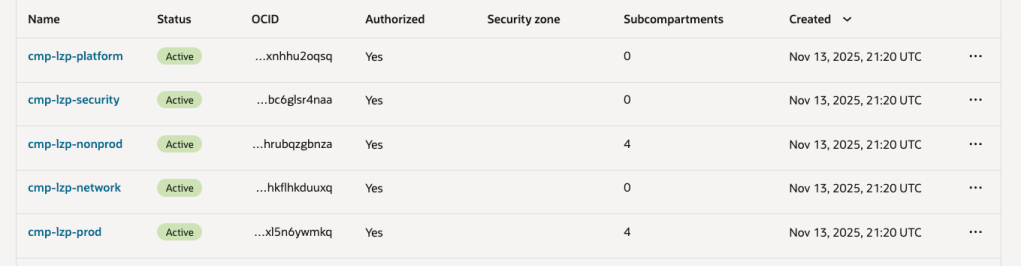
    -var-file ../oci_open_lz_one-oe_observability_cisl1.auto.tfvars.json 

    Within a few minutes, you should (hopefully!) have a beautiful OCI Landing Zone deployed within your tenancy.

  • Why isn’t DHCP working on the secondary VNIC of an OCI VM instance? βŒ

    Every day is a school day – especially with OCI!

    I was recently playing around in my lab and needed to add a secondary VNIC to one of my VMs for some testing that I was doing.

    I quickly set about adding a secondary VNIC and used the default option of assigning an IP address automatically using DHCP rather than specifying a static IP address (I’m lazy, I know!).

    I gave the server a reboot, logged in and to my surprise the shiny new secondary VNIC had acquired a nasty APIPA address (169.x.x.x) rather than the dynamic IP address that OCI had assigned (10.0.1.69) ❌:

    What is an APIPA address you may ask:

    “An APIPA (Automatic Private IP Addressing) IP address isΒ a self-assigned address in the 169.254.x.x range that a device uses when it cannot get an IP address from a DHCP server.Β This feature allows devices on a local network to communicate with each other even when the DHCP server is down, providing basic connectivity”

    I deleted and re-added the VNIC, rebooted the server more times that I care to admit – but still nothing, I couldn’t get rid of this pesky APIPA IP address and get the “real” IP address that OCI had assigned (10.0.1.69).

    After realising I’d sunk far too much time on this, I reached out to a colleague who is a networking whizz in OCI who informed me that OCI will only use DHCP for the primary VNIC on VM instances – for any secondary VNICs that you add to a VM instance, these must be configured with a static IP address (why oh why didn’t I ask them sooner 😫).

    This is quite confusing as the OCI console allows you to add a secondary VNIC and specify DHCP – it just doesn’t work πŸ€¦β€β™‚οΈ.

    It will even display the “dynamic” IP address that has been assigned to the instance in the console – it just won’t be picked up by the underling OS on the VM instance as DHCP doesn’t work:

    Moral of the story, when adding a secondary VNIC (or tertiary for that matter) use static IP addressing βœ….

    Note that whilst this affected a Windows Server in my case, this also applies to Linux too.

    Hopefully my pain, will help somebody else in the future!

  • Publishing a Streamlit App as a Container Instance in OCI β›΄οΈ

    I previously wrote about how to create a basic front-end for an OCI Generative AI Agent using Streamlit (which can be found here) 🎨.

    I often use Streamlit to create quick customer demo’s and PoCs for OCI Generative AI Agents. One thing that is really useful is the ability to run a Streamlit app within a container instance rather than locally on my laptop – which is ideal when I need to quickly give others access to the apps that I have built.

    Here is a quick guide as to how to take a Streamlit app and run this within an OCI Container Instance πŸ“‹.

    Step 1Ensure Container Instances have access to the Gen AI Agent service and Container Registry βœ…

    To do this we will need to create a Dynamic Group within OCI IAM, with the following rule:

    ALL {resource.type='computecontainerinstance'}

    This rule will ensure that every Container Instance within the tenancy is added to the Dynamic Group, which in this example is named “ContainerInstances” – how original! In the real-world, you may want to be more specific and specify a single container instance or Compartment as a member of the Dynamic Group.

    Now that the Dynamic Group has been created, we need to create a Policy that provides this group (e.g. all container instances within the tenancy) access to pull images from the OCI Container Registry and also grant it access to the OCI Generative AI Agents service, the reason for the latter is that we will use Resource Principal authentication to authenticate the container instance to the service, rather than the API Keys for a specific user account (which is safer as we won’t need to include any keys within the container image! πŸ”‘).

    The policy should have the following two statements:

    Allow dynamic-group ContainerInstances to read repos in tenancy
    Allow dynamic-group ContainerInstances to manage genai-agent-family in tenancy

    Now that we’ve got the Dynamic Group and Policy created, we can move on to Step 2!

    Step 2 – Obtain an auth token and get the tenancy namespace βœ…

    An auth token is required to authenticate to the OCI Container Registry service, which is required when pushing the container image to the registry.

    To create an Auth Token, do the following:

    Make sure that you copy the Auth Token somewhere safe as you will not be able to re-retrieve it after creation ⛔️.

    We now need to get the tenancy namespace, which is required to authenticate to the Container Registry, this can be obtained as follows:

    Now onto Step 3 πŸ‘‡

    Step 3 – Create a Container Image of the Streamlit App βœ…

    The code that I will use for the Streamlit App can be found on GitHub, this is a basic app that connects to an OCI Generative AI Agent and allows a user to ask the agent questions:

    Once you have this, two additional files are required to create the container image:

    requirements.txt, which should contain the following and includes the Python packages required to run the Streamlit app:

    streamlit
    oci

    …and Dockerfile (no file extension required!), which is used to create the container image. This will launch the Streamlit app listening on port 80. Ensure that you update the name of the Python script (in this case OCI-GenAI-Agent-Streamlit.py) to reflect the name of the script you need to run.

    FROM python:3
    WORKDIR /app
    COPY . /app
    RUN pip install --no-cache-dir -r requirements.txt
    EXPOSE 80
    ENTRYPOINT ["streamlit", "run", "OCI-GenAI-Agent-Streamlit.py", "--server.port=80", "--server.address=0.0.0.0"]

    Place the requirement.txt, Dockerfile and Python script into a single directory:

    …and then zip this up.

    Now login to the OCI Console, launch Cloud Shell, upload the zip file and uncompress (this is a quick way to transfer the files).

    We can now create the container image and upload this to the container registry, to do this run the following commands – make sure you run these from the directory that has been un-zipped, which contains the Streamlit app.

    docker login lhr.ocir.io --username namespace/username 

    The namespace was obtained in Step 2, the username is your username (what else could it be πŸ˜‚), for example within my case, this is:

    docker login lhr.ocir.io --username lrdkvqz1i7e6/brendankgriffin@hotmail.com 

    You may also need to update lhr.ocir.io to the correct endpoint for the container registry in your tenancies region, a full list of endpoints can be found here.

    It will then prompt for your password, for this you will need to enter the Auth Token 🎫 obtained in Step 2 (you did save this, right?)

    Here’s a short run-through of this:

    Next step is to build the container image and upload this to the container registry, you will need to run the following commands to do this.

    docker build --tag lhr.ocir.io/lrdkvqz1i7e6/streamlit:latest .

    Make sure that you update the endpoint (lhr.ocir.io) if needed and namespace (lrdkvqz1i7e6). This command will build the container image and tag it with the name streamlit:latest – this command needs to be run from the un-zipped directory that contains the Streamlit app files.

    Once it has built, it can be pushed to the OCI Container Registry using the following command:

    docker push lhr.ocir.io/lrdkvqz1i7e6/streamlit:latest

    Update the namespace and endpoint appropriately.

    Here’s a short walkthrough of this:

    Step 4 – Create a container instance from the container image βœ…

    We are nearly there 🏁, the final step is to create a container instance from the container image that we have just pushed to the container registry.

    To do this, you’ll need a Virtual Cloud Network (VCN) that has a public subnet (so that we can make the instance available over the Internet 🌍), if you don’t have one, you can use the VCN Wizard to quickly do this, as documented here.

    Make sure you have a Security List πŸ“‹ entry that permits access to the public subnet within the VCN on port 80 – in my case from any public IP address, but you may want to restrict this to specific public IP addresses.

    Once you have confirmed that you have a VCN in place, we can go through the process of creating the container instance using the container image that we just created.

    I’ve used the default settings for creating a container instance, in the real-world, you’d need to select an appropriate compute shape (CPU/memory).

    Grab the public IP address assigned to the container instance and open this in your browser of choice, the Streamlit app should open (all being well!).

    You may want to create a DNS entry and point this towards the public IP, to make it easier to access.

    Also in my final disclaimer, for anything but quick and dirty demo’s you should run this over SSL with authentication too! An OCI Load Balancer can be used to do SSL termination and Streamlit provide a useful guide on performing authentication, which can be found here.

    …and that’s it!

  • Transcribing speech to text using the OCI AI Speech service with Python πŸŽ€

    I’ve been playing around with the OCI AI Speech service recently, one thing I really struggled with was using the AI Speech API to create a transcription job to extract the text from an audio/video file (as I needed to automate the process).

    After much head scratching (…and some help from a colleague), I was able to assemble the following Python script, this provides a function named transcribe, which can be called to submit a transcription job. The following parameters are required:

    • inputfile – The name of the audio/video file to transcribe e.g. recording.mp3
    • bucket – The name of the bucket that contains the inputfile to transcribe (this is also where the JSON output of the transcription job will be stored)
    • compartmentid – OCID of the compartment to run the transcription job in
    • namespace – The Object Storage namespace
    import oci
    
    config = oci.config.from_file()
    
    def transcribe(inputfile,compartmentid,bucket,namespace):
        ai_speech_client = oci.ai_speech.AIServiceSpeechClient(config)
        create_transcription_job_response = ai_speech_client.create_transcription_job(
                create_transcription_job_details=oci.ai_speech.models.CreateTranscriptionJobDetails(
                    compartment_id=compartmentid,
                    input_location=oci.ai_speech.models.ObjectListInlineInputLocation(
                        location_type="OBJECT_LIST_INLINE_INPUT_LOCATION",
                        object_locations=[oci.ai_speech.models.ObjectLocation(
                            namespace_name=namespace,
                            bucket_name=bucket,
                            object_names=[inputfile])]),
                    output_location=oci.ai_speech.models.OutputLocation(
                        namespace_name=namespace,
                        bucket_name=bucket)))
    
    transcribe(inputfile="Name of file to transcribe",compartmentid="OCID of the compartment to run the transcription job in",bucket="Bucket that contains the file to transcribe",namespace="Object storage namespace")
    

    For example:

    transcribe(inputfile=”recording.mp3“,compartmentid=”ocid1.compartment.oc1..aaaaaaaae“,bucket=”Transcription“,namespace=”lrdkvqz1i7f9“)

    When this has been executed, the transcription job can be viewed within the OCI Console.

    Once the job completed, the transcription was available to view from within the job (clicking the filename within the Tasks section):

    Here is the transcript in all it’s glory.

    The sample can also be found on GitHub.

  • Running an OpenVPN server in OCI β˜οΈ

    I’ve previously written about how I setup a site-to-site VPN between a Raspberry Pi and OCI, this has worked like a charm and I’ve had no issues with it. This works really well when I’m at home, but as I often travel and need a convenient way to VPN into my OCI tenancy I started exploring running OpenVPN in OCI, this would enable me to install a VPN client on my laptop/phone and conveniently VPN into my tenant from wherever I am in the world 🌍.

    There is a pre-configured marketplace image for OpenVPN available within OCI, further information on this can be found here. The one drawback to this is that it only supports deployment on x64 VM instances, I’m tight and wanted to deploy OpenVPN on a free Ampere (ARM) VM instance so that it didn’t cost me a penny πŸͺ™.

    Rather than muck about and learn how to setup OpenVPN and go through the process manually, I stumbled across this fantastic script that fully automates the configuration βœ….

    I have a single Virtual Cloud Network (VCN) that I need access to, this VCN has a private and a public subnet, the resources that I need access to all reside within the private subnet and are not directly accessible via the Internet (hence the need for a VPN!).

    Below is the end-to-end process that I followed for setting up OpenVPN in OCI.

    Step 1 – Provisioned an Ampere VM instance running Ubuntu 24.04, with 1 OCPU and 6GB memory, deployed this within the public subnet within the VCN.

    Step 2 – Ran the OpenVPN installation and configuration script found here, taking the defaults for everything.

    Step 3 – Copied the VPN connection profile that the setup created from the OpenVPN server to my local machine (.ovpn file).

    Step 4 – Before attempting to connect to the OpenVPN server I needed to open UDP port 1194 which is the port that OpenVPN listens on.

    As I only have a single server within the public subnet in the VCN, I simply added an entry to the Security List associated with the public subnet, using a Network Security Group is the recommended way to do this – especially when you have multiple instances within a public subnet, however I wanted a quick and dirty solution πŸ˜€.

    The rule I added provides access to UDP port 1194 from anywhere to the OpenVPN server within the public subnet.

    Step 5 – Enable IP forwarding on the OpenVPN server, using the guidance found here.

    Step 6 – Installed the client for OpenVPN from https://openvpn.net/client/, clients are available for Windows, MacOS, Linux, Android, iOS and Chrome OS, so plenty of choice!

    Once the profile was imported, I could connect!

    That was it – I was really impressed with the ease of setting this up, even better it doesn’t cost me a penny πŸͺ™!

  • Creating a front end for the OCI Generative AI Service using Streamlit πŸŽ¨

    I recently shared an example of how to create a basic front-end for an OCI Generative AI Agent using Streamlit, in this post I’m going to share how to do this for the OCI Generative AI Service, this is useful for demo’s when you need to incorporate a specific look and feel, something that’s a little more snazzy than the playground within the OCI Console! πŸ’»

    Here’s what the basic front-end I created looks like:

    Installing Streamlit is a breeze using the single command below.

    pip install streamlit
    

    Once I’d done this, I put together the following Python script to create the web app, this can also be downloaded from GitHub.

    Disclaimer: I’m no developer and this code is a little hacky, but it gets the job done!

    The following variables need to be updated before running the script:

    • st.title β€“ Set’s the title of the page
    • st.set_page_config – Set’s the name and icon to use for the page
    • st.sidebar.image β€“ Configures the image to use in the sidebar
    • config β€“ Set’s the OCI SDK profile to use, further info on this can be found here – https://docs.oracle.com/en-us/iaas/Content/API/Concepts/sdkconfig.htm
    • compartment_id – The compartment to make the request against, a the Generative AI Service doesn’t need to be provisioned, this can be useful for cost tracking and budgeting purposes (as spend is against a specific compartment).
    • endpoint – The endpoint for the region to pass the request to, a full list of the current endpoints can be found here, in my example I’m connecting to the Frankfurt endpoint.
    • model_id – The OCID of the model to call, the eaisest way to obtain this is via the OCI Console: Analytics & AI > Generative AI > Chat > View model details. This will provide a list of the models that are available, simply copy the OCID of the model you’d like to use. Further details on the difference between each of the models can be found here.

    import oci
    import streamlit as st
    
    st.set_page_config(page_title="OCI GenAI Demo Front-End",page_icon="πŸ€–")
    st.title("OCI GenAI Demo Front-End πŸ€–")
    st.sidebar.image("https://brendg.co.uk/wp-content/uploads/2021/05/myavatar.png")
    
    # GenAI Settings
    compartment_id = "Compartment OCID"
    config = oci.config.from_file(profile_name="DEFAULT")
    endpoint = "https://inference.generativeai.eu-frankfurt-1.oci.oraclecloud.com"
    model_id = "Model OCID"
    
    def chat(question):
        generative_ai_inference_client = oci.generative_ai_inference.GenerativeAiInferenceClient(config=config, service_endpoint=endpoint, retry_strategy=oci.retry.NoneRetryStrategy(), timeout=(10,240))
        chat_detail = oci.generative_ai_inference.models.ChatDetails()
        chat_request = oci.generative_ai_inference.models.CohereChatRequest()
        chat_request.message = question 
        chat_request.max_tokens = 1000
        chat_request.temperature = 0
        chat_request.frequency_penalty = 0
        chat_request.top_p = 0.75
        chat_request.top_k = 0
        chat_request.seed = None
        chat_detail.serving_mode = oci.generative_ai_inference.models.OnDemandServingMode(model_id=model_id)
        chat_detail.chat_request = chat_request
        chat_detail.compartment_id = compartment_id
        chat_response = generative_ai_inference_client.chat(chat_detail)
        return chat_response.data.chat_response.text
    
    # Initialize chat history
    if "messages" not in st.session_state:
        st.session_state.messages = []
    
    # Display chat messages from history on app rerun
    for message in st.session_state.messages:
        with st.chat_message(message["role"]):
            st.markdown(message["content"])
    
    # Accept user input
    if prompt := st.chat_input("What do you need assistance with?"):
        # Add user message to chat history
        st.session_state.messages.append({"role": "user", "content": prompt})
        # Display user message in chat message container
        with st.chat_message("user"):
            st.markdown(prompt)
    
        # Display assistant response in chat message container
        with st.chat_message("assistant"):
            response = chat(prompt)
            write_response = st.write(response)
        # Add assistant response to chat history
        st.session_state.messages.append({"role": "assistant", "content": response})
    

    You may also want to tweak the chat_request settings for your specific use-case for Generative AI, my example is tuned for summarisation. Details for what each of the settings does for the Cohere model (which I used), can be found here.

    Once this file has been saved, it’s simple to run with a single command:

    streamlit run OCI-GenAI-Streamlit.py
    

    It will then automatically launch a browser and show the web app in action πŸ–₯️

    This basic example can easily be updated to meet your requirements, the Streamlit documentation is very comprehensive and easy to follow with some useful examples – https://docs.streamlit.io/.

  • Using Resource Principal authentication with OCI πŸ”

    When connecting to OCI services in using the SDKs there are four options for authentication πŸ”:

    • API Key
    • Session Token
    • Instance Principal
    • Resoure Principal

    Each of these is covered in detail within the OCI SDK Authentication Methods documentation πŸ“•.

    I had a situation recently where I wanted to use Resource Principal authentication to authenticate a Container Instance to an OCI Generative AI Agent, the container was running a Python-based front end for an agent that I had created, however rather than using an API Key to authenticate as a specific user account to the Generative AI Agent service, I wanted to authenticate as the actual Container Instance itself.

    Doing this meant that I didn’t need to store a private key and config file (of the user account) on the Container Instance, which could be viewed as a security risk.

    There are three steps required to configure Resource Principal authentication which I have explained below, one thing to note is that this approach can be adapted for authenticating to other OCI services.

    Step 1 – Create a Dynamic Group that includes the Container Instance πŸ«™

    This defines the resource that will be connecting from (the Container Instance) to the Generative AI Agent. To create the Dynamic Group, I did the following within the OCI Console – I navigated to:

    Identity & Security > Domains > (My Domain) > Dynamic groups > Create dynamic group.

    I then created a group named Container-Instances with the following rule:

    ALL {resource.type=’computecontainerinstance’}

    This Dynamic Group contains every Container Instance within my tenant, I could have been more granular and specified an individual Container Instance.

    For further details on how to create Dynamic Groups be sure to check out the official documentation.

    Step 2 – Create a Policy that provides members of the Dynamic Group with access to the Generative AI Agents service πŸ“„

    The policy grants permissions to the Dynamic Group created above so that members of this group are able to connect to the Generative AI Agent service, to create the policy I did the following within the OCI Console:

    Navigated to – Identity & Security > Domains > Policies > Create Policy

    I then created a policy with the following statement:

    Allow dynamic-group Container-Instances to manage genai-agent-family in tenancy

    This provides the Dynamic Group named Container-Instances (created in Step 1) the desired access to the Generative AI Agent service – each OCI service has specific resource types that can be used within policies, the full policy reference for the Generative AI Agent service can be found here.

    Step 3 – Update the Python code to authenticate to the Generative AI Agent service using the identify of the Container Instance (Resource Principal) 🐍

    To update the Python script that connects to the Generative AI Agent so that it uses Resource Principal rather than API Key authentication, I updated the following lines of code from this:

    config = oci.config.from_file("config")
    service_ep = "https://agent-runtime.generativeai.uk-london-1.oci.oraclecloud.com"
    agent_ep_id = "OCID"
    
    generative_ai_agent_runtime_client = oci.generative_ai_agent_runtime.GenerativeAiAgentRuntimeClient(config,service_endpoint=service_ep)
    

    To this:

    rps = oci.auth.signers.get_resource_principals_signer() 
    service_ep = "https://agent-runtime.generativeai.uk-london-1.oci.oraclecloud.com"
    agent_ep_id = "OCID"
    
    generative_ai_agent_runtime_client = oci.generative_ai_agent_runtime.GenerativeAiAgentRuntimeClient(config={},signer=rps,service_endpoint=service_ep)


    The two major changes are:

    • Using “oci.auth.signers.get_resource_principals_signer()” rather than loading a config file with “config = oci.config.from_file(“config”)”
    • When connecting to the service, using config={},signer=rps,service_endpoint=service_ep” (key bits in bold) rather than “config,service_endpoint=service_ep

    As mentioned earlier the approach that I’ve covered above an be adapted to work with other OCI services.

  • Unable to create a container instance in OCI

    I was working with a customer to deploy a Docker image that I’d added to their OCI Container Registry, however when provisioning a Container Instance using this image it was failing with the following error πŸ›‘:

    A container image provided is not compatible with the processor architecture of the shape selected for the container instance.

    This is a pretty descriptive error message, that you will receive when attempting to deploy a container on a host machine that has a different CPU architecture than that of the image you are attempting to deploy, for example trying to deploy a container that uses an x64 based image to a host machine that has an ARM CPU.

    In this specific case, I was attempting to deploy a container to a AMD x64 machine – something which I had done numerous times successfully with this very image – a real case of “it works on my machine!“. After much head scratching I figured out what I’d done wrong πŸ’‘.

    I had used the Cloud Shell to create the image and deploy to the Container Registry (I ❀️ the Cloud Shell!).

    It turns out that it’s possible to select the arcihtecture to use for the Cloud Shell, I had been using x64 in my tenant, however the admin at the customer had ARM configured for their Cloud Shell therefore when it was building the Docker image it was pulling the ARM version of the base image therefore failing when attempting to deploy this to an AMD x64 host.

    There are two options to fix this:

    1. Provision the Container Instance on an Ampere (ARM) host
    2. Re-create the image using a Cloud Shell with the desired CPU architcture, in this case x64

    I was lazy and opted for option 1, to however to change the CPU architecture for Cloud Shell:

    • Launch Cloud Shell
    • Select Actions > Architecture
    • Choose the desired architecture (this is a per-user setting, not tenant-wide)

    Hope this helps somebody in the future!

  • Sending raw requests using the OCI CLI πŸ’»

    The OCI CLI includes a raw-request option, as the name suggests this is a useful way to send manual requests to OCI services instad of using the native CLI commands πŸ’».

    For example to list the buckets within a specific compartment I can run the following OCI CLI command πŸͺ£:

    oci os bucket list --compartment-id (OCID) --namespace-name (NameSpace)
    

    Or alternatively I could run the following using the OCI CLI raw-request command.

    oci raw-request --http-method GET --target-uri https://objectstorage.uk-london-1.oraclecloud.com/n/lrdkvqz1i7e6/b?compartmentId=ocid1.compartment.oc1..aaaaaaaa5yxo6ynmcebpvqgcapt3vpmk72kdnl33iomjt3bk2bcraqprp6fq
    

    This is a fairly simple read request against object storage, to help me understand how to formulate the URL (target-uri) I added –debug to the initial oci os bucket list CLI command that I ran. This provides a wealth of information on what happens “under the hood” when running a CLI command and helped me to understand the –target-uri I needed to use for the raw-request command.

    For more complex scenarios, such as creating resources or using a service e.g. analysing an image with AI Vision, you can add –generate-param-json-input to a CLI command and it will generate a JSON file which can be populated with the desired parameters that you can then pass to raw-request using the –request-body parameter.

    In terms of real-world usage, the only real use-case for this is with new services that you need to interact with, where there isn’t a CLI command available, with that being said this would mean that you couldn’t use the –debug parameter to help understand how to send the request using raw-request, so you’d need to rely on documentation and/or trial and error – probably the latter!

  • Unable to connect to a Kubernetes cluster in OCI using kubectl πŸ”Œ

    The time finally came for me to get hands on with Kubernetes on OCI (or OKE as it’s affectionately know).

    Spinning up a Kubernetes cluster was an absolute breeze, however when I started to work through the Quick Start….or not so Quick Start for me – I stumbled up an error when attempting to deploy the sample app to my cluster.

    When I ran the command in Step 3 I received the following error:

    error: error validating “https://k8s.io/examples/application/deployment.yaml”: error validating data: failed to download openapi: the server has asked for the client to provide credentials; if you choose to ignore these errors, turn validation off with –validate=false

    Looked like some form of authentication issue, after much head scratching and experimentation I figured out what the problem was (it took me far too long ⏱️).

    I have multiple profiles specified within my OCI CLI configuration file, example below (with the juicy bits removed!):

    The OKE cluster I needed to connect to is within the tenancy I have named PubSec, if I take a look at the Kubernetes config file (located in “.kube” within my user profile), I could see that this uses the OCI CLI to connect to the cluster – however as it doesn’t specify a profile within the OCI CLI config this will use the DEFAULT profile, in my specific case I needed to override this to uses the PubSec profile.

    I resolved this by adding the highlighted lines (below) to the Kubernetes config file within “.kube”. This tells the OCI CLI to connect to the cluster using the PubSec profile rather than DEFAULT.

    Once I’d updated this, saved and re-sarted the terminal, I ran the command again and it worked like magic πŸͺ„