
Next up in random things Brendan has done……installing a desktop environment (Gnome) on a Linux instance (Ubuntu) hosted in OCI and making this available via Remote Desktop Protocol (RDP) with xrdp – it sounds quite complicated but there isn’t that much to getting it up and running ✅.
Basically, I wanted a VM that I can RDP to from anywhere….and any computer, importantly! To do basic coding (is in my coding is all basic 😀) using Visual Studio Code and Python.
To keep the costs down (I’m a tight Yorkshireman after all) I’m using an Always Free Ampere A1 VM instance running in OCI – so this will not cost me a penny to run 🙌.
To learn more about the OCI Always Free resources, check this article out.
To get started, I created a Linux instance using Ubuntu 24.04:

I placed this into a Public Subnet within a Virtual Cloud Network, to learn more about how to do this, check this guide out – the reason for placing the VM into a Public Subnet is so that it gets a public IP address and I can connect to this directly over the Internet, without requiring that a VPN or FastConnect be in-place.
Once the VM had been provisioned, I SSH’d onto the VM instance (if you are not sure how to do this, check this guide out) and then ran the following commands in order:
Update and Upgrade Installed Packages
sudo apt update && sudo apt upgrade -y
Install Ubuntu Desktop
sudo apt install ubuntu-desktop -y
Install xrdp
sudo apt install xrdp -y
Ensure that Gnome runs (the Ubuntu Desktop Environment) when logging in via RDP
echo "gnome-session" > ~/.xsession
Restart xrdp
sudo systemctl restart xrdp
Permit inbound traffic on TCP port 3389 (the port used by RDP)
sudo iptables -I INPUT 4 -m state --state NEW -p tcp --dport 3389 -j ACCEPT
sudo netfilter-persistent save
Set a password for the user “ubuntu” by default OCI configures the VM instance to authenticate the ubuntu user using SSH keys, for RDP you’ll need to use a password – you may prefer to use a separate non-root account for this.
sudo passwd ubuntu
Once those commands have been run, the final thing you’ll need to do is ensure that any Security Lists OR Network Security Groups (NSGs) that the VM instance is associated with permit inbound access to port 3389 – the port used by RDP.
More info on this (including how to do this) can be found here.
Here is how my Security List looks (there isn’t an NSG associated with my VM instance).
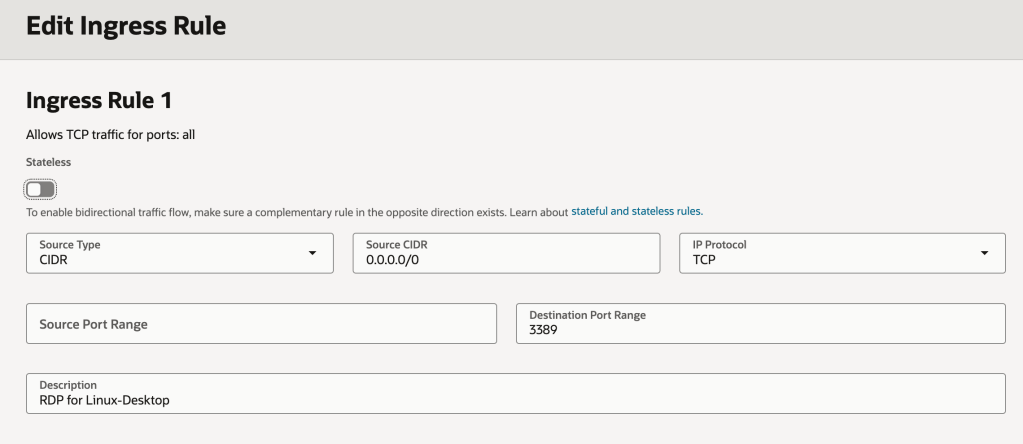
WARNING: This gives any machine on the Internet (source CIDR 0.0.0.0/0) access to this VM instance…..and any other resources in the subnet via RDP – port 3389! You’d likely want to restrict this to specific IP addresses or IP address ranges e.g. the public IP address you break out from your house/office to prevent any randomer on the Internet getting access.
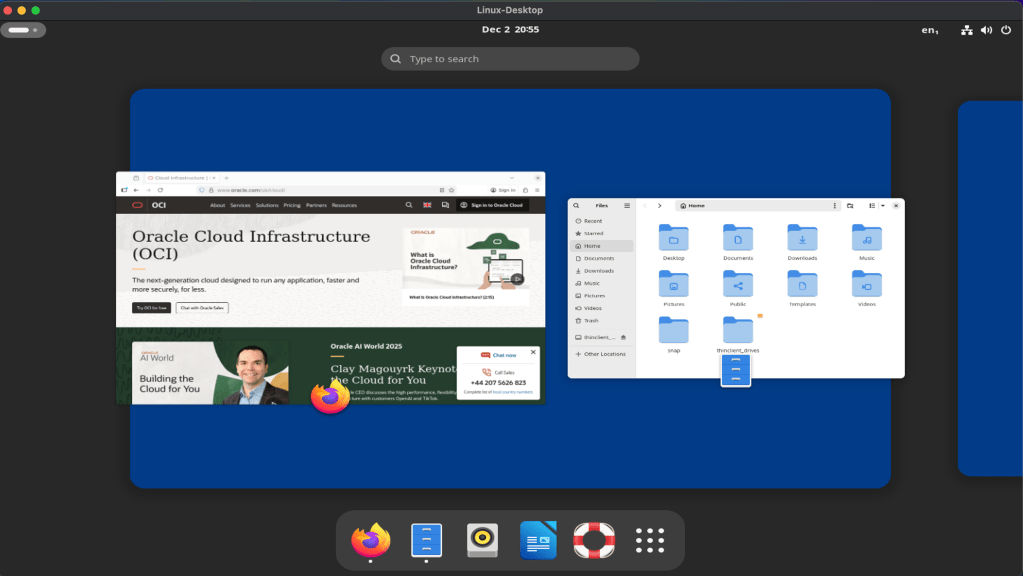
Once the Security List had been updated. I fired up the Microsoft RDP client (other RDP clients are available!) and configured it to connect to the public IP address of the VM instance and Voilà – I now have access to the desktop on my Ubuntu VM instance from anywhere.

Leave a comment