
I’ve previously written about how to use OCI Vision to perform image classification and object/text detection:
- Cataloging my video game collection using the OCI AI Vision Service 🎮 – https://brendg.co.uk/2024/02/15/cataloging-my-video-game-collection-using-oci-ai-vision-%f0%9f%8e%ae/
- Using the OCI Vision API with a local image 🔍 – https://brendg.co.uk/2024/01/21/using-the-oci-vision-api-with-a-local-image-%f0%9f%94%8d/
- OCI Vision: drawing a bounding box on analysed images 📦 – https://brendg.co.uk/2024/01/24/oci-vision-drawing-a-bounding-box-on-analysed-images-%f0%9f%93%a6/
- Creating an AI Vision Model in OCI that can detect brain tumours 🧠 – https://brendg.co.uk/2024/04/25/creating-an-ai-vision-model-in-oci-that-can-detect-brain-tumours-%f0%9f%a7%a0/
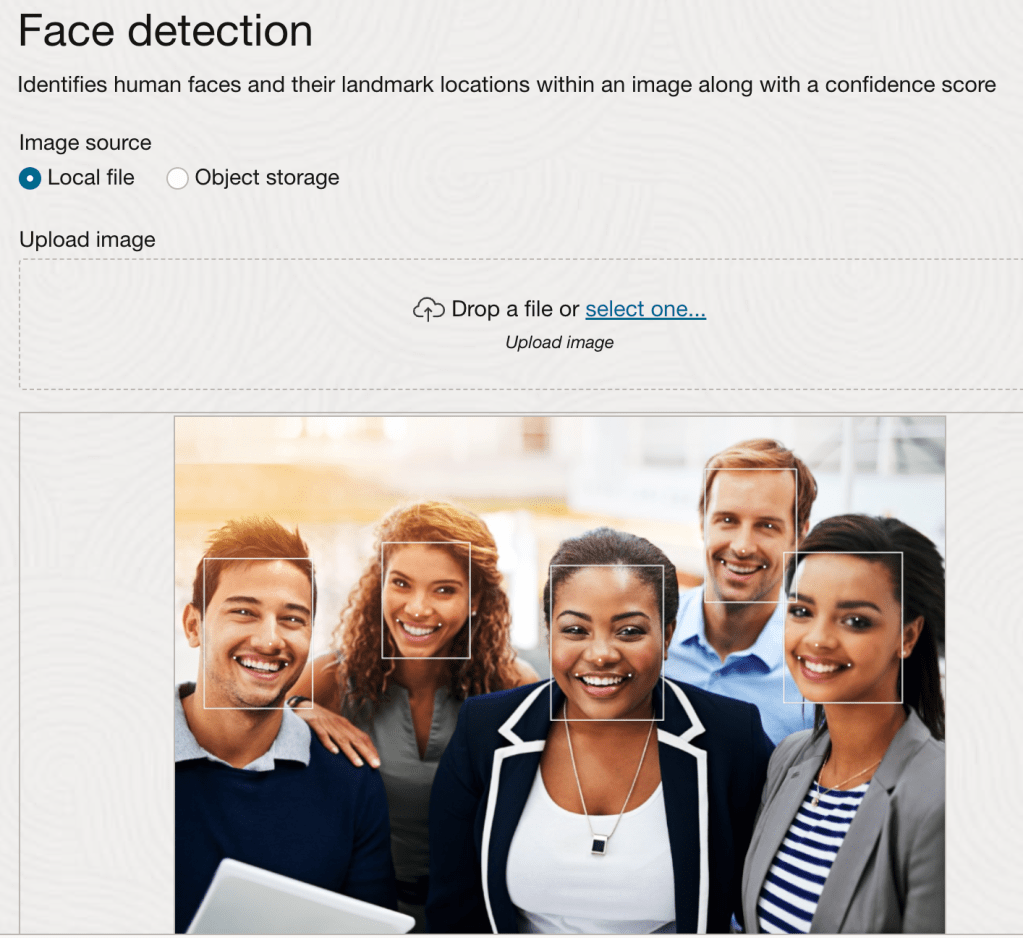
For my next challenge, I wanted to use the face detection capabilities within OCI Vision, however rather than simply drawing a bounding box on the faces detected within an image (as demonstrated below) I wanted to obscure/hide any faces detected within an image – which would be useful for privacy reasons.
I put together a script using Python with OpenCV and NumPy to achieve this, which does the following:
- Converts a local image on my machine to Base64 (imagepath variable)
- Submits this to the OCI Vision (face detection) API
- Returns details of all faces detected within an image
- Uses OpenCV and NumPy to take the normalized_vertices of the faces detected within the image (taken from the response) and obscures the faces
- Saves the image with the obscured faces (using the imagewritepath variable)
Here is an example output image, with the faces obscured (the colour used can be changed).

The script itself can be found below and on GitHub.
To run this you’ll need to update the imagepath and imagewritepath variables, you’ll also need to include your Compartment ID within compartment_id (within the Detect faces section).
import base64
import oci
import cv2
import numpy as np

imagepath = "/Users/User/Downloads/Faces.png" # path of the image to analyse
imagewritepath = "/Users/User/Downloads/FacesHidden.png" # image to create with faces(s) hidden

def get_base64_encoded_image(image_path): # encode image to Base64
    with open(image_path, "rb") as img_file:
        return base64.b64encode(img_file.read()).decode('utf-8')

image = get_base64_encoded_image(imagepath)

# Authenticate to OCI
config = oci.config.from_file()
ai_vision_client = oci.ai_vision.AIServiceVisionClient(config)

# Detect faces
analyze_image = ai_vision_client.analyze_image(
    analyze_image_details=oci.ai_vision.models.AnalyzeImageDetails(
        features=[
            oci.ai_vision.models.ImageObjectDetectionFeature(
                max_results=10,feature_type="FACE_DETECTION")],
        image=oci.ai_vision.models.InlineImageDetails(
            source="INLINE",
            data = image),
        compartment_id="ENTER COMPARTMENT ID"))

analysis = analyze_image.data
Faces = analysis.detected_faces
print("-Analysis complete, detected: " + str((len(Faces))) + " faces")

# Used by the for loop below to change the logic of reading the image, if greater than 1 face is processed we must update the updated image rather than the original
FaceNumber = 1

# Loop through each face detected, remove and save to a new image
for Face in Faces:
    print("-Processing face number " + str(FaceNumber))
    if FaceNumber == 1:
        # Read the image
        img = cv2.imread(imagepath)
    else:
         # Read the updated image (required if >1 faces are detected)
        img = cv2.imread(imagewritepath)

    # Define the polygon vertices using the first object detected in the image
    vertices = np.array([((Face.bounding_polygon.normalized_vertices[0].x), (Face.bounding_polygon.normalized_vertices[0].y)), ((Face.bounding_polygon.normalized_vertices[1].x), (Face.bounding_polygon.normalized_vertices[1].y)),
                     ((Face.bounding_polygon.normalized_vertices[2].x), (Face.bounding_polygon.normalized_vertices[2].y)),((Face.bounding_polygon.normalized_vertices[3].x), (Face.bounding_polygon.normalized_vertices[3].y))])

    # Convert the normalized vertices to pixel coordinates
    height, width = img.shape[:2]
    pixels = np.array([(int(vertex[0] * width), int(vertex[1] * height)) for vertex in vertices])

    # Fill the face with a solid colour
    cv2.fillPoly(img, [pixels], [255,255,255])

    # Save the image
    cv2.imwrite(filename=imagewritepath,img=img)

    # Increment the face count by 1
    FaceNumber += 1

print("-Finished!")
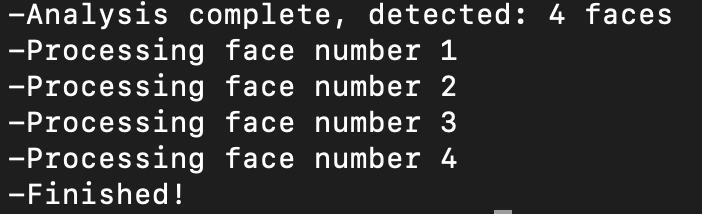
The script provides some basic logging messages to report progress:

Leave a comment