
I have a script that I run on my Raspberry Pi every two weeks using a Cron job. Because I’m lazy, I don’t want to have to manually verify that the script has run successfully. I had a brainwave over the weekend about using IFTTT to automatically notify me the status of the script, each time it executes.
What is IFTTT you may be asking 🤔?!?
IFTTT is short for If This Then That, and is the best way to integrate apps, devices, and services. We help devices, services, and apps work together in new and powerful ways.
IFTTT was founded on the belief that every thing works better together. Tech incompatibility has become challenging for anyone trying to build a smart home or create automatic routines in their life. IFTTT makes it easy.
Taken from What is IFTTT?
One of the useful features of IFTTT is the ability to host a webhook which can do something when it is called. In this specific case I had the idea to create an applet in IFTTT that hosts a webhook that when called will send a notification to my iPhone (which has the IFTTT mobile app installed).
A Webhook allows you to integrate with services that are not already on IFTTT using simple web requests. These Webhooks are unique to you using your own unique URL key, which can be found in the Documentation section of the Webhooks service page. A Webhook can act as both a trigger and an action, so the web requests are extremely flexible and customizable.
Taken from What is a webhook?

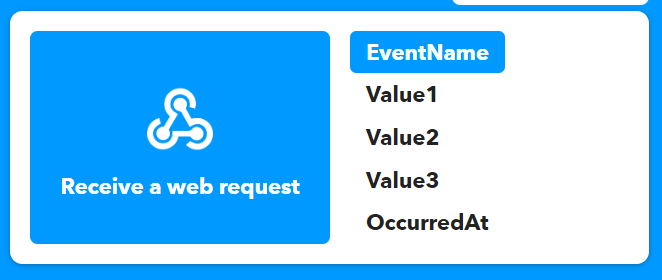
It’s possible to pass three values to a webhook via a query string (aptly named Value1, Value2 and Value3). My plan was to use these to send the name of the script (Value1) and the status of the script, such as “Successful” or “Failed” (Value2) – I won’t be using Value3. These values can then be used in the notification that IFTTT sends to my iPhone.
Here’s a short video that steps through the process of creating a webhook which sends a notification via the IFTTT mobile app.
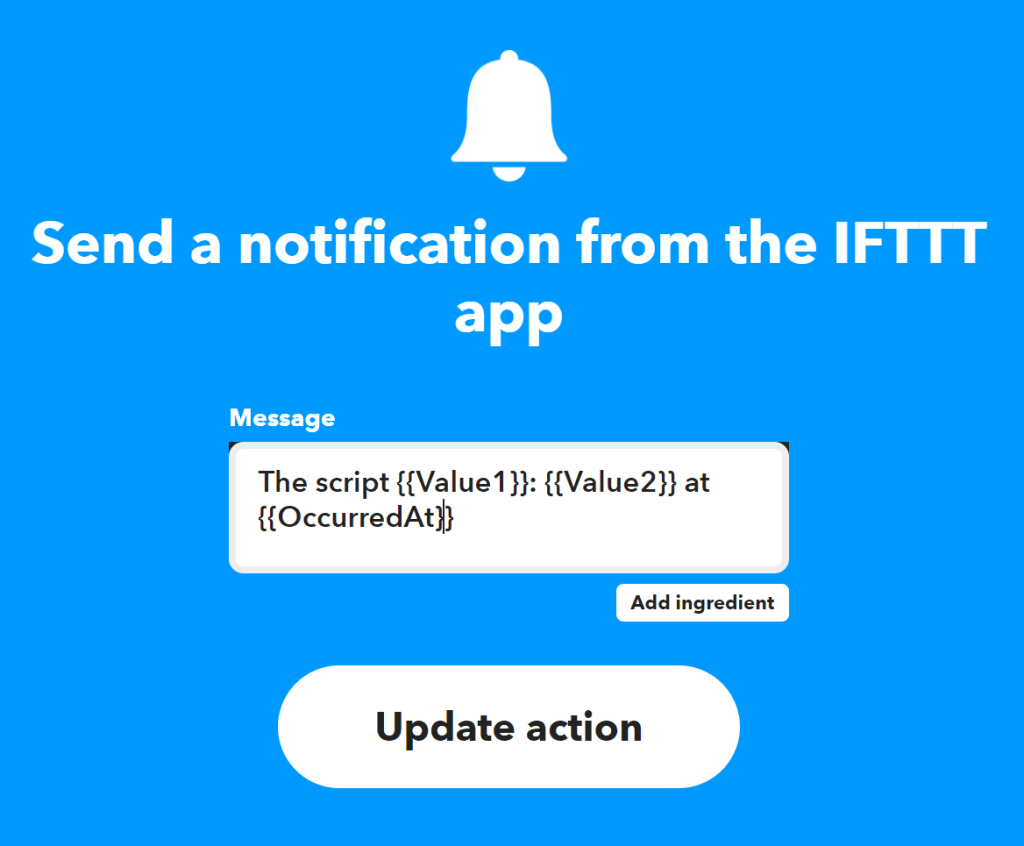
For reference, below are the settings of the notification action. This notification will send a notification with the text below, replacing Value1 with the name of the script and Value2 with the status of the script. OccurredAt will be replaced with the time that the web hook was called.
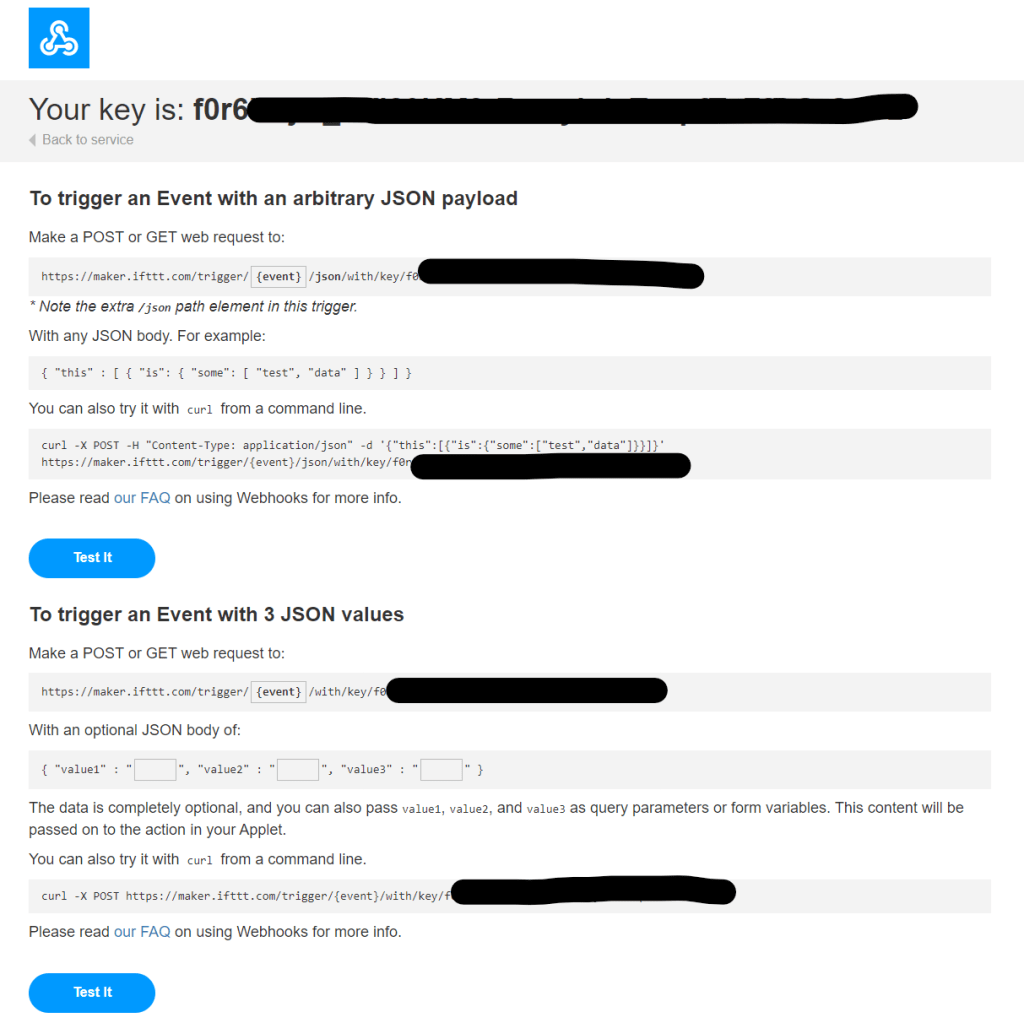
I was now ready to test this, but first I needed to obtain the URL and key for the webhook, I did this by browsing to https://ifttt.com/maker_webhooks and selecting Documentation. This presented my key and also some useful examples.
I did a quick test using Curl, a few points to note:
- ScriptStatus is the Event Name configured within the “Receive a web request” trigger field (2nd screenshot below).
- The key obtained in the previous steps needs to be referenced after /key/ (I blanked this out for obvious reasons 🙂).
- I pass a query string containing Value1 and Value 2 (highlighted). Value1 is the name of the script (BinChecker) and Value2 is the script status (I used “failed” for testing)

curl -X POST "https://maker.ifttt.com/trigger/ScriptStatus/with/key/KEY?value1=BinChecker&value2=failed"

Here is the notification I received:

Lastly I incorporated this into my Python script using the following:
try:
    AddEvent(start,end,summary)
except:
    requests.post("https://maker.ifttt.com/trigger/ScriptStatus/with/key/KEY?value1=BinChecker&value2=failed")
else:
    requests.post("https://maker.ifttt.com/trigger/ScriptStatus/with/key/KEY?value1=BinChecker&value2=success")
My Python script uses try/except/else blocks (documented here). The script calls a function AddEvent(), if this generates an exception, the except block is called, which calls the webhook passing the script name (BinChecker) and the status (failed). If it doesn’t generate an exception the else block is called which passes the script name (BinChecker) and the status (success).
My plan is to use this approach for all of the scheduled scripts that I have running on my Raspberry Pi.

Leave a comment